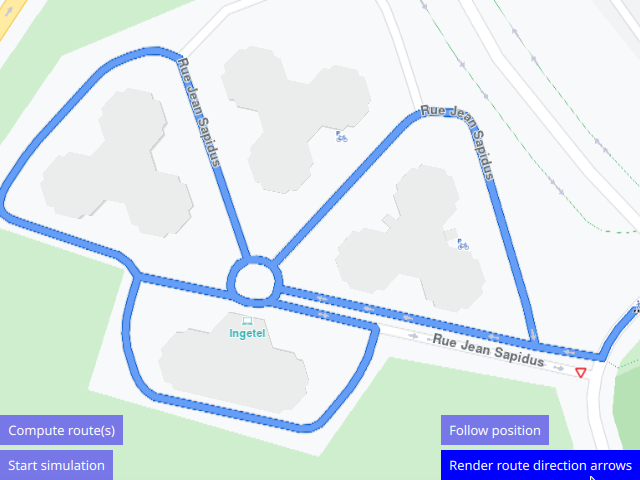
Route Direction Arrows
In this guide you will learn how to render arrows on the route, indicating
the direction of travel, and also set their color.
RoutingService is used to compute a route and NavigationService
to start a real or simulated navigation on that route, with the route direction
arrows layer activated.
The Route Direction Arrows layer must be added to the map style used for rendering the map.
Travel direction arrows on route
First, get an API key token, see the Getting Started guide.
Qt should be installed to continue.The Maps SDK for Qt should be installed, see the Setup Maps SDK for Qt guide.
Overview
How it works
In Qt, go to the File menu and select Open File or Project…
then browse to the RouteDirectionArrows example folder and open RouteDirectionArrows.pro
You may want to have a look at Setting your API Key to see how to open and configure a project and set your API Key.
Route Direction Arrows
Adding the Route Direction Arrows layer to a map style:
1) Go to the Styles tab in the online studio:
https://developer.magiclane.com/api/studio
Select your style or create a new one and then under
Available Layersfilter byarrow;Drag the
Route Direction Arrowslayer fromAvailable LayerstoSelected Layersin theRoad arrowssection;Click on it in the list, to set its
Inner ColorandBorder Colorin theStyletab on the right;Name the style in the upper left by clicking on its current name, such as Basic 1, and then typing the new name, such as Route Arrows;
Click on
Settingsin the upper right and in theResolutiondrop-down selectMobilethen clickSave;Click the left arrow in the upper left corner to go back to the list of styles;
Click the 3 dots to the right of your style and select
Download Style;
Routing service
A RoutingService is defined to compute and render a route on the map.
1RoutingService {
2  id: routingService
3  type: Route.Type.Fastest
4  transportMode: Route.TransportMode.Car
Route waypoints
A route is defined by 2 or more waypoints, where the first one is the departure position, and the last one is the destination, in the order in which they were added. There can be zero or more intermediate waypoints, through which the route must pass in the order in which they were added to the list of waypoints from which the route is calculated. Each waypoint has an optional name, and a latitude and longitude coordinate in degrees.
 1waypoints: LandmarkList {
 2   Landmark {
 3       name: "start"
 4       coordinates: Coordinates {
 5           latitude: 48.52564
 6           longitude: 7.73589
 7       }
 8   }
 9   Landmark {
10       name: "waypoint1"
11       coordinates: Coordinates {
12           latitude: 48.52568
13           longitude: 7.73546
14       }
15   }
16
17   // . . .
18
19   Landmark {
20       name: "stop"
21       coordinates: Coordinates {
22           latitude: 48.52542
23           longitude: 7.73470
24       }
25   }
26}
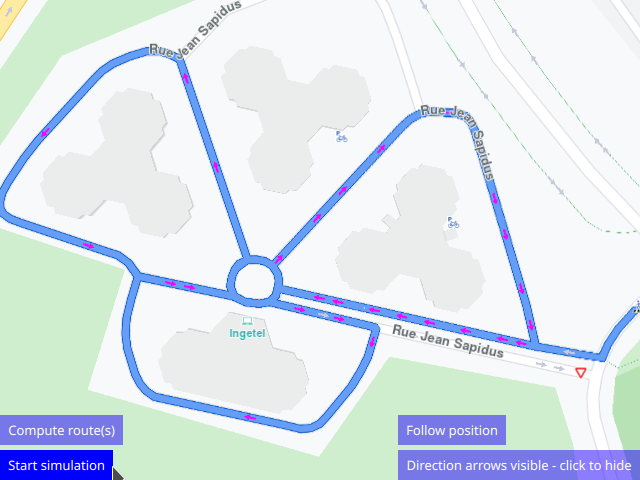
Activating Route Direction Arrows
A RouteRenderSettings object is created, and the renderOptions
member is set to active the route direction arrows using the enum value
RouteRenderSettings.ShowDirectionArrows;
Optionally, the direction arrows inner and outer color can be set dynamically
to something other than defined in the map style, as shown.
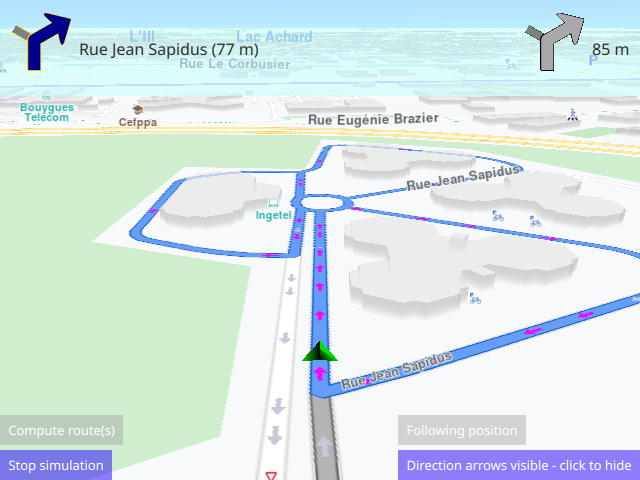
The NavigationService is then used to simulate navigation, as usual.
1onFinished: {
2  let myrouteRenderSettings = ServicesManager.createRouteRenderSettings();
3  myrouteRenderSettings.renderOptions = RouteRenderSettings.ShowDirectionArrows;
4  myrouteRenderSettings.directionArrowInnerColor = Qt.rgba(1,0,1,1);
5  myrouteRenderSettings.directionArrowOuterColor = Qt.rgba(0,1,1,1);
6  mapView.routeCollection.set(routeList);
7  mapView.routeCollection.setRouteRenderSettings(0,myrouteRenderSettings);
8  mapView.centerOnRouteList(routeList);
9}
Note that in this case, the map style is set by path,
and it is located in the mapstyles directory
within the folder of this example. In order for it to be
found as shown, the .style map style file must be listed
in the qml.qrc file as follows:
1<RCC>
2   <qresource prefix="/">
3       <file>main.qml</file>
4       <file>mapstyles/MobileRouteArrow.style</file>
5       <file>mapstyles/MobileBasic1.style</file>
6   </qresource>
7</RCC>
After the Route Direction Arrows layer was added to the map style,
as described above, the map style is set in the
Component.onCompleted: block, after the example is loaded and the
sdk is initialized.
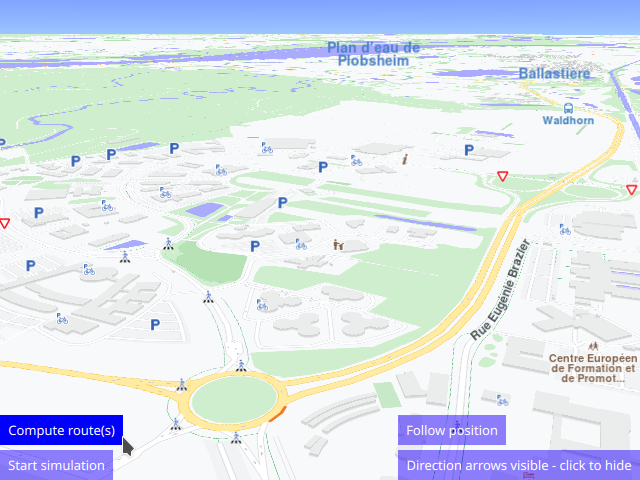
The Compute route button calculates the route and renders it on the map:
 1Button {
 2   text: "Compute route(s)"
 3   enabled: ServicesManager.settings.connected && !navigation.active
 4   background: Rectangle {
 5       opacity: parent.hovered ? 1 : 0.5
 6       color: enabled ? parent.down ? "#aa00aa" :
 7                                      (parent.hovered ? "#0000ff" : "#2000ff") : "#aaaaaa"
 8   }
 9   palette { buttonText: "#ffffff"; }
10   onClicked: {
11       routingService.update();
12       mapView.stylePath = "qrc:/mapstyles/MobileRouteArrow.style";
13   }
14}
There is also a button to start/stop the simulated navigation; a button to toggle between the map style with the route direction arrows, and the map style without the Route Direction Arrows layer; and a button to resume following position, if the map was moved manually during navigation.
Following position means that the camera follows the simulated position along the route. Moving the map stops following position, and the position arrow can move off the screen as it keeps traveling along the route.