Range Finder
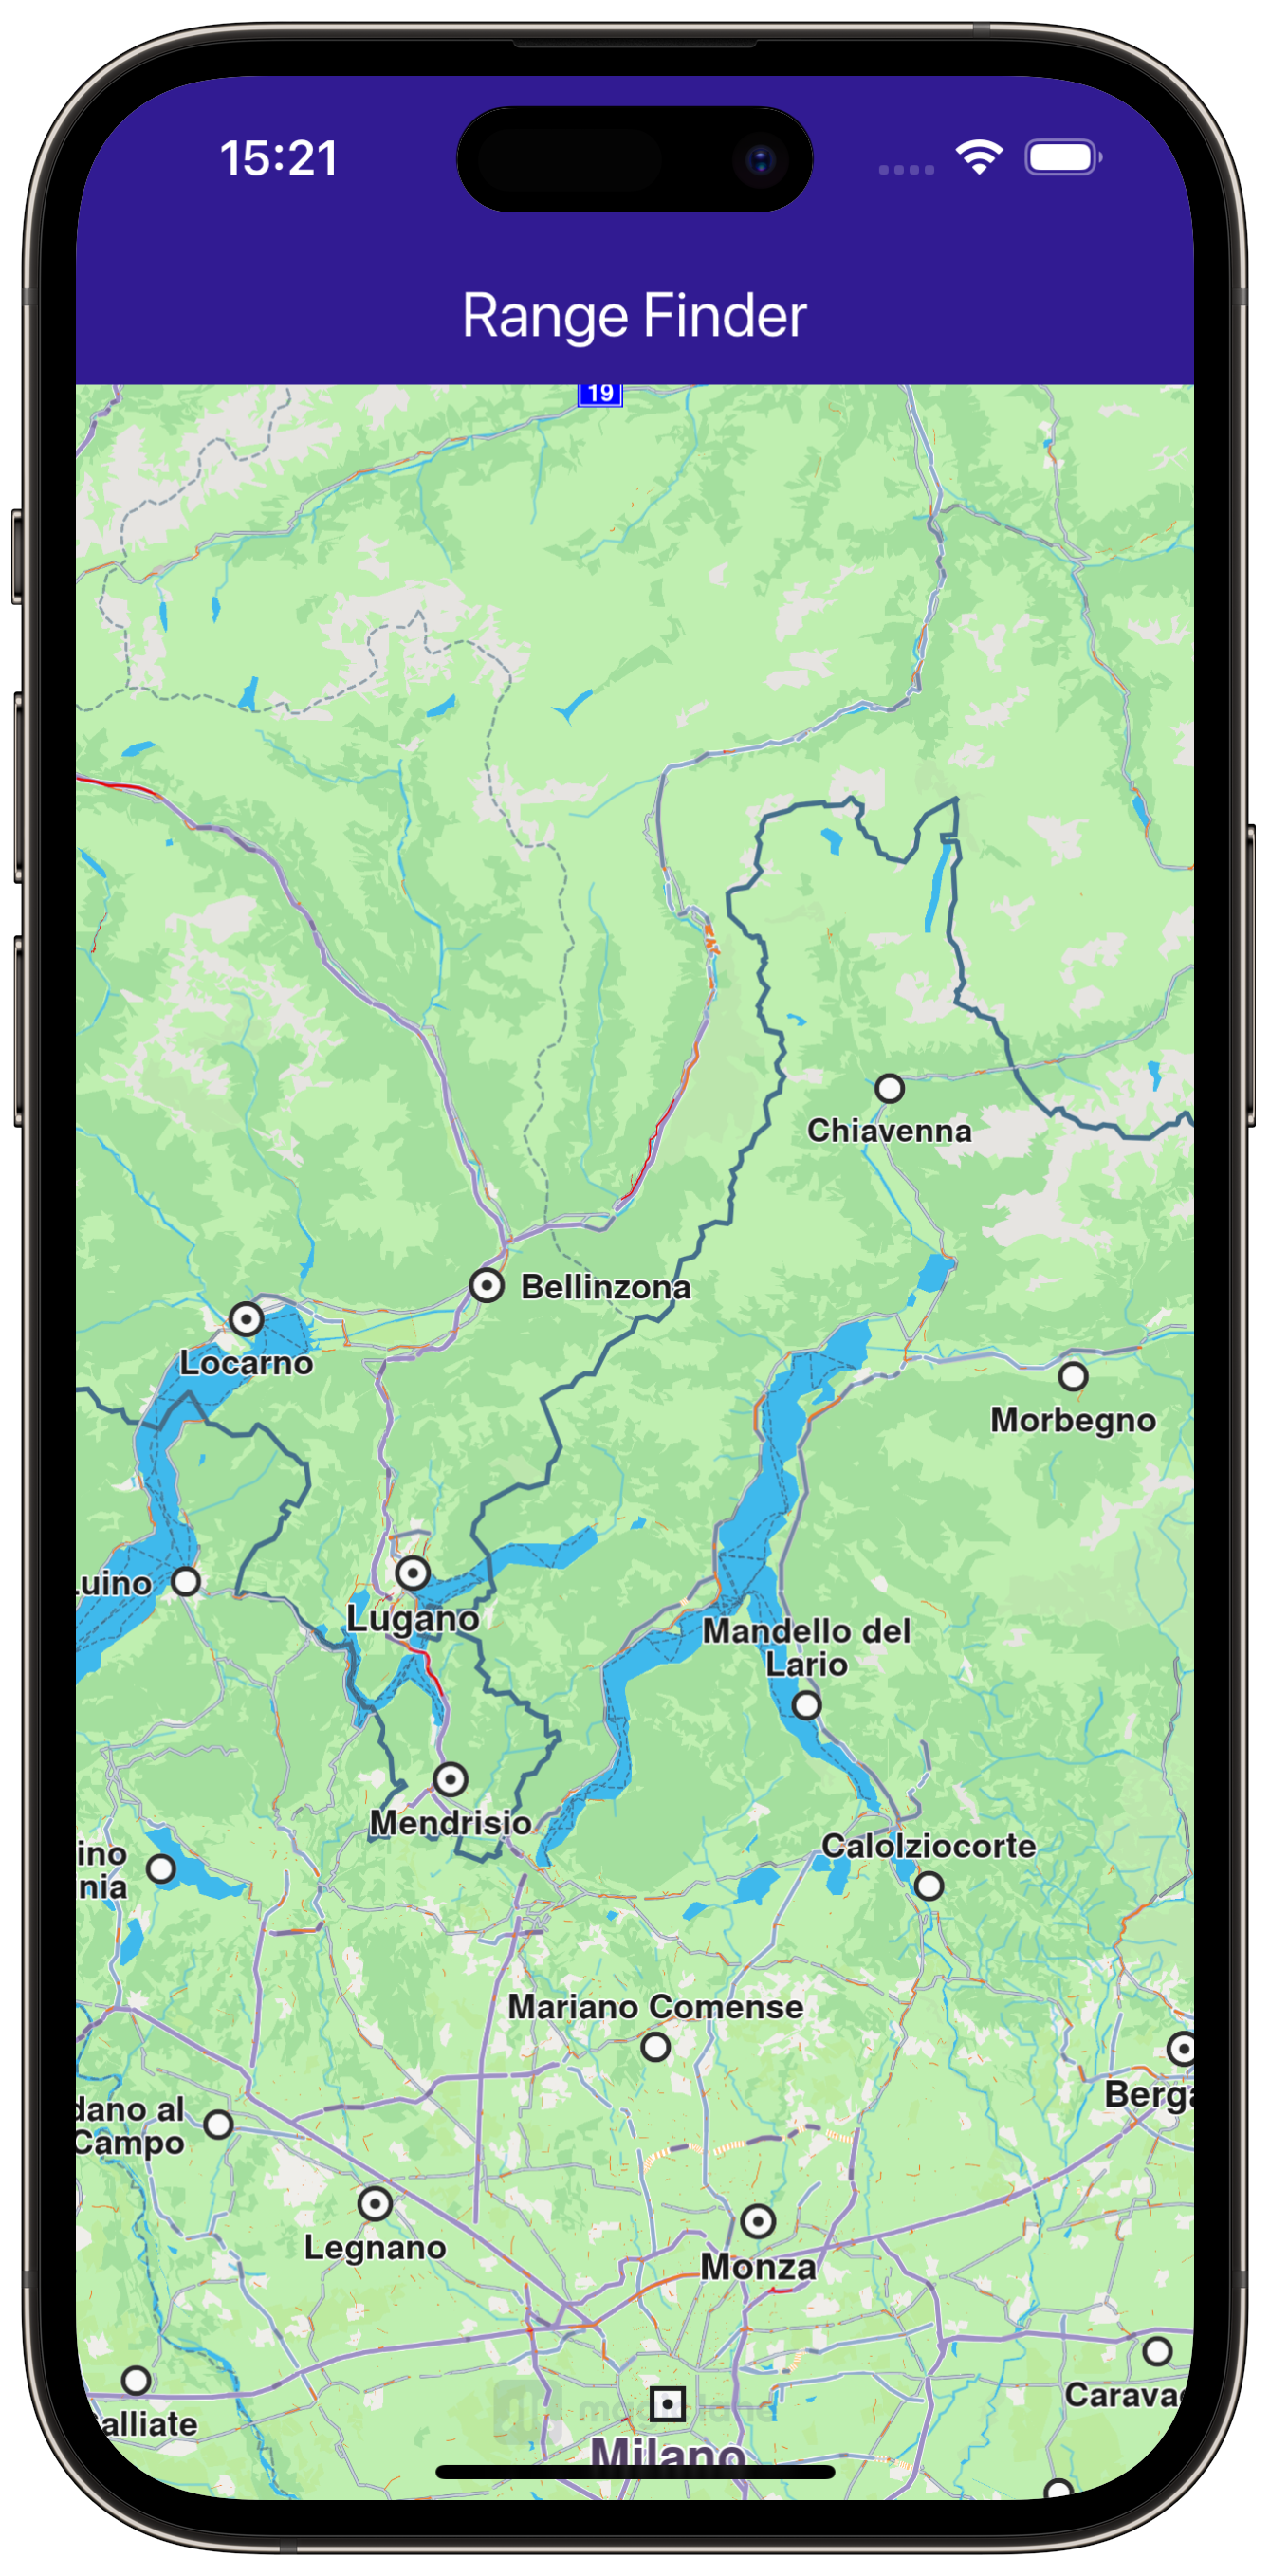
In this guide, you will learn how to implement route range calculation from a Point of Interest (POI) using the gem_kit package. This example demonstrates how to display a map, tap on a landmark, and calculate route ranges based on different transport modes and preferences.
|
|||
Setup
Prerequisites
Build and Run
Start a terminal/command prompt and navigate to the route_ranges directory within the Flutter examples directory. This is the name of the example project.
Note - the gem_kit directory containing the Maps SDK for Flutter
should be in the plugins directory of the example, e.g.
example_pathname/plugins/gem_kit - see the environment setup guide above.
Run: flutter pub get
Configure the native parts:
First, verify that the ANDROID_SDK_ROOT environment variable
is set to the root path of your android SDK.
In android/build.gradle add the maven block as shown,
within the allprojects block, for both debug and release builds:
allprojects {
    repositories {
        google()
        mavenCentral()
        maven {
           url "${rootDir}/../plugins/gem_kit/android/build"
        }
    }
}
in android/app/build.gradle
within the android block, in the defaultConfig block,
the android SDK version minSdk must be set as shown below.
Additionally, for release builds, in android/app/build.gradle,
within the android block, add the buildTypes block as shown:
Replace example_pathname with the actual project pathname
android {
    defaultConfig {
        applicationId "com.magiclane.gem_kit.examples.example_pathname"
        minSdk 21
        targetSdk flutter.targetSdk
        versionCode flutterVersionCode.toInteger()
        versionName flutterVersionName
    }
    buildTypes {
        release {
            minifyEnabled false
            shrinkResources false

            // TODO: Add your own signing config for the release build.
            // Signing with the debug keys for now, so `flutter run --release` works.
            signingConfig signingConfigs.debug
        }
    }
}
Then run the project:
flutter run --debugorflutter run --release
Import Necessary Packages
First, import the required packages in your Dart code.
import 'package:gem_kit/core.dart';
import 'package:gem_kit/map.dart';
import 'ranges_panel.dart';
import 'package:flutter/material.dart';
App entry and initialization
const projectApiToken = String.fromEnvironment('GEM_TOKEN');

void main() {
  runApp(const MyApp());
}
This code initializes the projectApiToken with the required authorization token and launches the app.
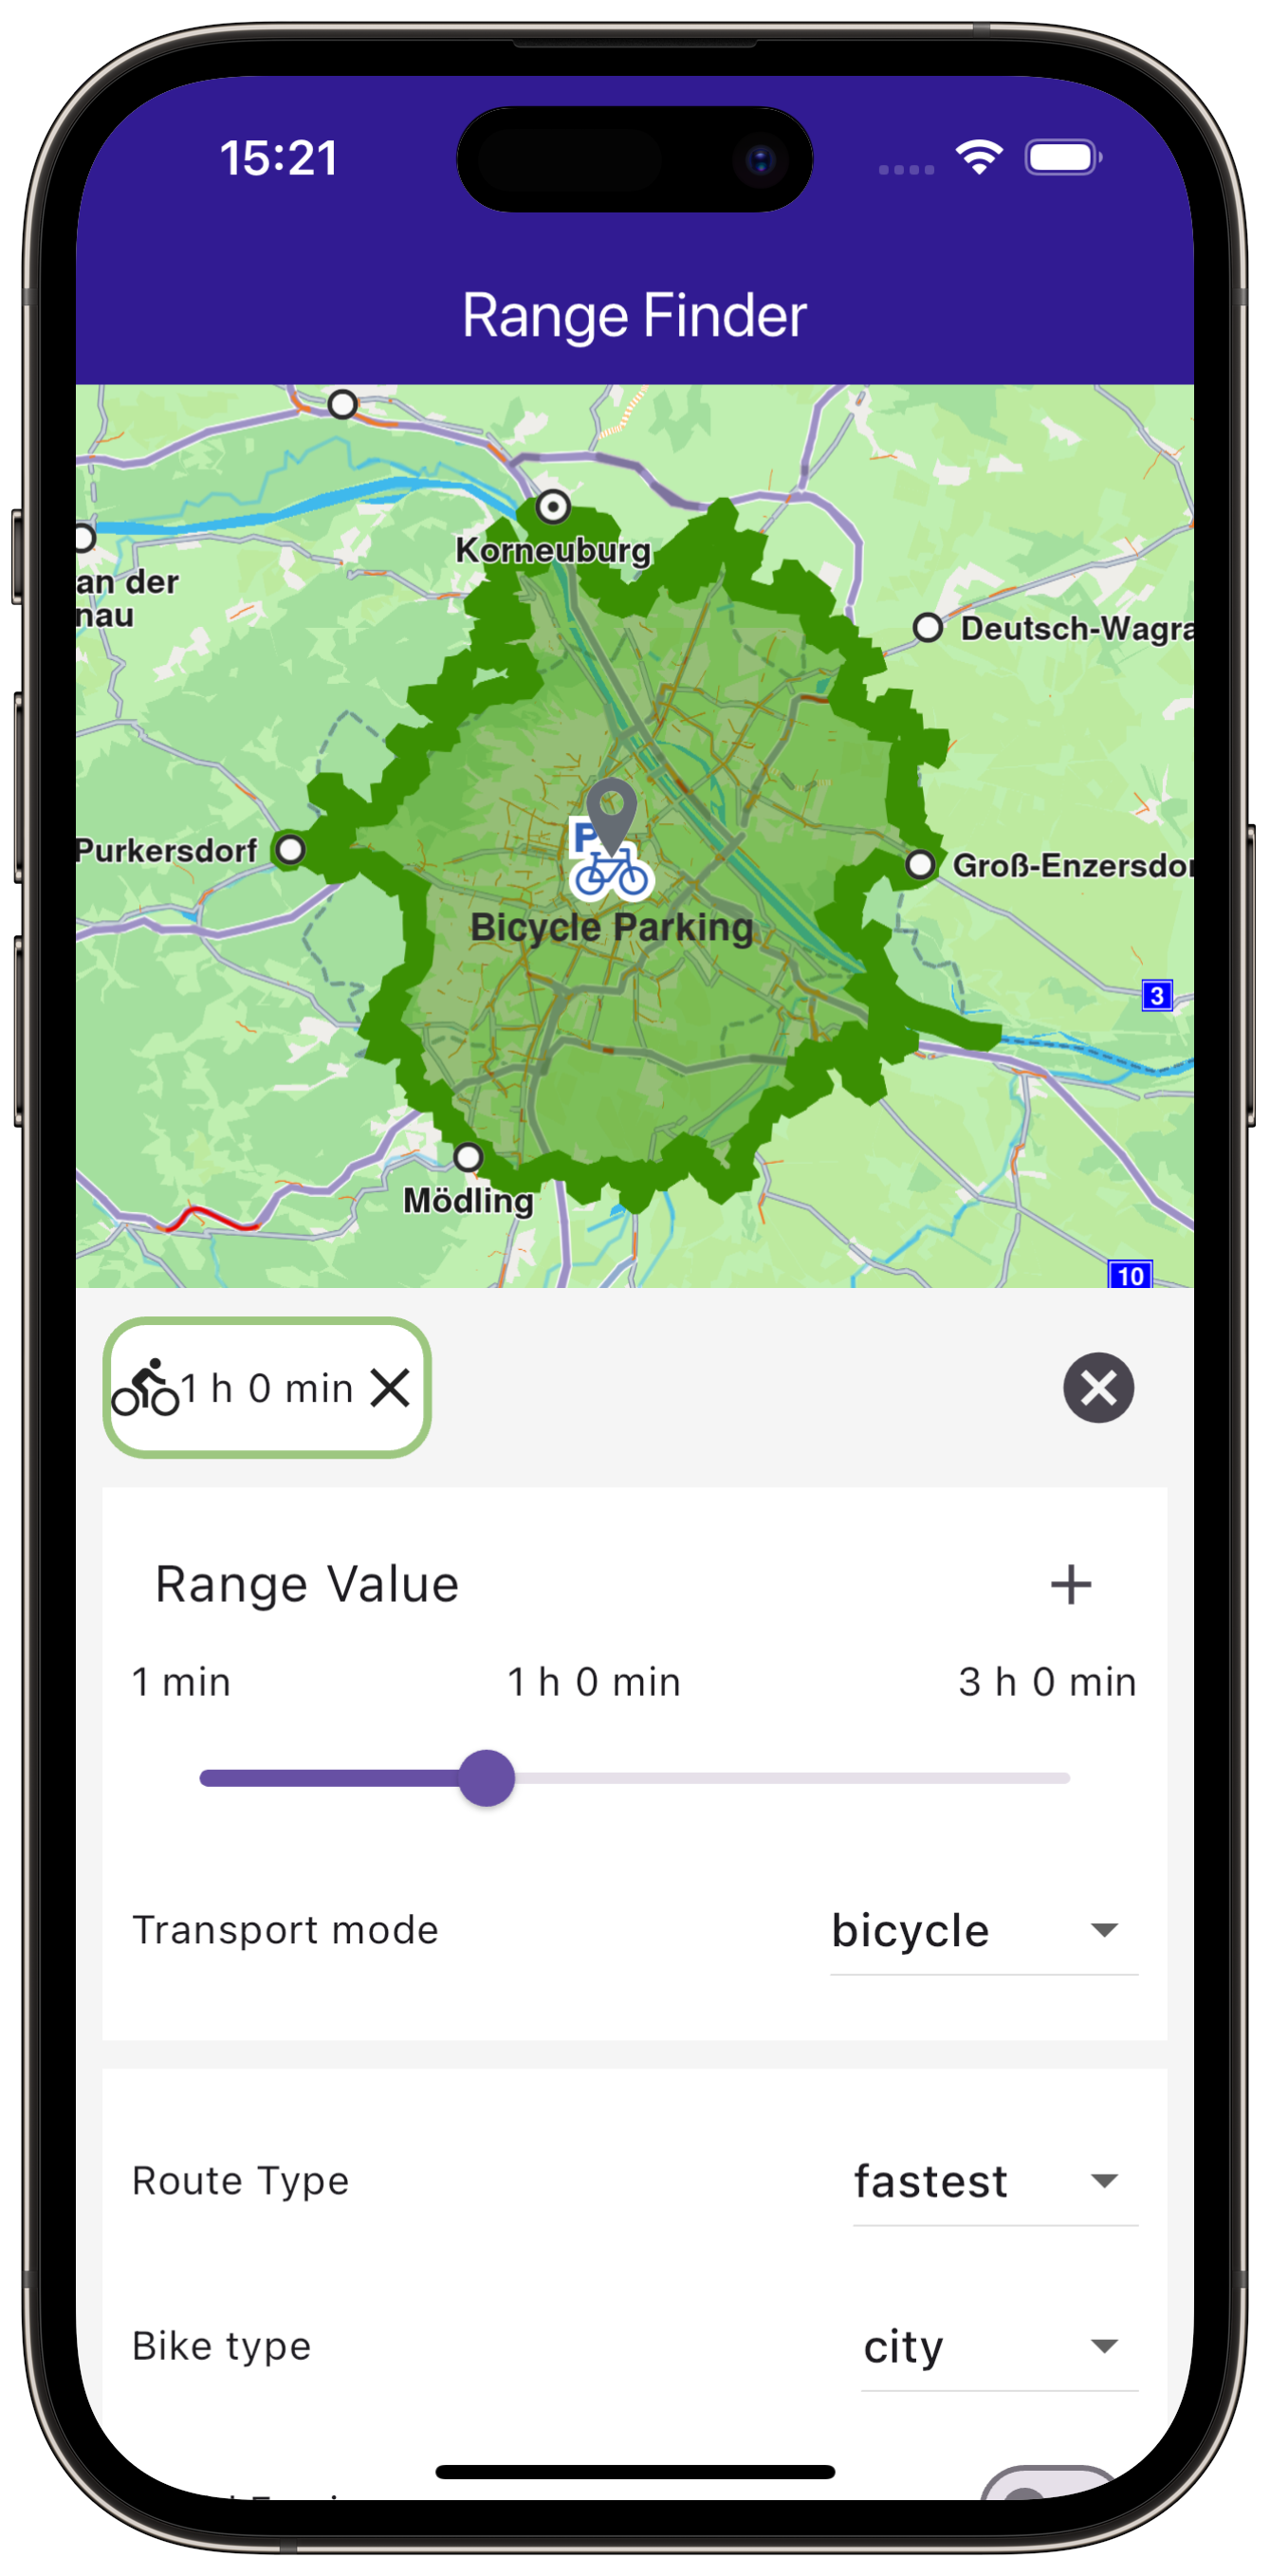
How it Works
This example demonstrates the following features:
Allow users to interact with a map by tapping landmarks to focus on specific Points of Interest (POIs).
Perform route range calculations from selected POIs using preferences such as transport mode.
|
|||
Build the Main Application
Define the main application widget, MyApp.
class MyApp extends StatelessWidget {
  const MyApp({super.key});

  @override
  Widget build(BuildContext context) {
    return const MaterialApp(
      debugShowCheckedModeBanner: false,
      title: 'Range Finder',
      home: MyHomePage(),
    );
  }
}
Handle Maps and Routes in the Stateful Widget
|
|
Create the stateful widget, MyHomePage, which will handle the map and routing functionality.
class MyHomePage extends StatefulWidget {
  const MyHomePage({super.key});

  @override
  State<MyHomePage> createState() => _MyHomePageState();
}
Define State Variables and Methods
Within _MyHomePageState, define the necessary state variables and methods to interact with the map and manage routes.
class _MyHomePageState extends State<MyHomePage> {
  late GemMapController _mapController;
  Landmark? _focusedLandmark;

  @override
  void dispose() {
    GemKit.release();
    super.dispose();
  }

  @override
  Widget build(BuildContext context) {
    return Scaffold(
      appBar: AppBar(
        toolbarHeight: 50,
        backgroundColor: Colors.deepPurple[900],
        title: const Text('Range Finder', style: TextStyle(color: Colors.white)),
      ),
      body: Stack(
        children: [
          GemMap(
            onMapCreated: _onMapCreated,
          ),
          if (_focusedLandmark != null)
            Align(
                alignment: Alignment.bottomCenter,
                child: RangesPanel(
                  onCancelTap: _onCancelLandmarkPanelTap,
                  landmark: _focusedLandmark!,
                  mapController: _mapController,
                ))
        ],
      ),
    );
  }

  void _onMapCreated(GemMapController controller) {
    _mapController = controller;
    _registerLandmarkTapCallback();
  }

  void _registerLandmarkTapCallback() {
    _mapController.registerTouchCallback((pos) async {
      _mapController.setCursorScreenPosition(pos);
      final landmarks = _mapController.cursorSelectionLandmarks();

      if (landmarks.isEmpty) {
        return;
      }

      _mapController.activateHighlight(landmarks);
      final lmk = landmarks[0];
      setState(() {
        _focusedLandmark = lmk;
      });

      _mapController.centerOnCoordinates(lmk.coordinates);
    });
  }

  void _onCancelLandmarkPanelTap() {
    _mapController.deactivateAllHighlights();
    _mapController.preferences.routes.clear();
    setState(() {
      _focusedLandmark = null;
    });
  }
}
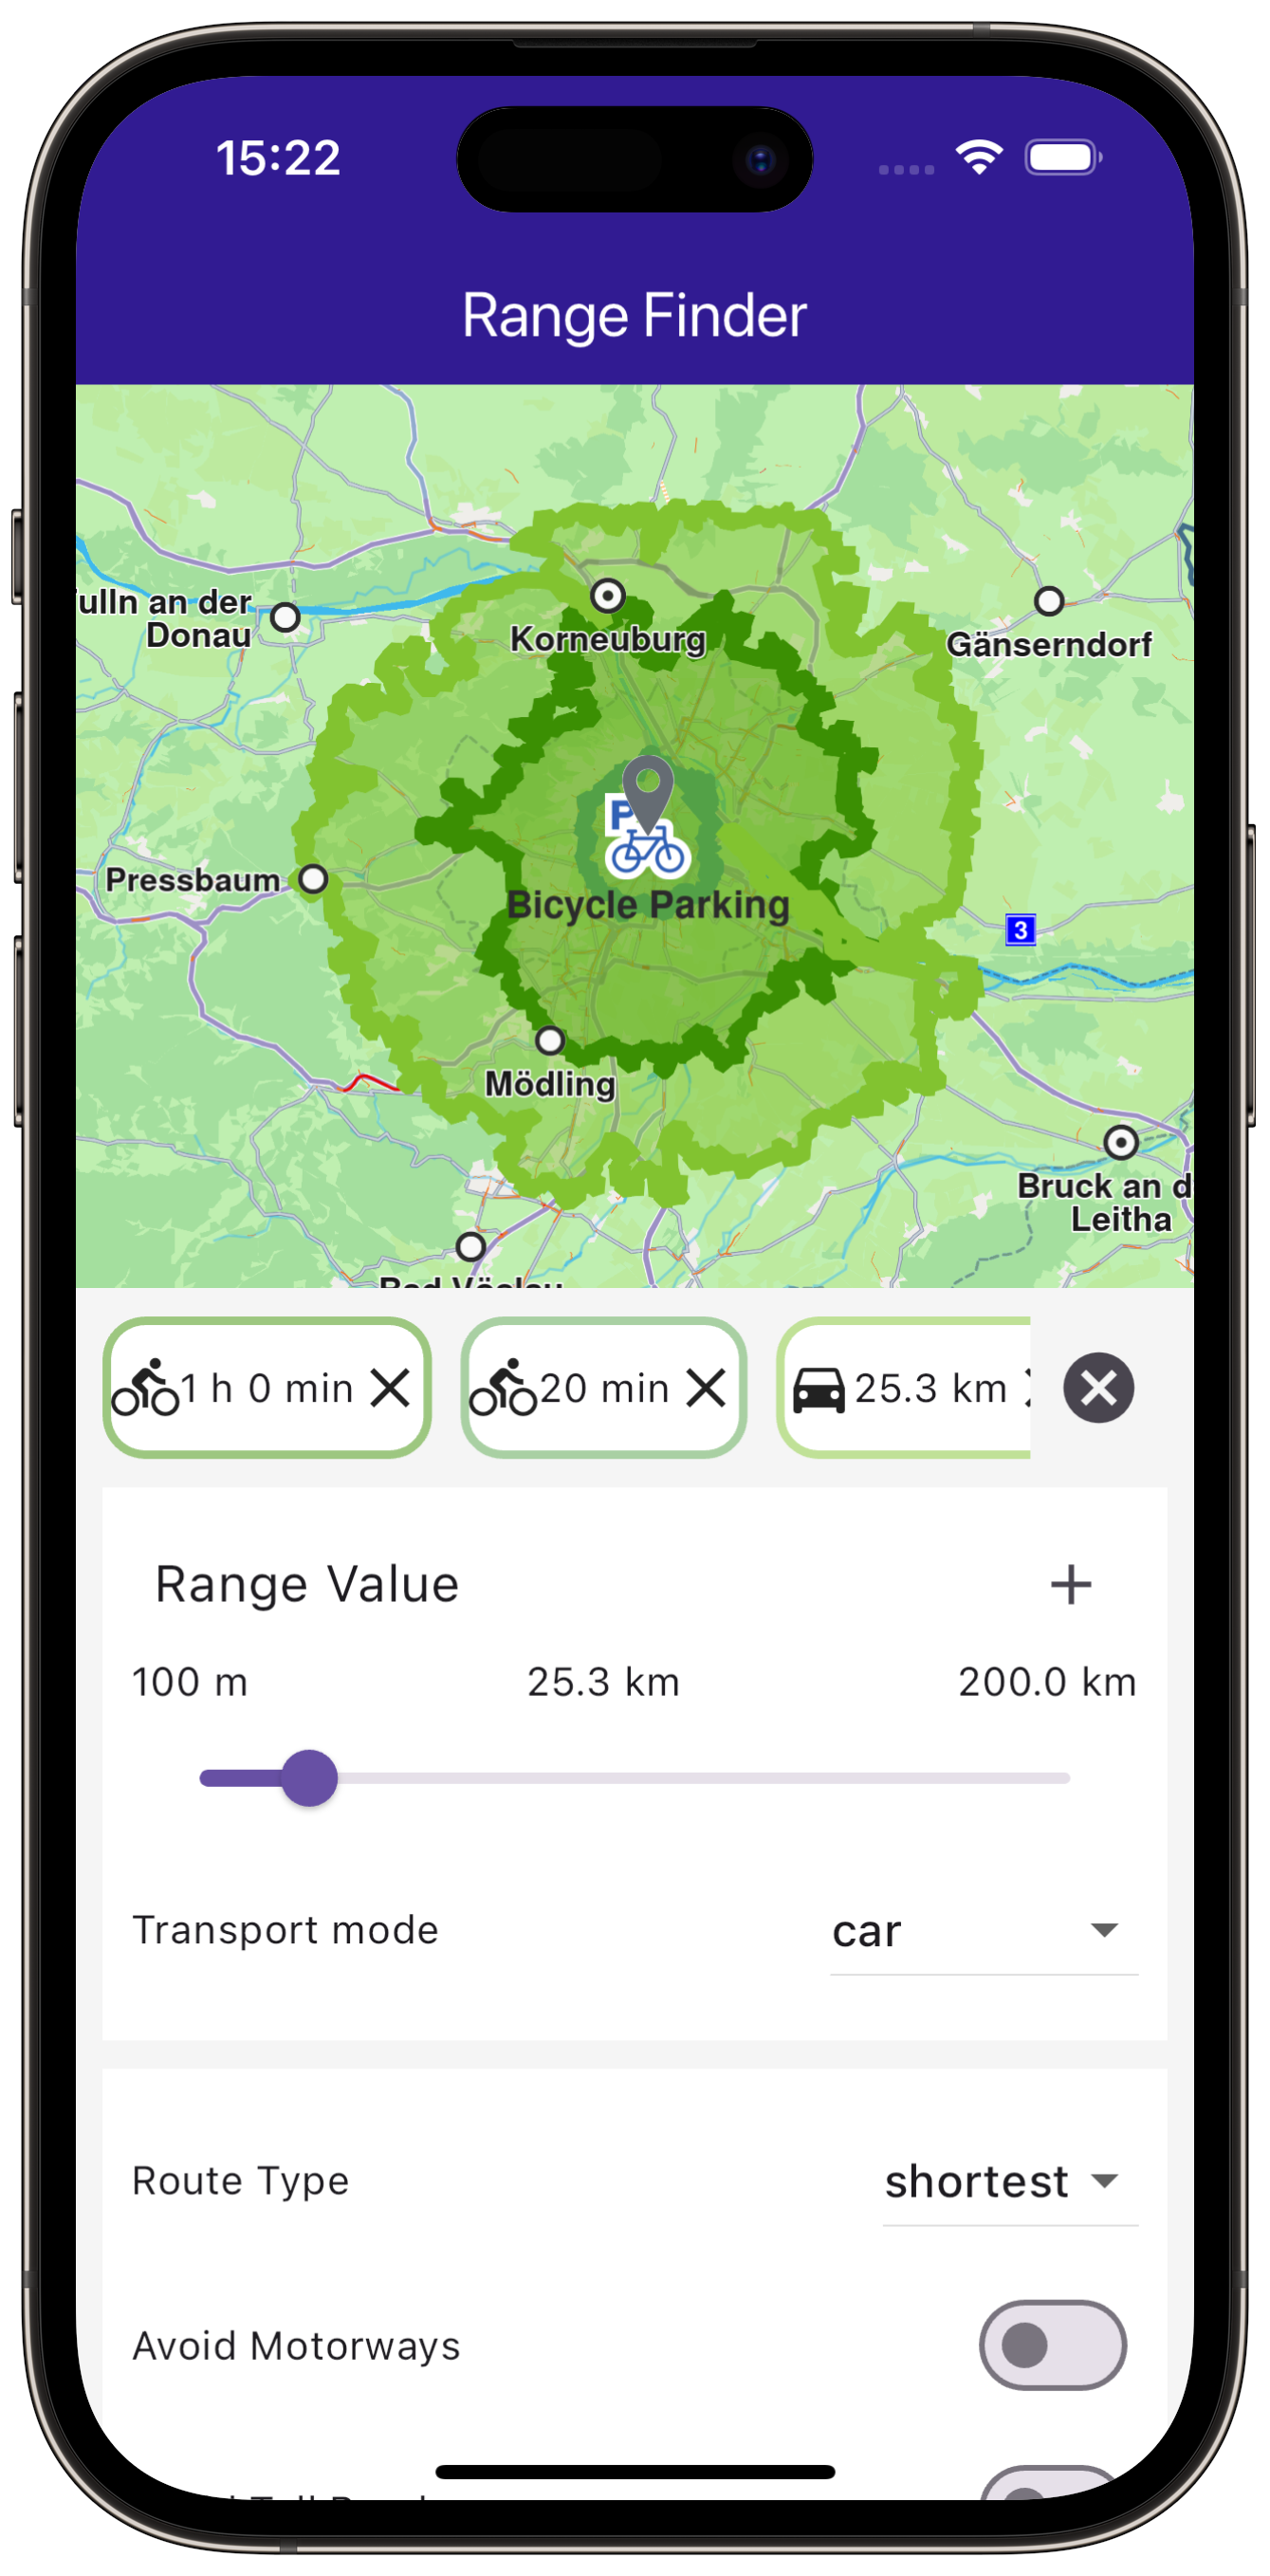
Range Calculation and Preferences
The RangesPanel widget handles the UI and logic for calculating and displaying route ranges. Here are the critical parts:
Define State Variables
Define state variables to hold user preferences and the calculated route ranges.
class _RangesPanelState extends State<RangesPanel> {
  int _rangeValue = 3600;
  RouteTransportMode _transportMode = RouteTransportMode.car;
  RouteType _routeType = RouteType.fastest;
  bool _avoidMotorways = false;
  bool _avoidTollRoads = false;
  bool _avoidFerries = false;
  bool _avoidUnpavedRoads = false;
  BikeProfile _bikeProfile = BikeProfile.city;
  double _hillsValue = 0;
  TrafficAvoidance _trafficAvoidance = TrafficAvoidance.roadblocks;
  List<Range> routeRanges = [];
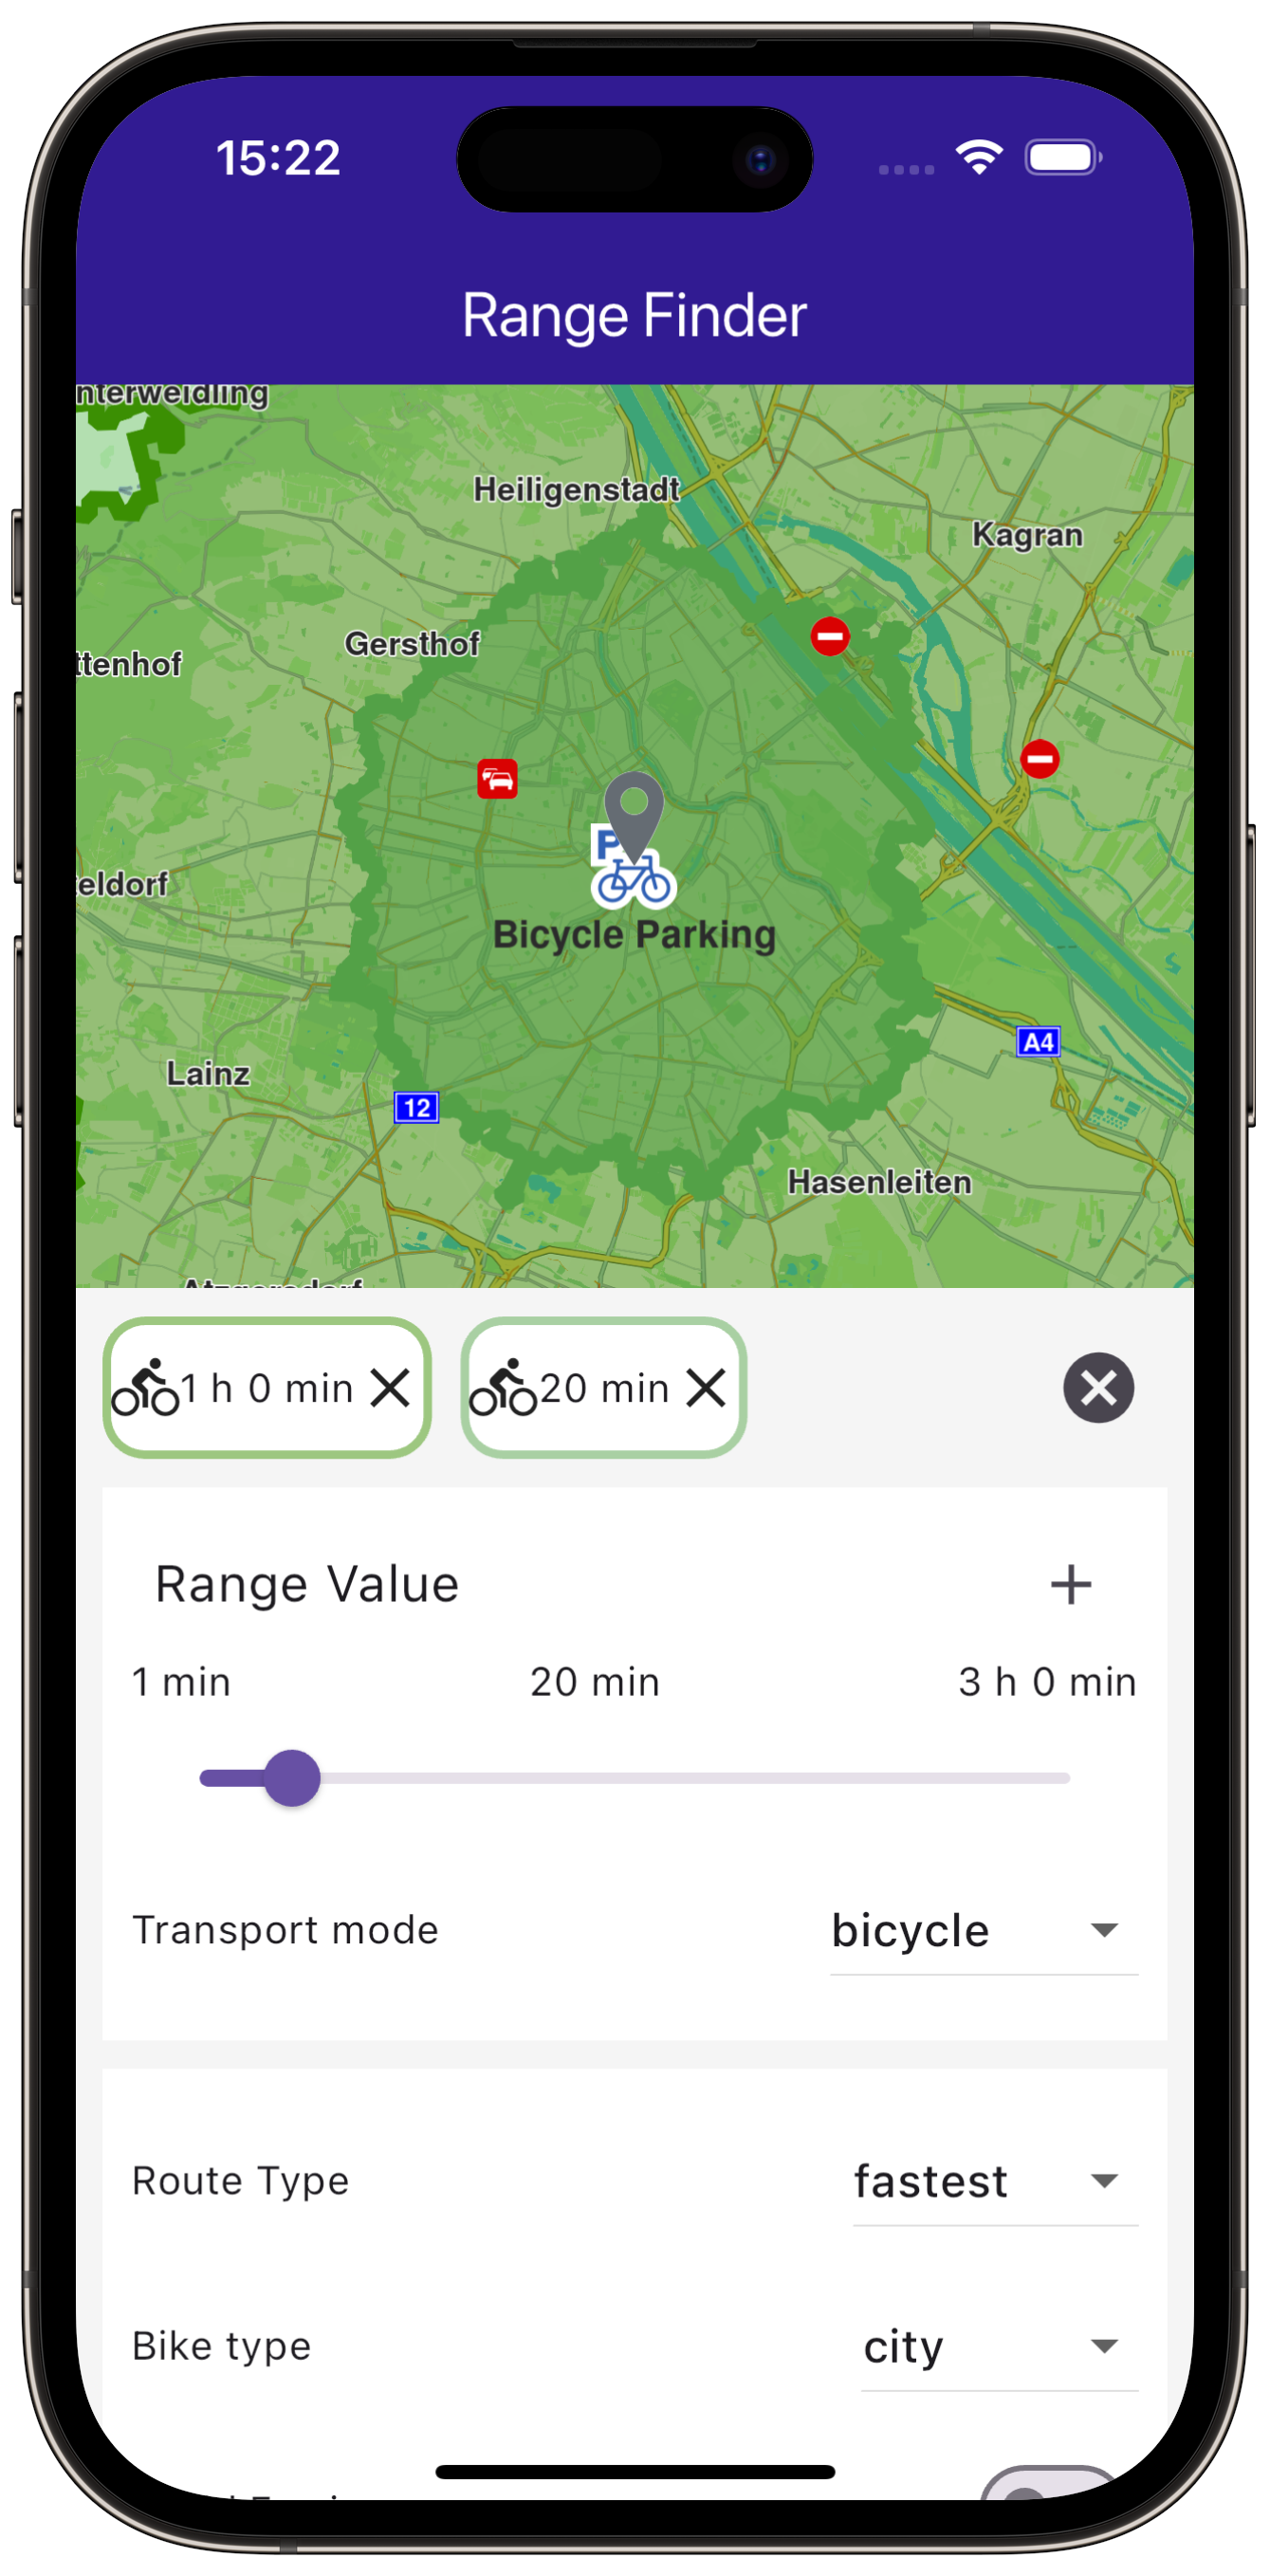
Calculate Route Ranges
Use the RoutingService to calculate route ranges based on user preferences.
void _onAddRouteRangeButtonPressed(BuildContext context) {
  if (!_doesRouteRangeExist()) {
    _showSnackBar(context, message: "The route is being calculated.");

    RoutingService.calculateRoute([widget.landmark], _getRoutePreferences(),
        (err, routes) {
      ScaffoldMessenger.of(context).clearSnackBars();

      if (err == GemError.success) {
        final routesMap = widget.mapController.preferences.routes;
        final randomColor = Color.fromARGB(128, Random().nextInt(200),
            Random().nextInt(200), Random().nextInt(200));
        RouteRenderSettings settings =
            RouteRenderSettings(fillColor: randomColor);
        routesMap.add(routes!.first, true, routeRenderSettings: settings);
        _centerOnRouteRange(routes.first);

        setState(() {
          _addNewRouteRange(routes.first, randomColor);
        });
      }
    });

    setState(() {});
  }
}
Define Route Preferences
Create a method to build route preferences based on user inputs.
RoutePreferences _getRoutePreferences() {
  switch (_transportMode) {
    case RouteTransportMode.car:
      return RoutePreferences(
        avoidMotorways: _avoidMotorways,
        avoidTollRoads: _avoidTollRoads,
        avoidFerries: _avoidFerries,
        avoidUnpavedRoads: _avoidUnpavedRoads,
        transportMode: _transportMode,
        routeType: _routeType,
        routeRanges: [_rangeValue],
      );
    case RouteTransportMode.lorry:
      return RoutePreferences(
        avoidMotorways: _avoidMotorways,
        avoidTollRoads: _avoidTollRoads,
        avoidFerries: _avoidFerries,
        avoidUnpavedRoads: _avoidUnpavedRoads,
        transportMode: _transportMode,
        routeType: _routeType,
        routeRanges: [_rangeValue],
        avoidTraffic: _trafficAvoidance,
      );
    case RouteTransportMode.pedestrian:
      return RoutePreferences(
        avoidFerries: _avoidFerries,
        avoidUnpavedRoads: _avoidUnpavedRoads,
        transportMode: _transportMode,
        routeRanges: [_rangeValue],
      );
    case RouteTransportMode.bicycle:
      return RoutePreferences(
        avoidFerries: _avoidFerries,
        avoidUnpavedRoads: _avoidUnpavedRoads,
        transportMode: _transportMode,
        routeType: _routeType,
        routeRanges: [_rangeValue],
        avoidBikingHillFactor: _hillsValue,
        bikeProfile: BikeProfileElectricBikeProfile(
            profile: _bikeProfile, eProfile: ElectricBikeProfile()),
      );
    default:
      return RoutePreferences();
  }
}
Handle User Interactions
Methods to manage user interactions, such as deleting, toggling, and centering on route ranges.
void _deleteRouteRange(int index) {
  widget.mapController.preferences.routes.remove(routeRanges[index].route);
  setState(() {
    routeRanges.removeAt(index);
  });
}

void _toggleRouteRange(int index) {
  if (routeRanges[index].isEnabled) {
    widget.mapController.preferences.routes.remove(routeRanges[index].route);
    return;
  } else {
    RouteRenderSettings settings =
        RouteRenderSettings(fillColor: routeRanges[index].color);
    widget.mapController.preferences.routes
        .add(routeRanges[index].route, true, routeRenderSettings: settings);
    _centerOnRouteRange(routeRanges[index].route);
  }
}

void _centerOnRouteRange(Route route) {
  const appbarHeight = 50;
  const padding = 20;

  widget.mapController.centerOnRoute(route,
      screenRect: RectType(
        x: 0,
        y: (appbarHeight + padding * MediaQuery.of(context).devicePixelRatio)
            .toInt(),
        width: (MediaQuery.of(context).size.width *
                MediaQuery.of(context).devicePixelRatio)
            .toInt(),
        height: ((MediaQuery.of(context).size.height / 2 -
                    appbarHeight -
                    2 * padding * MediaQuery.of(context).devicePixelRatio) *
                MediaQuery.of(context).devicePixelRatio)
            .toInt(),
      ));
}

void _showSnackBar(BuildContext context,
    {required String message, Duration duration = const Duration(hours: 1)}) {
  final snackBar = SnackBar(
    content: Text(message),
    duration: duration,
  );

  ScaffoldMessenger.of(context).showSnackBar(snackBar);
}
You can start calculating a range by tapping the + button after adjusting your specifications
for the routes.