Draw and Fly To Polyline
In this guide you will learn how to render an interactive map, draw a polyline on the map, and fly to the location of the polyline.
Setup
First, get an API key token, see the Getting Started guide.
Download the Maps & Navigation SDK for Android archive fileDownload the DrawPolyline project archive file or clone the project with Git
See the Configure Android Example guide.
Run the example
In Android Studio, from the File menu, select Sync Project with Gradle Files
An android device should be connected via USB cable.
Press SHIFT+F10 to compile, install and run the example on the
android device.
|
|
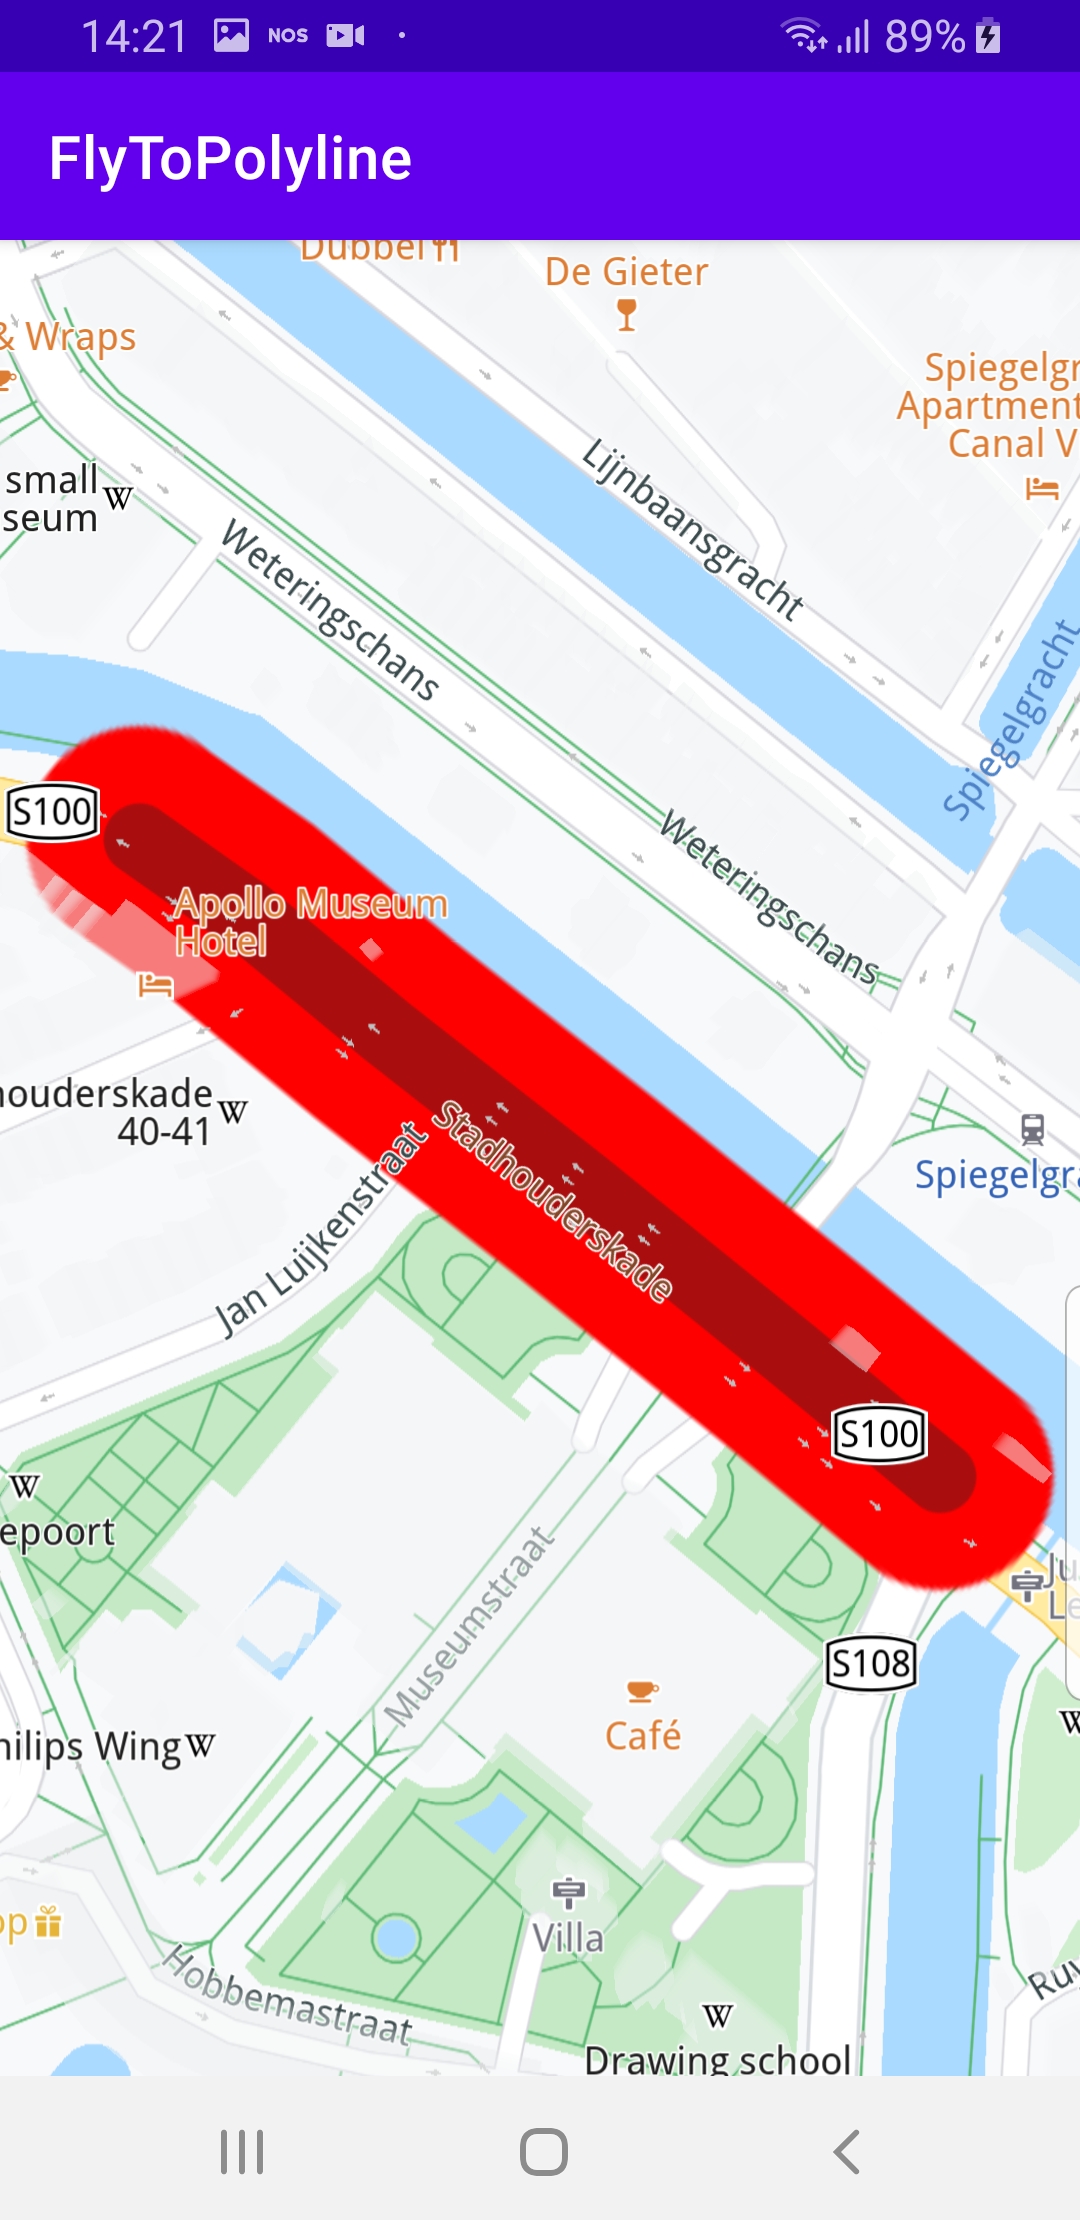

The example draws a polyline on the map and flies
to it.
Displays an interactive map which is fully 3D,
supporting pan, pinch-zoom, rotate and tilt.
How it works
You can open the MainActivity.kt file to see how the polyline is drawn on the map.
 1private fun flyToPolyline() = SdkCall.execute {
 2     gemSurfaceView.mapView?.let { mapView ->
 3         /*
 4         Make a MarkerCollection and a Marker item that will be stored in the collection.
 5         You can create multiple Marker items that can be added in the same collection.
 6          */
 7         val markerCollection = MarkerCollection(EMarkerType.Polyline, "My marker collection")
 8         // Define a marker item and add the necessary coordinates to it.
 9         val marker = Marker().apply {
10             add(52.360234, 4.886782)
11             add(52.360495, 4.886266)
12             add(52.360854, 4.885539)
13             add(52.361184, 4.884849)
14             add(52.361439, 4.884344)
15             add(52.361593, 4.883986)
16         }
17         // Add the marker item to the collection.
18         markerCollection.add(marker)
19         // Make a list of settings that will decide how each marker collection will be displayed on the map.
20         val settings = MarkerCollectionRenderSettings()
21         // Add the collection to the desired map view so it can be displayed.
22         mapView.preferences?.markers?.add(markerCollection, settings)
23         // Center the map on this marker collection's area.
24         markerCollection.area?.let { mapView.centerOnArea(it) }
25     }
26}
In the
flyToPolyline() function a MarkerCollection is created.
Coordinate pairs for the polyline perimeter are added to a Marker,
which is then added to the MarkerCollection instance.This is then added to the map, together with
MarkerCollectionRenderSettings.Then the bounding box area of the polyline is obtained:
markerCollection.area?.let { mapView.centerOnArea(it) }
and centerOnArea() flies the camera to the bounding box
containing the polyline, such that the entire polyline fits in
the viewport. 1override fun onCreate(savedInstanceState: Bundle?)
2{
3 super.onCreate(savedInstanceState)
4 setContentView(R.layout.activity_main)
5 gemSurfaceView = findViewById(R.id.gem_surface)
6 SdkSettings.onMapDataReady = onMapDataReady@{ isReady ->
7 if (!isReady) return@onMapDataReady
8 // Defines an action that should be done when the map is ready.
9 flyToPolyline()
10 }
11 SdkSettings.onApiTokenRejected = {
12 showDialog("TOKEN REJECTED")
13 }
14 if (!Util.isInternetConnected(this))
15 {
16 showDialog("You must be connected to internet!")
17 }
18}
MainActivity overrides onCreate() which checks that internet access
is available, and when the map is initialized, calls the flyToPolyline()
function to render a polyline on the map, and then fly the camera to it
and center the polyline in the viewport.