Route Direction Arrows
In this guide you will learn how to render arrows on the route, indicating
the direction of travel, and also set their color.
RoutingService
is used to compute a route and NavigationService
to start a real or simulated navigation on that route, with the route direction
arrows layer activated.
The Route Direction Arrows
layer must be added to the map style used for rendering the map.
Setup
Prerequisites
Setting your API key token
To set your API key token, define it like this:
#define API_TOKEN "YOUR_API_KEY_TOKEN"
replacing YOUR_API_KEY_TOKEN
with your actual API key token text, within the quotes.
This can be done in the main()
function, before the following line:
#if defined(API_TOKEN)
or outside the main()
function, further up, or in a header file.
Although it is also possible to define your API key token as the text value of the GEM_TOKEN
environment variable, this is not recommended, as it is not secure.
Use case
On a complicated route, it may be useful to render arrows on the route to indicate the direction of travel.
How to use the sample
When you open the sample, a preset route is computed, and a
simulated navigation along that route starts, with the route
direction arrows rendered on the route. This is made possible
by also setting a map style which has the Route Direction Arrows
layer.
Route Direction Arrows
Adding the Route Direction Arrows layer to a map style:
1) Go to the Styles tab in the online studio:
https://developer.magiclane.com/api/studio
Select your style or create a new one and then under
Available Layers
filter byarrow
;Drag the
Route Direction Arrows
layer fromAvailable Layers
toSelected Layers
in theRoad arrows
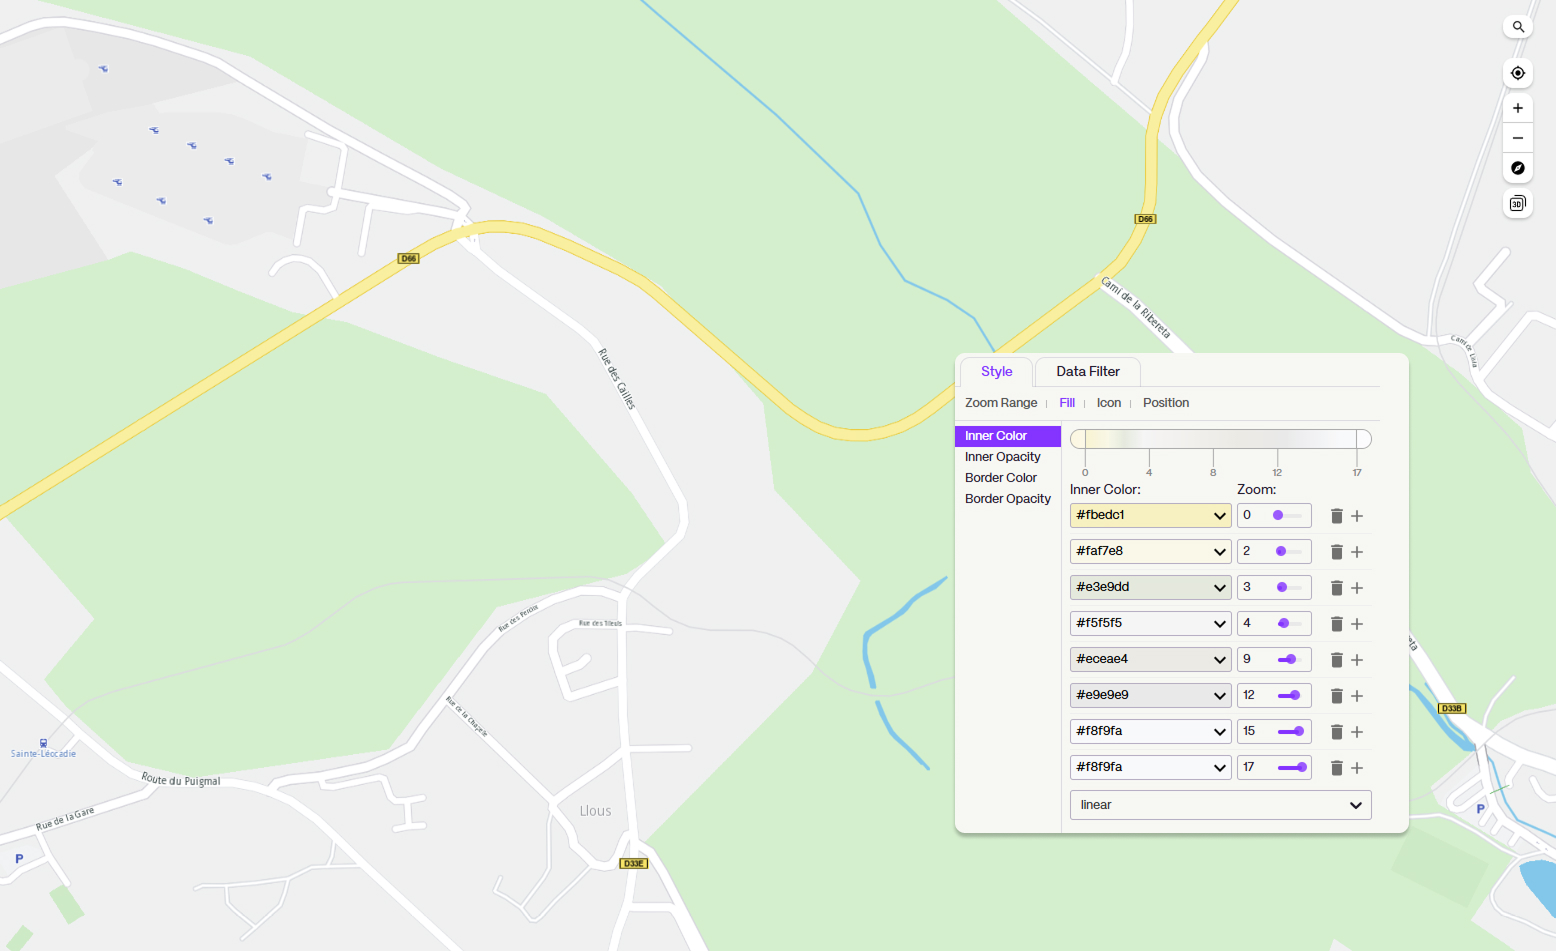
section;Click on it in the list, to set its
Inner Color
andBorder Color
in theStyle
tab on the right;Name the style in the upper left by clicking on its current name, such as Basic 1, and then typing the new name, such as Route Arrows;
Click on
Settings
in the upper right and in theResolution
drop-down selectMobile
then clickSave
;Click the left arrow in the upper left corner to go back to the list of styles;
Click the 3 dots to the right of your style and select
Download Style
;
How it works
Create an instance of
Environment
and set your API key token:
1int main( int argc, char** argv )
2{
3 std::string projectApiToken = "";
4#define API_TOKEN "YOUR_API_KEY_TOKEN"
5#if defined(API_TOKEN)
6 projectApiToken = std::string( API_TOKEN );
7#endif
8 // Sdk objects can be created & used below this line
9 Environment::SdkSession session(projectApiToken, { argc > 1 ? argv[1] : "" });
The SDK is initialized with your API key token string and the log file path, where to write the application logs. Note that the log file path is not initialized by default, the empty string above, after the API key token, which means that no logs are written. The log file path is initialized with the first command line argument, if any. Create a
gem::MapView
interactive map object, using an OpenGL context for 3D graphics, the SDK environment created above, and a touch event listener for interactive user touch and mouse input, such as pan and zoom.
1// Create an interactive map view
2CTouchEventListener pTouchEventListener;
3gem::StrongPointer<gem::MapView> mapView = gem::MapView::produce(session.produceOpenGLContext(
4 Environment::WindowFrameworks::Available, "RouteDirectionArrows", &pTouchEventListener));
5if ( !mapView )
6{
7 GEM_LOGE( "Error creating gem::MapView: %d", GEM_GET_API_ERROR() );
8}
The absolute resources path (SDK install path) is obtained, and the relative
/Data/Res/
path is appended to it, thus building the path to the input data files. The.style
input file(s) should be copied from the directory of this example to theData/Res/
subdirectory within the SDK install path. Example:C:/MAGICLANE/Data/Res/
whereC:/MAGICLANE
is the SDK install path.
1std::string sdkResrcPath = Environment::GetInstance().GetResourcesPath();
2std::string projectRelativePath = "/Data/Res/";
3std::string projectAbsolutePath = sdkResrcPath + projectRelativePath;
The map style with the
Route Direction Arrows
layer is set by path:
1std::string inputMapStyle = projectAbsolutePath +
2 "MobileRouteArrow.style";
3mapView->preferences().setMapStyleByPath(inputMapStyle);
The color of the direction arrows can optionally be set to something other than they are set in the layer; then activate the route direction arrow rendering:
1gem::RouteRenderSettings routeSettings;
2routeSettings.setDirectionArrowInnerColor(gem::Rgba(255, 0, 255, 224));
3routeSettings.setDirectionArrowOuterColor(gem::Rgba(0, 255, 255, 224));
4routeSettings.setOption(gem::ERouteRenderOptions::RRS_ShowDirectionArrows);
Calculate, render and simulate navigation on a route. At least 2 waypoints define the route: the first is the departure position, and the last is the destination. There can be zero or more intermediate waypoints through which the route passes, in the order they are listed. The coordinates are {latitude,longitude} in degrees; the landmark name is optional, and can be an empty string.
1gem::LandmarkList waypoints({
2 { "", { 48.526059 , 7.735456 } },
3 { "", { 48.525613 , 7.735448 } },
4 { "", { 48.525995 , 7.733916 } },
5 { "", { 48.526143 , 7.733535 } },
6 });
The class
MyNavigationListener
implements thegem::INavigationListener
interface, and is used to receive asynchronous navigation events, such as:onNavigationStarted()
,onNavigationInstructionUpdated()
,onWaypointReached()
,onDestinationReached()
and others. The first result route (at index 0) is added to the map:mapView->preferences().routes().add(routes[0]);
The render settings defined above are set, so the route direction arrows are rendered:mapView->preferences().routes().setRenderSettings(routes[0], routeSettings);
1// Compute route using these preferences: car / fastest / without alternatives in result
2gem::RouteList routes;
3ProgressListener routeListener;
4auto navListener = gem::StrongPointerFactory<MyNavigationListener>();
5gem::RoutingService().calculateRoute(routes, waypoints,
6 gem::RoutePreferences().setTransportMode(gem::RTM_Car).setRouteType(
7 gem::RT_Fastest).setAlternativesSchema(gem::AS_Never), &routeListener);
8
9// Wait until route calculation finished & check success
10if (WAIT_UNTIL(std::bind(&ProgressListener::IsFinished, &routeListener), 30000)
11&& routeListener.GetError() == gem::KNoError && !routes.empty())
12{
13 // Add the first resulting route (at index 0) to map view
14 mapView->preferences().routes().add(routes[0]);
15 mapView->preferences().routes().setRenderSettings(routes[0], routeSettings);
16 mapView->centerOnRoute(routes[0], gem::Rect(), gem::Animation(gem::AnimationLinear,
17 gem::ProgressListener(), 2000));
18 // Start simulated navigation along the route
19 gem::NavigationService().startSimulation(routes[0], navListener, gem::ProgressListener());
20 // Start follow GPS positions ( generated by simulation ) - camera follows position along route
21 mapView->startFollowingPosition();
22}
A separate thread is used to demonstrate doing other things during navigation, such as, in this case, checking if the position indicator (green GPS arrow by default) has moved outside the viewport, if the user pans the map, which deactivates follow position mode - and the corresponding status is printed in the console debug output, once per second:
1void navThread(std::string navThread, gem::StrongPointer<gem::MapView> mapView)
2{
3 auto positionArrow = gem::MapSceneObject::getDefPositionTracker().first;
4 bool isPositionArrowVisible = true;
5 while ( true )
6 {
7 isPositionArrowVisible = mapView.get()->checkObjectVisibility(*positionArrow);
8 GEM_LOGE("POSITION ARROW IS %s THE VIEWPORT # # #", isPositionArrowVisible
9 ? "WITHIN": "OUTSIDE");
10 std::this_thread::sleep_for(std::chrono::milliseconds(1000));
11 }
12}
1std::thread thread1(navThread, "navThread", mapView);
Use the special provided macro to keep the interactive map and wait until the user closes the window.
1 WAIT_UNTIL_WINDOW_CLOSE();
2 return 0;
3}