Custom Position Icon
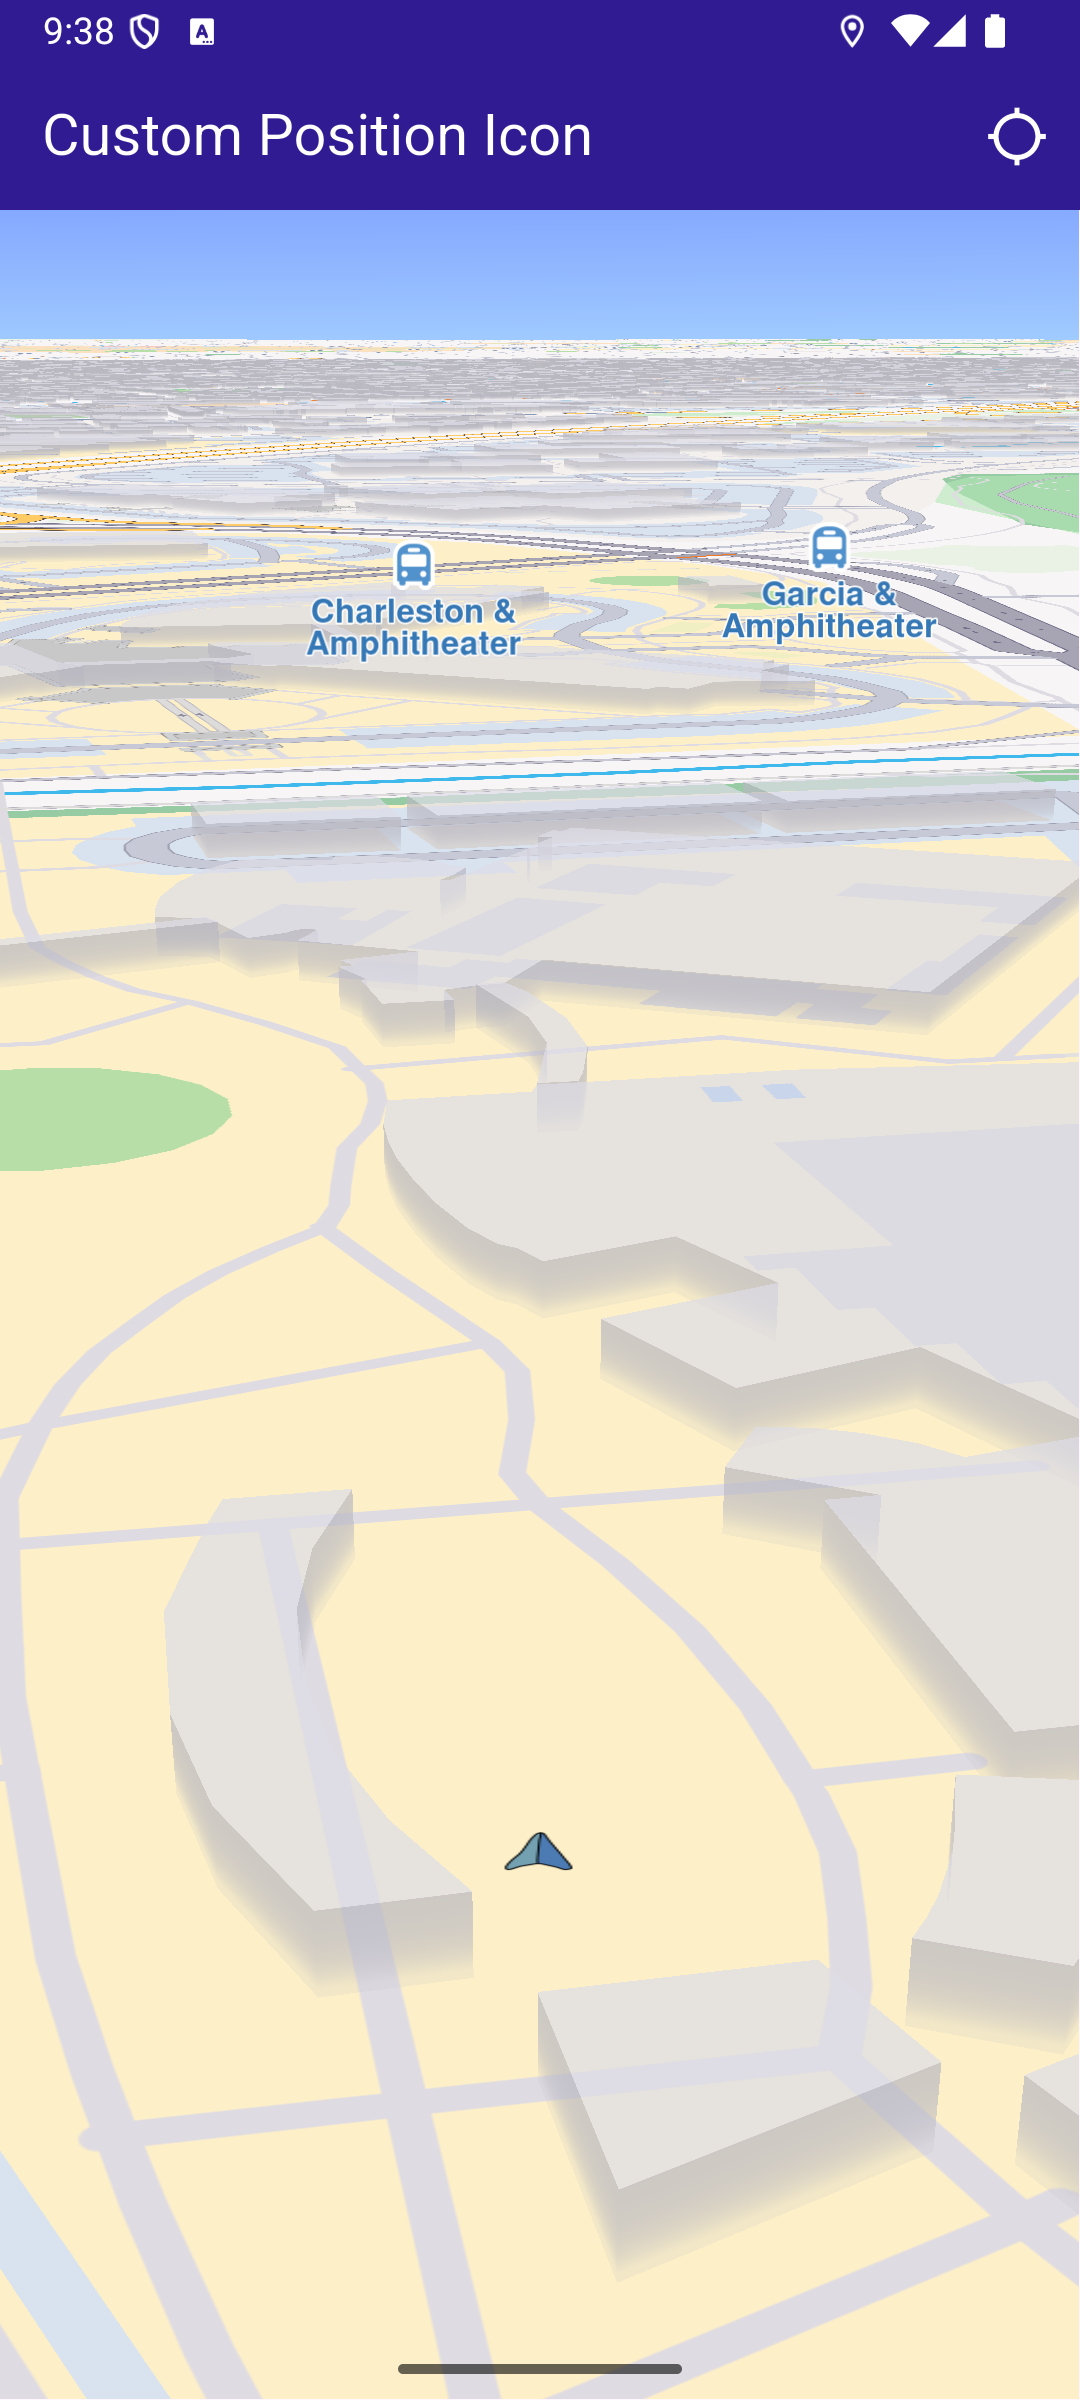
This example presents how to create an app that displays a custom icon for the position tracker on a map using Maps SDK for Flutter.
How it works
The example app demonstrates the following features:
- Display a custom icon for the position tracker on the map.
- Handle user interaction to start following the current position.
Importing Assets
Before running the app, ensure that you save the necessary files (such as the custom icon or 3D object) into the assets directory. For example:
- Save your custom icon image (e.g., navArrow.png ) in the assets folder.
Update your pubspec.yaml file to include these assets:
flutter:
  assets:
    - assets/
UI and Map Integration
This code defines the main UI elements, including the map and an app bar with a button to follow the current position.
Map Creation and Custom Position Tracker Icon
This method initializes the map controller, loads a custom icon for the position tracker from the assets, and applies it with a specified scale.
Handling Position Tracking
This method handles user interaction to request location permissions, sets the live data source, and starts following the current position on the map.
Utility Functions
The setPositionTrackerImage method is crucial as it allows you to customize the position tracker icon with any image or 3D object. Ensure the image is correctly loaded from assets and properly scaled to fit your application’s design.
- Android
- iOS
Add the following code to the android/app/src/main/AndroidManifest.xml file, within the <manifest> block:
<uses-permission android:name="android.permission.ACCESS_FINE_LOCATION" />
<uses-permission android:name="android.permission.ACCESS_COARSE_LOCATION" />
This example uses the Permission Handler package. Be sure to follow the setup guide.
Add the following to ios/Runner/Info.plist inside the <dict>:
<key>NSLocationWhenInUseUsageDescription</key>
<string>Location is needed for map localization and navigation</string>
This example uses the Permission Handler package. Follow the official setup instructions. Add this to your ios/Podfile:
post_install do |installer|
  installer.pods_project.targets.each do |target|
    flutter_additional_ios_build_settings(target)

    target.build_configurations.each do |config|
      config.build_settings['GCC_PREPROCESSOR_DEFINITIONS'] ||= [
        '$(inherited)',
        'PERMISSION_LOCATION=1',
      ]
    end
  end
end