Navigate Route
In this guide, you will learn how to compute a route between a departure point and a destination point, render the route on an interactive map, and then navigate along the route.
How It Works
This example demonstrates the following features:
- Compute routes between a departure and destination.
- Display routes on a map and allow for multiple route alternatives.
- Begin turn-by-turn navigation along the selected route with real-time positioning.
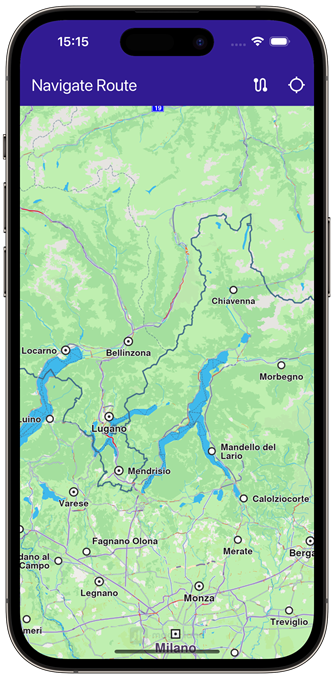 | 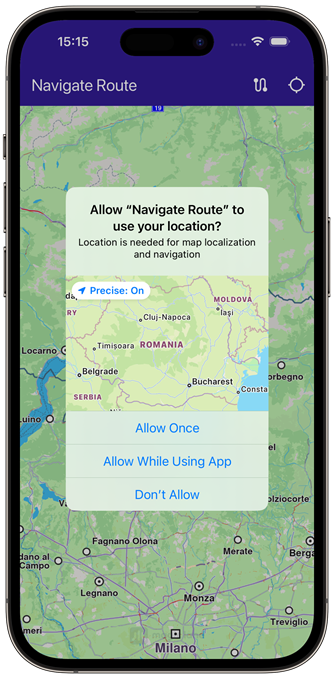 |
|---|---|
| Initial map view | Location permission dialog |
Map Initialization
This callback function is called when the interactive map is initialized and ready to use.
void _onMapCreated(GemMapController controller) {
  // Save controller for further usage.
  _mapController = controller;
}
Building the Route
void _onBuildRouteButtonPressed(BuildContext context) {
  if (_currentLocation == null) {
    _showSnackBar(context,
        message: 'Current location is needed to compute the route.', duration: const Duration(seconds: 3));
    return;
  }

  // Define the departure
  final departureLandmark = Landmark.withCoordinates(_currentLocation!);

  // Define the destination.
  final destinationLandmark = Landmark.withLatLng(latitude: 52.51614, longitude: 13.37748);

  // Define the route preferences.
  final routePreferences = RoutePreferences();
  _showSnackBar(context, message: 'The route is calculating.');

  // Calling the calculateRoute SDK method.
  _routingHandler =
      RoutingService.calculateRoute([departureLandmark, destinationLandmark], routePreferences, (err, routes) {
    // If the route calculation is finished, we don't have a progress listener anymore.
    _routingHandler = null;

    ScaffoldMessenger.of(context).clearSnackBars();

    if (err == GemError.routeTooLong) {
      print('The destination is too far from your current location. Change the coordinates of the destination.');
      return;
    }

        if (err == GemError.success) {
          final routesMap = _mapController.preferences.routes;

          for (final route in routes) {
            routesMap.add(
              route,
              route == routes.first,
              label: route.getMapLabel(),
            );
          }

          _mapController.centerOnRoutes(routes: routes);
          setState(() {
            _areRoutesBuilt = true;
          });
        }
      },
    );
  }
When the route button in the upper right corner is pressed, a route is computed from the current position to a preset location in Europe.
A route must have at least two waypoints, one for the departure, and one for the destination. Optionally, zero or more intermediate waypoints may be specified through which the route will pass, in order from departure to destination.
Each waypoint is a Landmark and has latitude and longitude coordinates. In this case, the current location is obtained and set in the departure landmark waypoint:
final departureLandmark = Landmark.withCoordinates(_currentLocation!);
and the destination is set to preset coordinates:
final destinationLandmark = Landmark.withLatLng(latitude: 52.51614, longitude: 13.37748);
then the route is calculated:
RoutingService.calculateRoute()
If there are no errors, the list of resulting routes (as there may be a few alternatives) is added to the map:
routesMap.add()
the first resulting route is auto-selected as the main route, and then the map is centered on the resulting routes, such that they fit in the viewport:
_mapController.centerOnRoutes(routes);
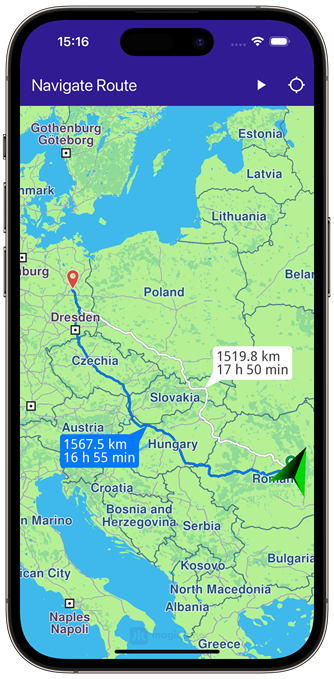 |  |
|---|---|
| Computed route displayed | Route navigation started |
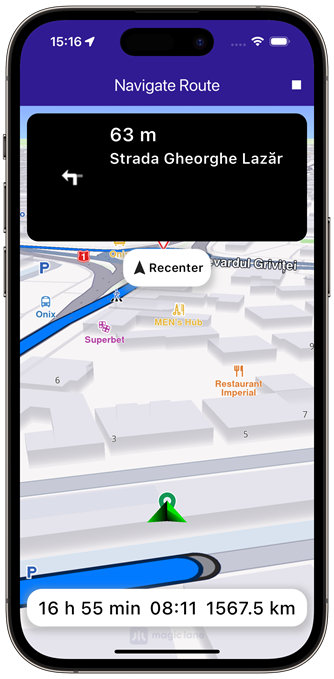
Starting Navigation
Once a route is computed, tapping the play button in the upper right starts navigation on the selected route.
  void _startNavigation() {
    final routes = _mapController.preferences.routes;

    if (routes.mainRoute == null) {
      _showSnackBar(context, message: "No main route available");
      return;
    }

    _navigationHandler = NavigationService.startSimulation(
      routes.mainRoute!,
      null,
      onNavigationInstruction: (instruction, events) {
        setState(() {
          _isNavigationActive = true;
        });
        currentInstruction = instruction;
      },
      onError: (error) {
        setState(() {
          _isNavigationActive = false;
          _cancelRoute();
        });

        if (error != GemError.cancel) {
          _stopNavigation();
        }
        return;
      },
    );

    _mapController.startFollowingPosition();
  }
Following the Position
void _onFollowPositionButtonPressed() async {
  if (kIsWeb) {
    // On web platform permissions are handled differently than other platforms.
    // The SDK handles the request for permission for location.
    _locationPermissionStatus = PermissionStatus.granted;
  } else {
    // For Android & iOS platforms, permission_handler package is used to ask for permissions.
    _locationPermissionStatus = await Permission.locationWhenInUse.request();
  }

  if (_locationPermissionStatus == PermissionStatus.granted) {
    // After the permission was granted, we can set the live data source (in most cases the GPS).
    // The data source should be set only once; otherwise, we'll get -5 error.
    if (!_hasLiveDataSource) {
      PositionService.instance.setLiveDataSource();
      _getCurrentLocation();
      _hasLiveDataSource = true;
    }

    // After the data source is set, startFollowingPosition can be safely called.
    // Optionally, we can set an animation
    final animation = GemAnimation(type: AnimationType.linear);

    // Calling the start following position SDK method.
    _mapController.startFollowingPosition(animation: animation);
  }
  setState(() {});
}
Follow position means the camera tracks the position of the phone/device, indicated by an arrow moving along the route on the map.
_mapController.startFollowingPosition();
Note that if location (GPS sensor) permission was not previously granted, the app will ask for location permission from the user, as this is required for navigation.
_locationPermissionStatus = await Permission.locationWhenInUse.request();
Once permission is granted by the user, it is possible to set the location (GPS sensor) as the data source for the phone/device position on the map:
PositionService.instance.setLiveDataSource();
If the user pans the map away from the route, clicking the Re-center button starts following position again.
Top Navigation Instruction Panel
class NavigationInstructionPanel extends StatelessWidget {
final NavigationInstruction instruction;
const NavigationInstructionPanel({super.key, required this.instruction});
Widget build(BuildContext context) {
return Container(
width: MediaQuery.of(context).size.width - 20,
height: MediaQuery.of(context).size.height * 0.2,
padding: const EdgeInsets.all(10),
decoration: BoxDecoration(
color: Colors.black,
borderRadius: BorderRadius.circular(15),
),
child: Row(
mainAxisAlignment: MainAxisAlignment.start,
children: [
Container(
padding: const EdgeInsets.all(20),
width: 100,
child:
instruction.nextTurnDetails.abstractGeometryImg.isValid
? Image.memory(
instruction.nextTurnDetails.abstractGeometryImg.getRenderableImageBytes(size: Size(200, 200), format: ImageFileFormat.png)!,
gaplessPlayback: true,
)
: const SizedBox(), // Empty widget
),
SizedBox(
width: MediaQuery.of(context).size.width - 150,
child: Column(
crossAxisAlignment: CrossAxisAlignment.start,
mainAxisAlignment: MainAxisAlignment.start,
children: [
Text(
instruction.getFormattedDistanceToNextTurn(),
textAlign: TextAlign.left,
style: const TextStyle(
color: Colors.white,
fontSize: 25,
fontWeight: FontWeight.w600,
),
overflow: TextOverflow.ellipsis,
),
Text(
instruction.nextStreetName,
style: const TextStyle(
color: Colors.white,
fontSize: 20,
fontWeight: FontWeight.w600,
),
overflow: TextOverflow.ellipsis,
),
],
),
),
],
),
);
}
}
Bottom Navigation Panel
class NavigationBottomPanel extends StatelessWidget {
final String remainingDuration;
final String remainingDistance;
final String eta;
const NavigationBottomPanel({
super.key,
required this.remainingDuration,
required this.remainingDistance,
required this.eta,
});
Widget build(BuildContext context) {
return Container(
decoration: BoxDecoration(
color: Colors.white,
borderRadius: const BorderRadius.all(Radius.circular(20)),
boxShadow: [
BoxShadow(
color: Colors.grey.withValues(alpha: 0.5),
spreadRadius: 5,
blurRadius: 7,
offset: const Offset(0, 3),
),
],
),
width: MediaQuery.of(context).size.width - 20,
height: 50,
margin: const EdgeInsets.symmetric(horizontal: 10),
padding: const EdgeInsets.symmetric(horizontal: 15),
child: Row(
mainAxisAlignment: MainAxisAlignment.spaceBetween,
children: [
Text(
remainingDuration,
style: const TextStyle(
color: Colors.black,
fontSize: 24,
fontWeight: FontWeight.w500,
),
),
Text(
eta,
style: const TextStyle(
color: Colors.black,
fontSize: 24,
fontWeight: FontWeight.w500,
),
),
Text(
remainingDistance,
style: const TextStyle(
color: Colors.black,
fontSize: 24,
fontWeight: FontWeight.w500,
),
),
],
),
);
}
}
Flutter Examples
Maps SDK for Flutter Examples can be downloaded or cloned with Git.