Magic Lane Documentation
Enterprise-grade mapping APIs and SDKs for teams that demand data control, offline resilience, and predictable performance.
Follow our step-by-step guide to sign up for a free account, create a project, generate your API key and start building your mapping solution.


Tools
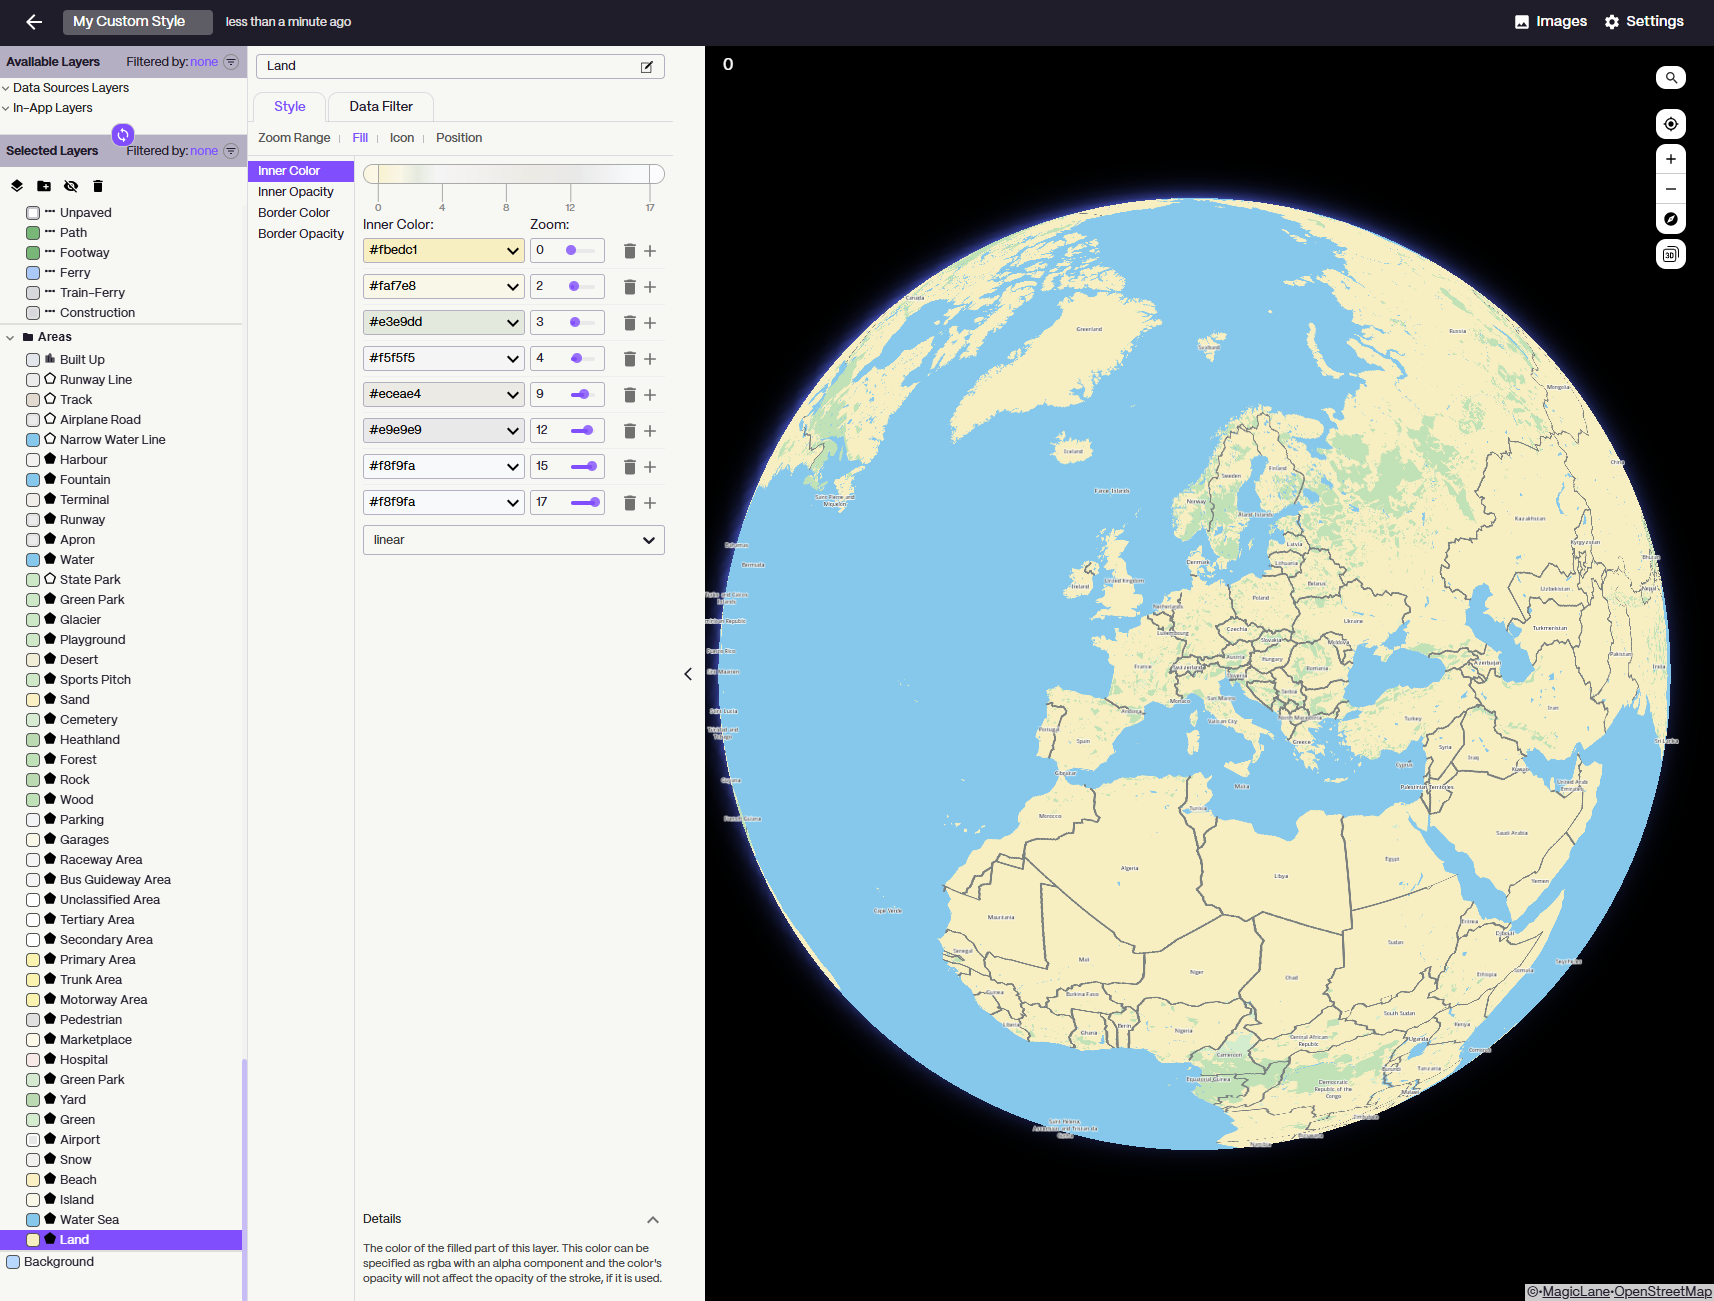
Map Studio
Create and customize your own map styles with our intuitive visual editor. Design maps that match your brand and application needs.
- Create custom map styles with an easy-to-use visual interface
- Customize colors, fonts, and map elements to match your brand
- Download, upload, edit and refine your map styles
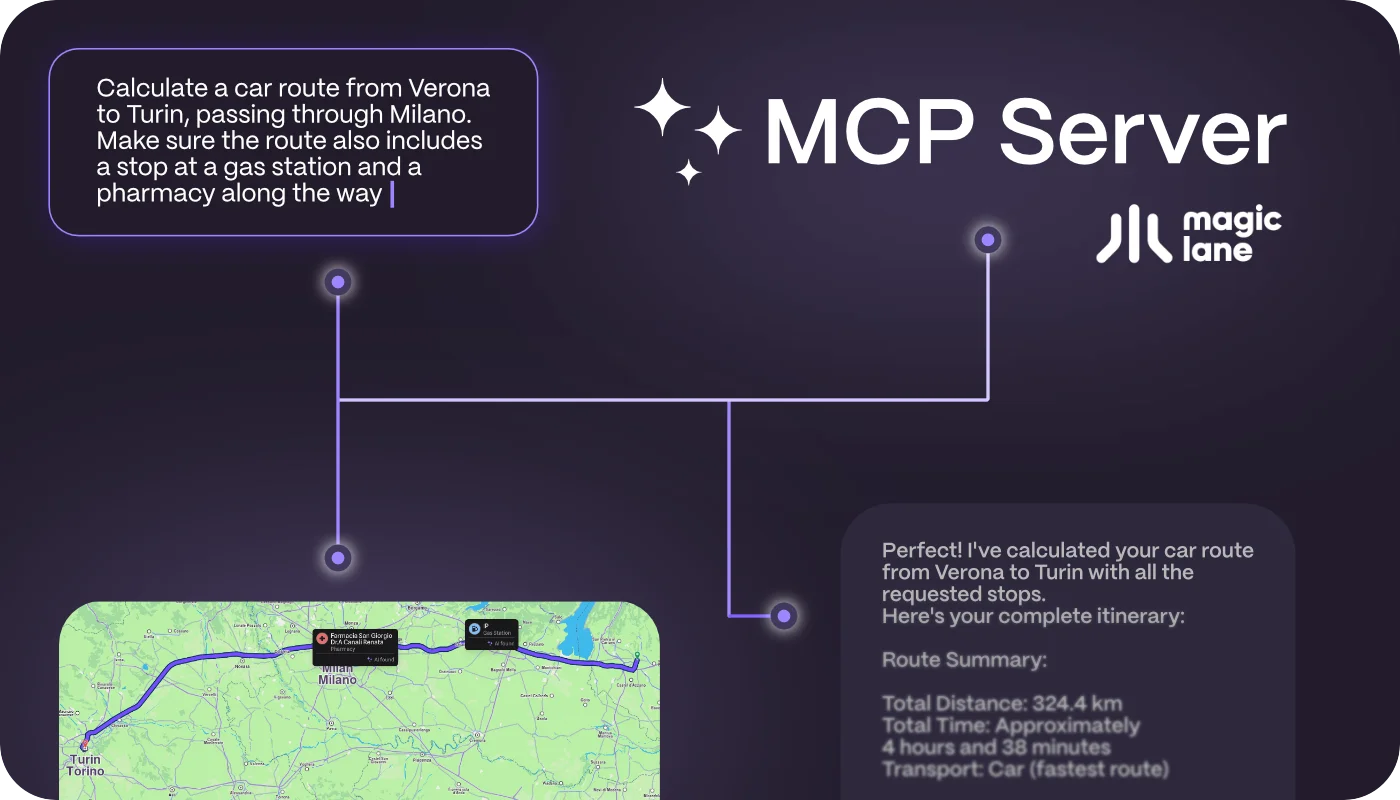
MCP Server
Connect AI assistants to Magic Lane APIs through the Model Context Protocol. Enable natural language interactions with mapping and navigation services.
- Calculate routes, search locations, and access map data via AI assistants
- Seamless integration with Claude, ChatGPT, and other MCP-compatible clients
- Support for routing, search, reverse geocoding, and isochrone calculations
Maps client SDKs
Maps SDK for Android
Build interactive Android maps with the Maps SDK, featuring 3D views, navigation, styling, offline support, and real-time location tracking.
Maps SDK for iOS
Develop immersive iOS maps with 3D views, navigation, offline access, and real-time tracking.
Maps SDK for Flutter
Create powerful Flutter apps with global maps, offline routing, and optimized navigation for cars, pedestrians, and cyclists.
Maps SDK for C++
Develop efficient, lightweight maps and navigation for C++ with global coverage, 3D terrain, offline support, and turn-by-turn guidance.
Maps SDK for TypeScript
Discover how to integrate search functionality, build routes, and enable navigation on custom interactive maps within your web application.
REST APIs
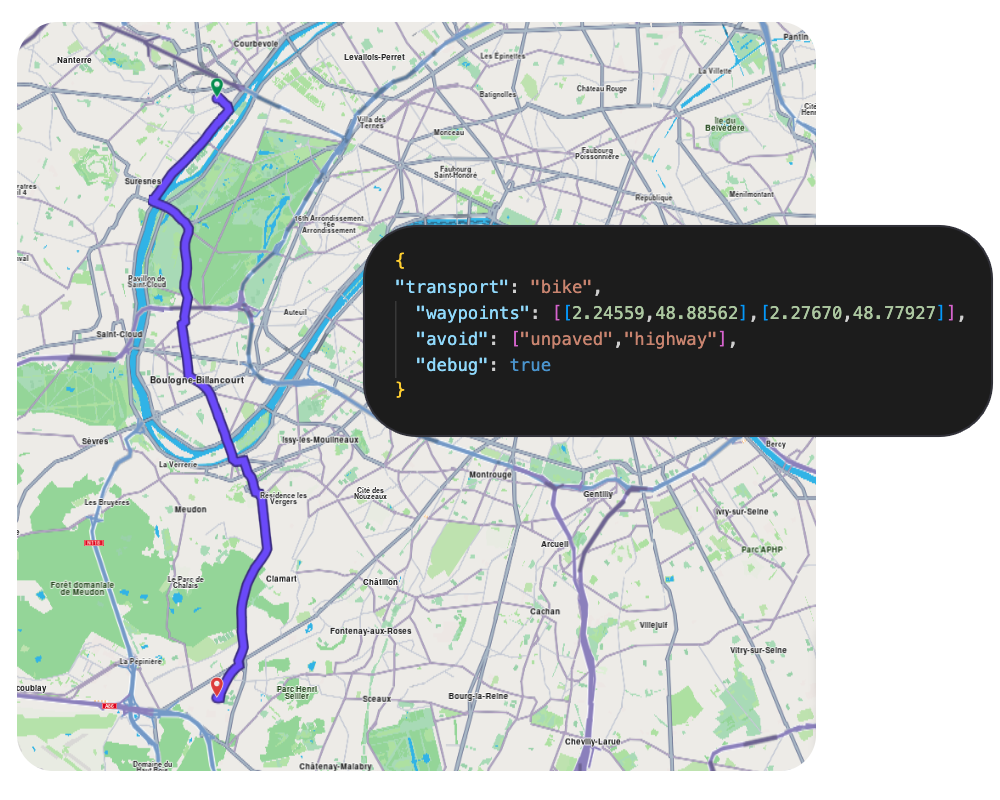
Routing API
Calculate optimal routes between multiple waypoints for efficient navigation and trip planning.
- Find optimal route and ETA with turn-by-turn directions
- Support for car, truck, bike, and pedestrian modes
- Vehicle-specific routing with dimensions, weight, and fuel type
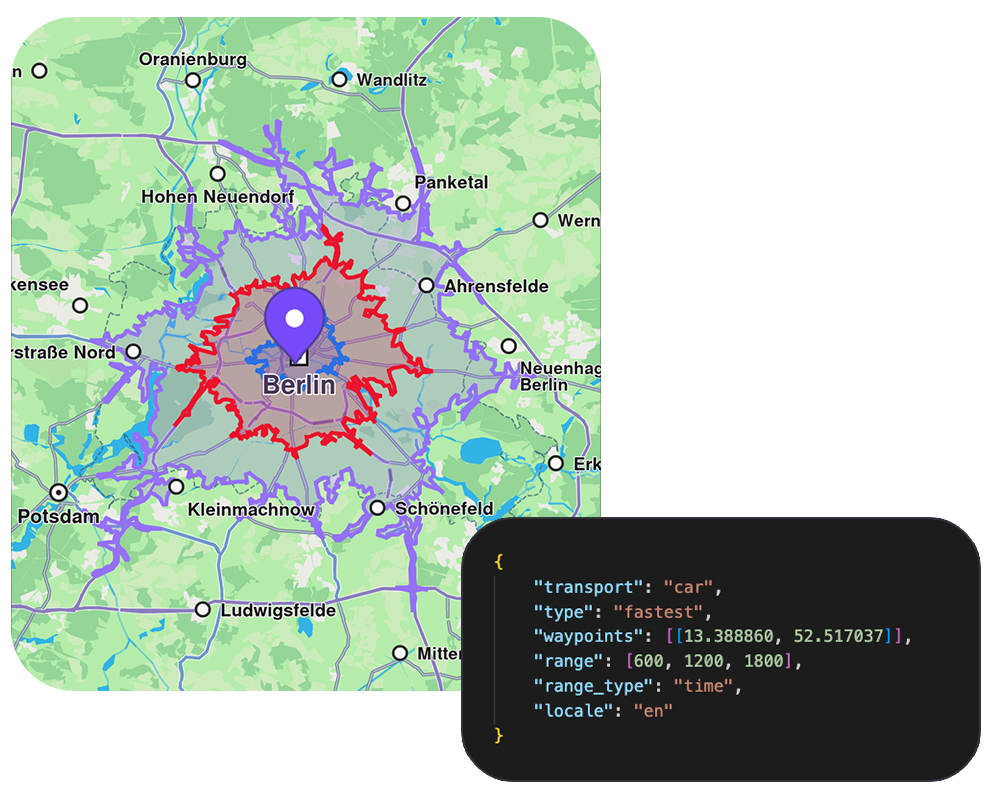
Isochrones API
Generate reachable area polygons to visualize service coverage and accessibility zones.
- Calculate reachable areas by time, distance, or EV battery consumption
- Multiple range intervals in a single request
- Support for all transport modes including EV-specific calculations
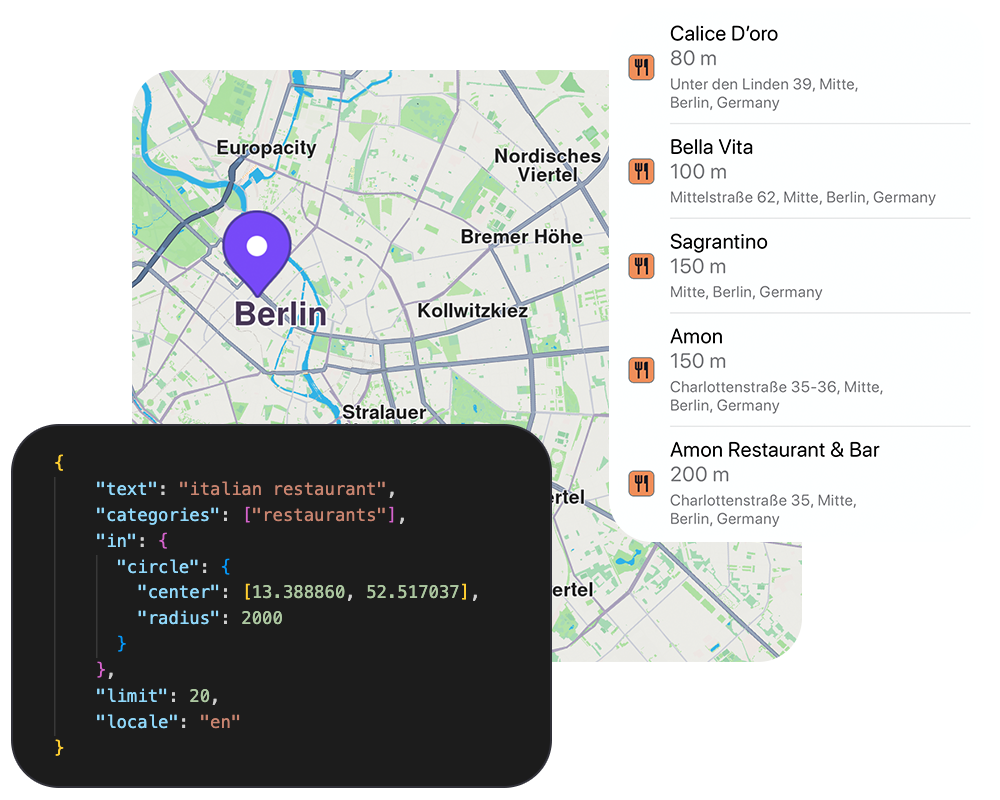
Search API
Search and geocode addresses, places, and points of interest with precision.
- Search by name, address, or keyword with ranked results
- Filter by POI categories (restaurants, hotels, gas stations, etc.)
- Geographic filtering: around a point, within an area, or along a path
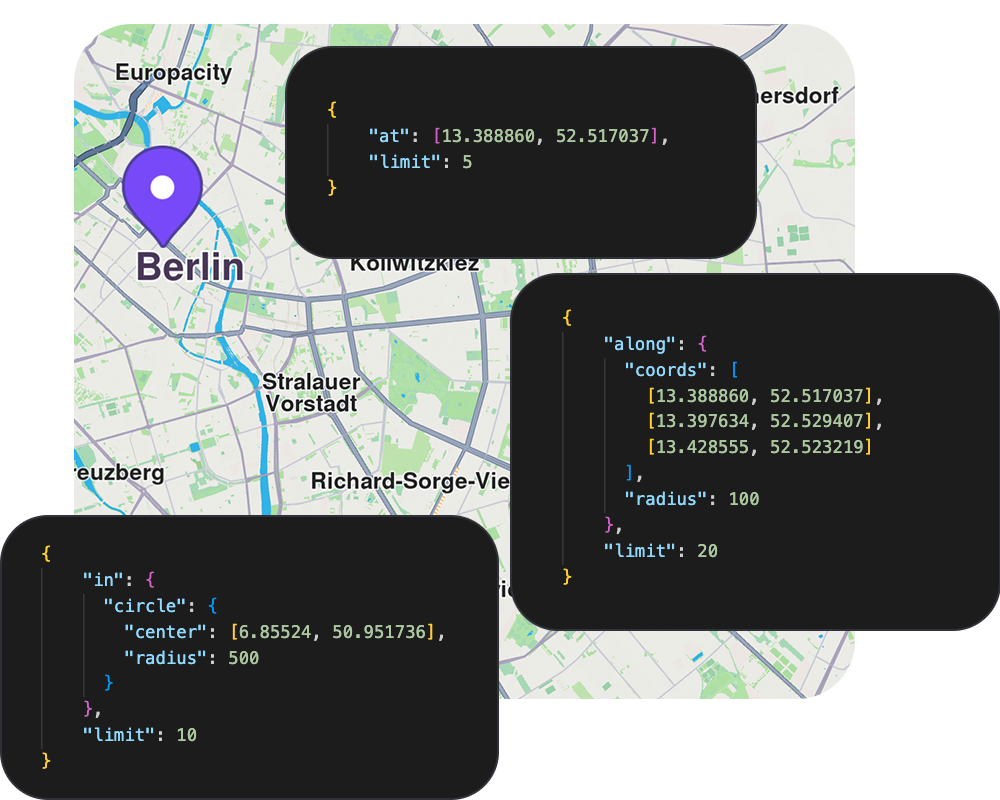
Reverse Geocoding API
Convert geographic coordinates into detailed, human-readable addresses.
- Convert coordinates to detailed addresses with postal codes
- Search around a point, within an area, or along a path
- Returns multiple results with distance ranking and POI identification
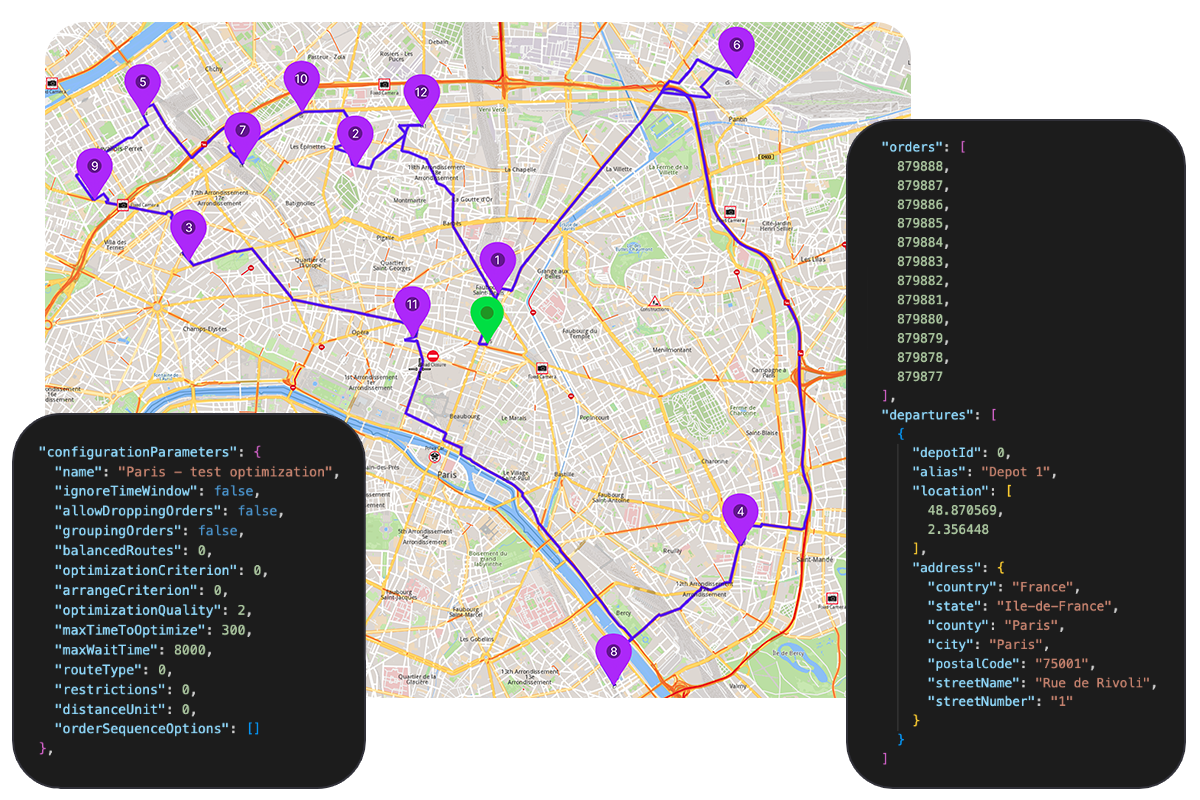
Fleet Management API
Optimize complex multi-stop delivery routes for your entire fleet with advanced algorithms.
- Multi-order and multi-vehicle route optimization with time windows
- Support for various vehicle types with custom constraints (weight, volume, dimensions)
- Real-time route reoptimization with order priorities and delivery sequencing
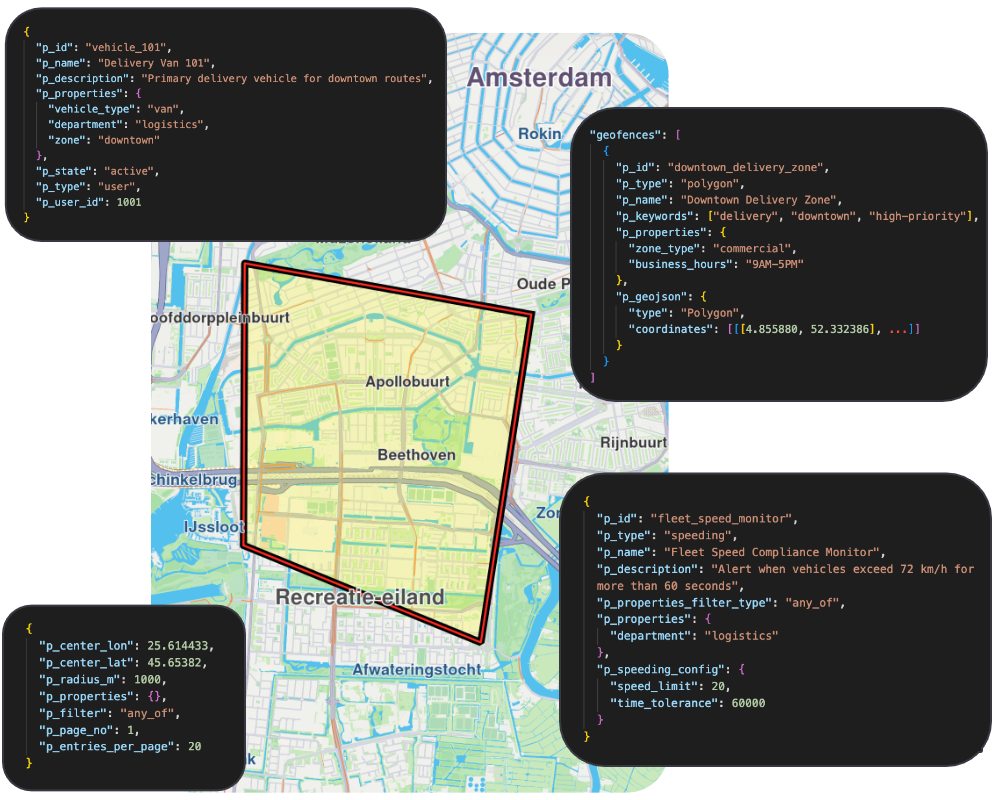
Geofences & Asset Monitoring API
Create virtual boundaries, track asset locations in real-time, and configure automated alerts for geofence events, speeding, and idle detection.
- Polygon, circular, and rectangular geofences with batch operations up to 1,000 per request
- Real-time asset tracking with location history and proximity-based geofence searches
- Automated monitors for entry/exit events, speeding alerts, and idle detection
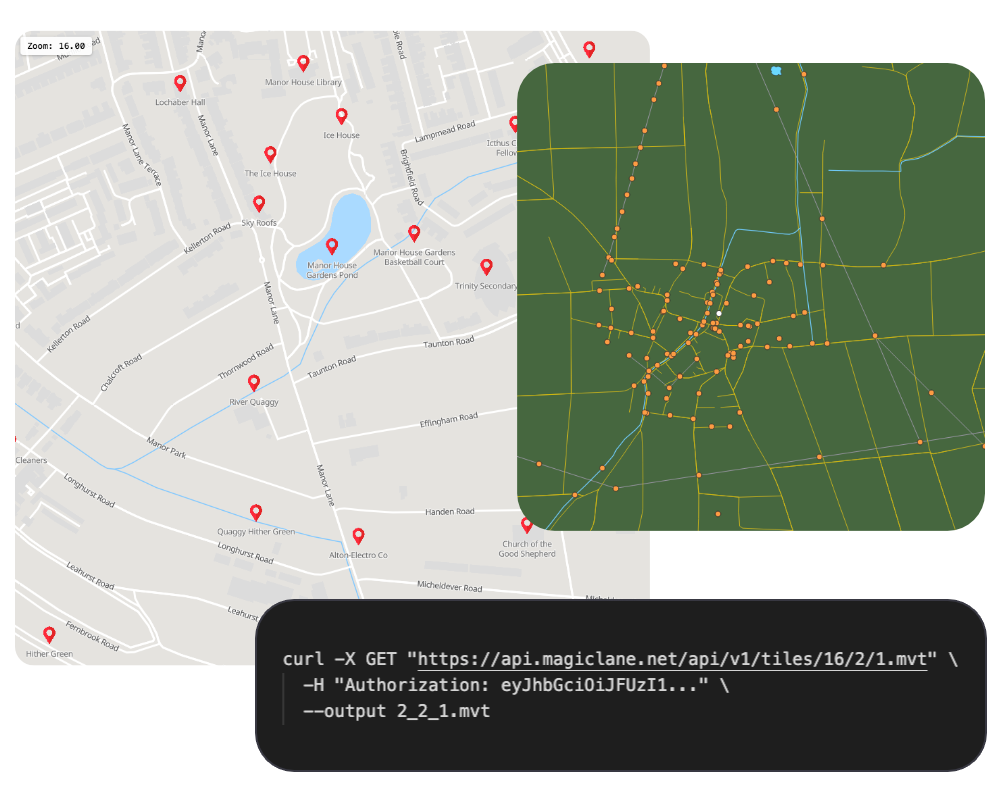
Vector Tiles API
Access vector map tiles in Slippy tile format for rendering high-performance, customizable maps in your applications.
- Slippy tile format with configurable zoom levels for precise detail control
- Mapbox Vector Tile (MVT) and Protocol Buffers (PBF) output formats
- Lightweight binary tiles for fast rendering in any compatible map library