Display markers
The base class for the marker hierarchy is Marker. It encapsulates coordinates assigned to a specific part. Multiple coordinates can be added to the same marker and be separated into different parts. If no part is specified, the coordinates are added to a default part, indexed as 0. The coordinates are stored in a list-like structure, where you can specify their index explicitly. By default, the index is set to -1, meaning the coordinate will be appended to the end of the list.
 |  |
|---|---|
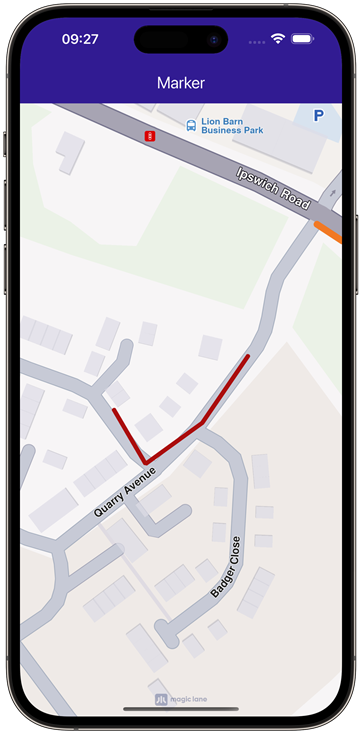
| Displaying a marker with coordinates separated into different parts | Displaying a marker with coordinates added to same part |
// code used for displaying a marker with coordinates separated into different parts
final marker1 = Marker()
  ..add(Coordinates(latitude: 52.1459, longitude: 1.0613), part: 0)
  ..add(Coordinates(latitude: 52.14569, longitude: 1.0615), part: 0)
  ..add(Coordinates(latitude: 52.14585, longitude: 1.06186), part: 1)
  ..add(Coordinates(latitude: 52.14611, longitude: 1.06215), part: 1);
// code used for displaying a marker with coordinates added to the same part
final marker1 = Marker()
  ..add(Coordinates(latitude: 52.1459, longitude: 1.0613), part: 0)
  ..add(Coordinates(latitude: 52.14569, longitude: 1.0615), part: 0)
  ..add(Coordinates(latitude: 52.14585, longitude: 1.06186), part: 0)
  ..add(Coordinates(latitude: 52.14611, longitude: 1.06215), part: 0);
To display any type of marker on a map, it must first be added to a MarkerCollection. Creating a collection of markers requires providing a name and specifying the desired MarkerType enum as parameters for its constructor. The collection of markers displayed above used MarkerType.polyline, but it can also be MarkerType.point or MarkerType.polygon.
Once the MarkerCollection object has been populated, it must be added to the MapViewMarkerCollections field within the MapViewPreferences class. This can be accessed through the GemMapController, as shown below:
mapController.preferences.markers.add(markerCollection);
Point Type Marker
Visually represented as an icon, it is used to dynamically highlight user-defined locations. To display a point-type marker, the MarkerCollection to which the markers are added must be of the MarkerType.point type.
final marker = Marker()
  ..add(Coordinates(latitude: 52.1459, longitude: 1.0613), part: 0)
  ..add(Coordinates(latitude: 52.14569, longitude: 1.0615), part: 0)
  ..add(Coordinates(latitude: 52.14585, longitude: 1.06186), part: 1)
  ..add(Coordinates(latitude: 52.14611, longitude: 1.06215), part: 1);

final markerCollection = MarkerCollection(markerType: MarkerType.point, name: "myCollection");

markerCollection.add(marker);

mapController.preferences.markers.add(markerCollection);
The result will be the following:
 |
|---|
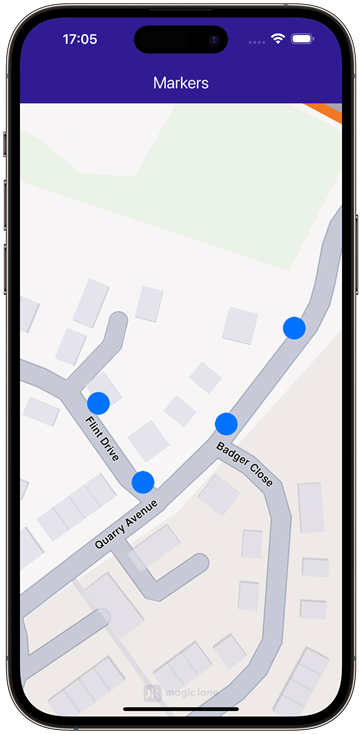
| Displaying point-type markers on map |
By default, point-type markers appear as blue circles up to a specific zoom level. When the zoom threshold is exceeded, they automatically cluster into orange circles, and at higher levels of clustering, they transition to red circles. Learn more at Marker Clustering
Polyline Type Marker
This type of marker is designed to display a continuous line consisting of one or more connected straight-line segments. To use it, ensure the MarkerRenderSettings specifies markerType as MarkerType.polyline. It's important to note that markers can include multiple coordinates, which may or may not belong to the same part. Coordinates within the same part are connected by a polyline, which is red by default, while coordinates outside the part remain unconnected.
For more information, see Markers section.
Polygon Type Marker
This type of marker is designed to display a closed two-dimensional figure composed of straight-line segments that meet at their endpoints. To use it, ensure the MarkerRenderSettings specifies markerType as MarkerType.polygon.
 |
|---|
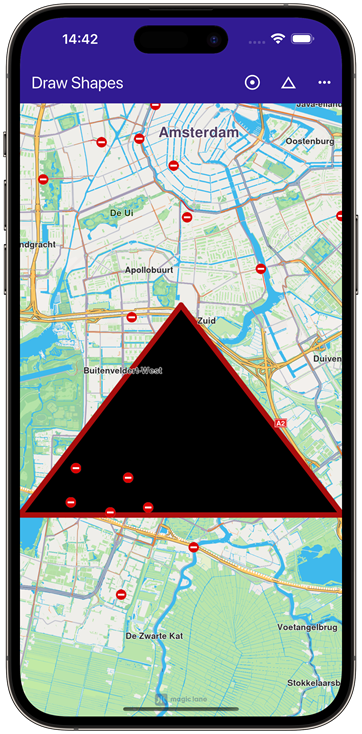
| Polygon drawn between three coordinates |
To successfully create a polygon, at least three coordinates must be added to the same part. Otherwise, the result will be an open polyline rather than a closed shape.
Polygons can be customized using properties like polygonFillColor and polygonTexture. Additionally, since polygon edges are essentially polylines, you can further refine their appearance with polyline-related attributes such as polylineInnerColor, polylineOuterColor, polylineTexture, and more.
Marker Customizations
To customize the appearance of markers on GemMap, you can use the MarkerCollectionRenderSettings class.
This class is designed for customizing the appearance of individual markers. It includes various fields that can influence a marker's appearance, regardless of its type, as it provides customizable features for all marker types. For example:
- For markers of type
MarkerType.polyline, you can use fields such aspolylineInnerColor,polylineOuterColor,polylineInnerSize, andpolylineOuterSize. - For
MarkerType.polygon, thepolygonFillColor,polygonTexturefields are available, among others. - For
MarkerType.point, you can use fields such aslabelTextColor,labelTextSize,image,imageSize.
All dimensional sizes (imageSize, textSize, etc.) are measured in millimeters.
If customizations unrelated to a marker's specific type are applied—for example, using polylineInnerColor for a MarkerType.point—they will simply be ignored, and the marker's appearance will remain unaffected.
For MarkerType.point, a key customizable field is labelingMode. This field is a set that consists of values from MarkerLabelingMode enum. This allows you to enable desired features, such as positioning the label text above the icon or placing the icon above the marker's coordinates, by adding them to the labelingMode set as shown below:
final renderSettings = MarkerCollectionRenderSettings(labelingMode: {
      MarkerLabelingMode.itemLabelVisible,
      MarkerLabelingMode.textAbove,
      MarkerLabelingMode.iconBottomCenter
    });

mapController.preferences.markers.add(markerCollection, settings: renderSettings);
To hide a marker's name or its group's name, create a MarkerCollectionRenderSettings object with a labelingMode that excludes MarkerLabelingMode.itemLabelVisible and MarkerLabelingMode.groupLabelVisible. By default, both options are enabled.
The above code will result in the following marker appearance:
 | 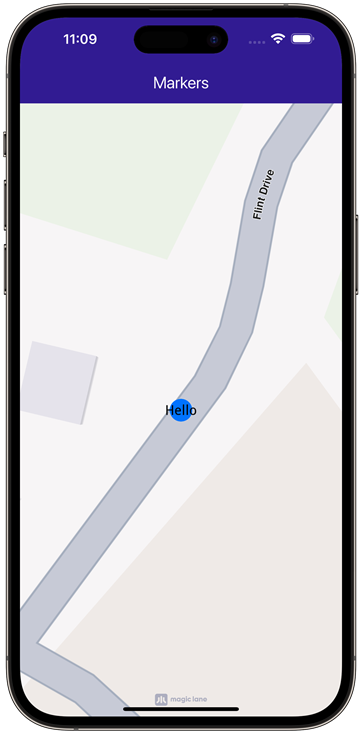 |
|---|---|
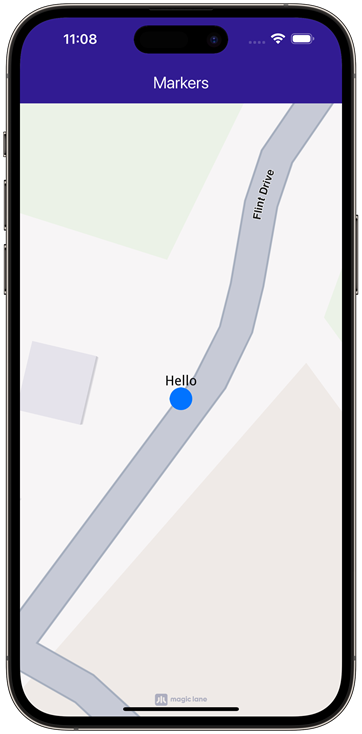
| Displaying a marker with text above icon | Displaying a marker with text centered on icon |
To assign a name to a marker, use the name setter of the Marker class.
To customize the icons of the displayed markers, add the collection to MapViewMarkerCollections and configure a MarkerCollectionRenderSettings instance with the relevant image field. This field controls the appearance of the entire collection.
import 'package:flutter/services.dart' show rootBundle;

final ByteData imageData = await rootBundle.load('assets/poi83.png');
final Uint8List pngImage = imageData.buffer.asUint8List();

final renderSettings = MarkerCollectionRenderSettings(image: GemImage(image: pngImage, format: ImageFileFormat.png));
Code above is setting a custom icon to a marker. The result is the following:
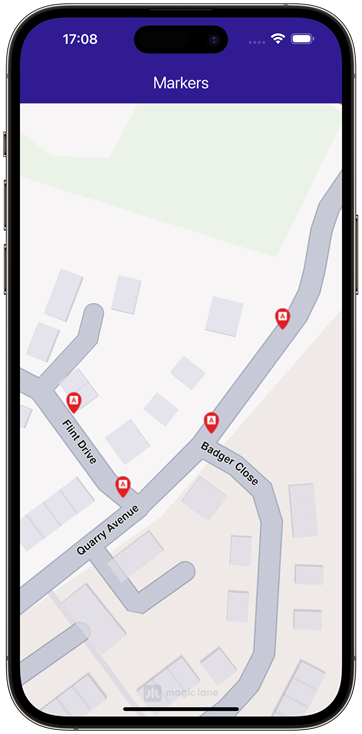 |
|---|
| Displaying point-type markers with render settings |
Marker Clustering
Clustering or grouping is a default feature of markers. Beyond a certain zoom level, the markers automatically cluster into a single marker containing a number of items lesser than lowGCountDefault if the group is a low density one. The image of those groups can be customized with lowDensityPointsGroupImage, mediumDensityPointsGroupImage, highDensityPointsGroupImage fields of MarkerCollectionRenderSettings. The number of markers contained by a group can be set through lowDensityPointsGroupMaxCount, mediumDensityPointsGroupMaxCount.
| Grouping behaviour |
// code for markers not grouping at zoom level 70
final renderSettings = MarkerCollectionRenderSettings();

mapController.preferences.markers.add(markerCollection, settings: renderSettings);

mapController.centerOnCoordinates(Coordinates(latitude: 52.14611, longitude: 1.06215), zoomLevel: 70);
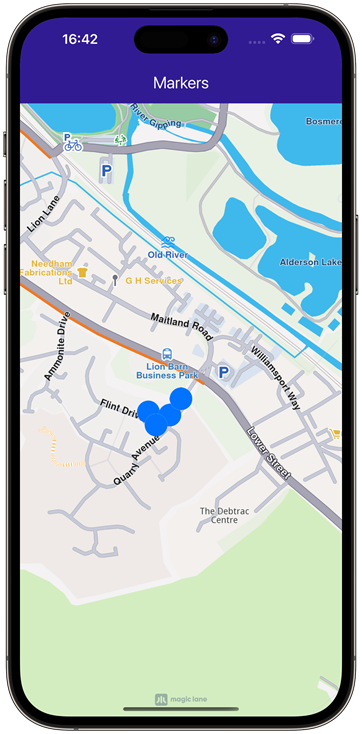 |
|---|
| Markers not clustering |
// code for markers grouping at zoom level 70
final renderSettings = MarkerCollectionRenderSettings(labelTextSize: 3.0, labelingMode: labelingMode, pointsGroupingZoomLevel: 70);

mapController.preferences.markers.add(markerCollection, settings: renderSettings);

mapController.centerOnCoordinates(Coordinates(latitude: 52.14611, longitude: 1.06215), zoomLevel: 70);
 |
|---|
| Clustered markers |
You can disable marker clustering by setting the pointGroupingZoomLevel to 0. However, note that doing so for a large number of markers may significantly impact performance, as rendering each individual marker increases GPU resource usage.
Adding large amount of markers
If there is a need for adding lots of markers at the same time, this can be done much more efficiently through addList method of MapViewMarkerCollection. This uses a list of MarkerWithRenderSettings objects, which consists of an MarkerJson (essentially, it’s a marker consisting of a list of coordinates and an associated marker name) and an MarkerRenderSettings. The following example showcases how it works:
List<MarkerWithRenderSettings> markers = [];

for (int i = 0; i < 8000; ++i) {
  // Generate random coordinates to display some markers.
  double randomLat = minLat + random.nextDouble() * (maxLat - minLat);
  double randomLon = minLon + random.nextDouble() * (maxLon - minLon);

  final marker = MarkerJson(
    coords: [Coordinates(latitude: randomLat, longitude: randomLon)],
    name: "POI $i",
  );

  // Choose a random POI icon for the marker and set the label size.
  final renderSettings = MarkerRenderSettings(
      image: GemImage(
          image: listPngs[random.nextInt(listPngs.length)],
          format: ImageFileFormat.png),
      labelTextSize: 2.0);

  // Create a MarkerWithRenderSettings object.
  final markerWithRenderSettings =
      MarkerWithRenderSettings(marker, renderSettings);

  // Add the marker to the list of markers.
  markers.add(markerWithRenderSettings);
}

// Create the settings for the collections.
final settings = MarkerCollectionRenderSettings();

// Set the label size.
settings.labelGroupTextSize = 2;

// The zoom level at which the markers will be grouped together.
settings.pointsGroupingZoomLevel = 35;

// Set the image of the collection.
settings.image = GemImage(image: imageBytes, format: ImageFileFormat.png);
// To delete the list you can use this method: mapController.preferences.markers.clear();

// Add the markers and the settings on the map.
mapController.preferences.markers.addList(list: markers, settings: settings, name: "Markers");