Adjust the map view
The Maps SDK for Flutter provides multiple ways to modify the map view, center on coordinates or areas, including GemView functionality for exploring different perspectives.
The SDK enables a range of features, including zooming in and out, tilting the camera, centering on specific locations, and more, all through the GemMapController provided by the GemMap upon creation.
- Use
viewportgetter to return the current viewport of the map view. - Center on specific coordinates with
centerOnCoordinateswhich takes extra parameters for centering preferences such as zoom level, screen position, map angle, animation and more. - Center on a specific geographic area represented by a rectangle with coordinates as corners with
centerOnArea. - Align map according to the north direction by using
alignNorthUp. - Adjust the current zoom level using
setZoomLevel, where lower values result in a more zoomed-out view. - Perform a scrolling behavior based on horizontal and vertical scroll offsets with
scrollmethod. MapCameraclass provides further functionality such as manipulating orientation, position, and state.
Map viewport
The map viewport refers to the area displayed by the GemMap widget. Getting the current viewport provides an RectType object which consists of xy screen coordinates and width and height on GemMap.
The top left coordinate of the screen is represented by [0, 0] and bottom right [viewport.width, viewport.height].
final currentViewport = mapController.viewport
This viewport can be useful when you need to use methods such as centerOnAreaRect.
The width and height of the map view is measured in physical pixels. To transform them into flutter logical pixels you need to use GemMapController.devicePixelSize getter. See more about devicePixelSize at flutter documentation.
To convert physical pixels used within the SDK to Flutter's logical pixels, you can follow this approach:
final currentViewport = mapController.viewport;
final flutterHeightPixels = currentViewport.height / mapController.devicePixelSize;
final flutterWidthPixels = currentViewport.width / mapController.devicePixelSize;
Map centering
Map centering can be achieved using the centerOnCoordinates, centerOnArea, centerOnAreaRect, centerOnRoute, centerOnRoutePart, centerOnRouteInstruction, centerOnRouteTrafficEvent methods.
Map centering on coordinates
In order to center the WGS coordinates on the viewport coordinates you can use the centerOnCoordinates method like so:
mapController.centerOnCoordinates(Coordinates(latitude: 45, longitude: 25));
A linear animation can be incorporated while centering, as demonstrated below:
controller.centerOnCoordinates(
    Coordinates(latitude: 52.14569, longitude: 1.0615),
    animation: GemAnimation(type: AnimationType.linear, duration: 2000));
You can call the skipAnimation() method of GemMapController to bypass the animation. To check if an animation is in progress the isAnimationInProgress getter can be used. To check if the camera is moving (as a consecince of an animation or not), the isCameraMoving getter can be used.
In order to convert a screen position to WGS coordinates, the GemMapController.transformScreenToWgs() method is used:
Coordinates coordsToCenter = mapController.transformScreenToWgs(Point(pos.x, pos.y));

mapController.centerOnCoordinates(coordsToCenter, zoomLevel: 70);
If the applied style includes elevation and terrain data is loaded, the transformScreenToWgs method returns Coordinates objects that include altitude. You can check for terrain support using the hasTerrainTopography getter.
To convert WGS coordinates to screen coordinates, the GemMapController.transformWgsToScreen():
Coordinates wgsCoordinates = Coordinates(latitude: 8, longitude: 25);

Point<int> screenPosition = mapController.transformWgsToScreen(wgsCoordinates);
In order to convert a list of WGS coordinates to screen coordinates, use GemMapController.transformWgsListToScreen method. In order to convert a RectType<int> to a RectangleGeographicArea use the transformScreenToWgsRect method.
This centers the view precisely on the specified coordinates, positioning them at position of the cursor (which by default is in the center of the screen).
Map centering on coordinates at given screen position
To center on a different area of the viewport (not the position of the cursor), provide a screenPosition parameter, represented as an Point<int>. Note that x coordinate should be in [0, viewport.width] and y coordinate between [0, viewport.height].
The screenPosition parameter is defined in physical pixels, not logical pixels.
The following example demonstrates how to center the map at one-third of its height:
final physicalHeightPixels = mapController.viewport.height;
final physicalWidthPixels = mapController.viewport.width;

mapController.centerOnCoordinates(
    Coordinates(latitude: 52.48209, longitude: -2.48888),
    zoomLevel: 40,
    screenPosition: Point(physicalWidthPixels ~/ 2, physicalHeightPixels ~/ 3),
);
 |
|---|
| Centered at one-third of map height |
More parameters such as animation, mapAngle, viewAngle and slippyZoomLevel can be passed to the method in order to achieve a higher level of control.
Map centering on area
Centering can be done on a specific RectangleGeographicArea which consists of top left and bottom right coordinates.
final topLeftCoords = Coordinates(latitude: 44.93343, longitude: 25.09946);
final bottomRightCoords = Coordinates(latitude: 44.93324, longitude: 25.09987);
final area = RectangleGeographicArea(topLeft: topLeftCoords, bottomRight: bottomRightCoords);

mapController.centerOnArea(area);
This will center the view on the geographic area ensuring the RectangleGeographicArea covers most of the viewport. For centering the geographic area on a particular coordinate of the viewport, the screenPosition parameter, represented as an Point<int> should be provided.
Alternatively, to center the RectangleGeographicArea method on a specific region of the viewport, you can use the centerOnAreaRect method. This requires passing the viewRc parameter, represented as a RectType<int>, which defines the targeted region of the screen. The RectType passed to the viewRc parameter determines the positioning of the centered area relative to the top-left coordinates x and y, which represent the top-left corner. Consequently, the top-right corner will be at x + RectType's width.
As the width and height of RectType decrease, the centering will result in a more zoomed-out view. For a more zoomed-in perspective, use larger values within the range [1, viewport.width - x] and [1, viewport.height - y].
Use the getOptimalRoutesCenterViewport and getOptimalHighlightCenterViewport methods to compute the viewport region that best fits given routes and highlights.
Map centering on area with padding
Centering on an area using padding can be done with by altering the screen coordinates (in physical pixels) by adding/subtracting the padding value. Then a new RectangleGeographicArea object needs to be instantiated with the padded screen coordinates transformed into wgs coordinates using GemMapController.transformScreenToWgs(point).
The following code exemplifies the process:
// Getting the RectangleGeographicArea in which the route belongs
final routeArea = route.geographicArea;
const paddingPixels = 200;

// Getting the top left point screen coordinates in physical pixels
final routeAreaTopLeftPoint = mapController.transformWgsToScreen(routeArea.topLeft);

// Adding padding by shifting point in the top left
final topLeftPadded = Point<int>(
    routeAreaTopLeftPoint.x - paddingPixels,
    routeAreaTopLeftPoint.y - paddingPixels,
);

final routeAreaBottomRightPoint = mapController.transformWgsToScreen(routeArea.bottomRight);

// Adding padding by shifting point downwards three times the padding
final bottomRightPadded = Point<int>(
    routeAreaBottomRightPoint.x + paddingPixels,
    routeAreaBottomRightPoint.y + 3 * paddingPixels,
);

// Converting points with padding to wgs coordinates
final paddedTopLeftCoordinate = mapController.transformScreenToWgs(topLeftPadded);
final paddedBottomRightCoordinate = mapController.transformScreenToWgs(bottomRightPadded);

mapController.centerOnArea(RectangleGeographicArea(
    topLeft: paddedTopLeftCoordinate,
    bottomRight: paddedBottomRightCoordinate,
));
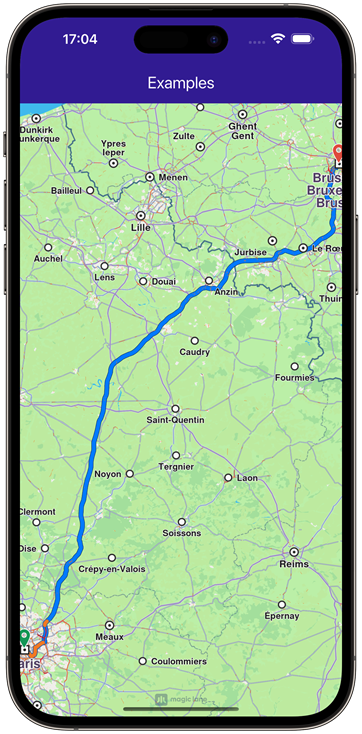 | 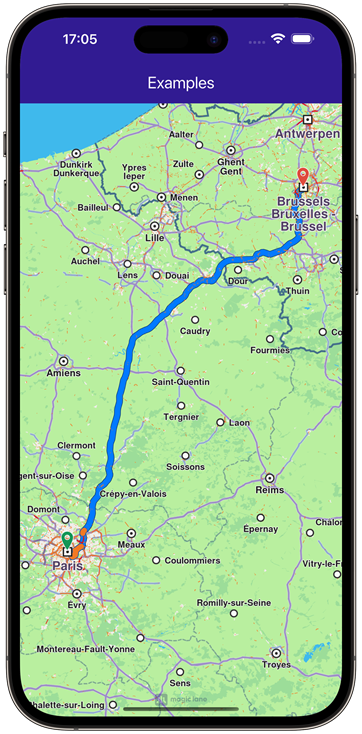 |
|---|---|
| Displaying a route without padding | Displaying a route with center padding |
When applying padding, such as using the height of a Flutter panel, note that the height is measured in logical pixels, which do not directly correspond to the SDK's physical pixels. A conversion is required, as detailed here.
Map zoom
This is done throughout setZoomLevel method of MapViewPreferences from the GemMapController class in the following way:
mapController.setZoomLevel(50);
To get the current zoom level use the zoomLevel getter. A bigger value means the camera is closer to the terrain.
The maximum and minimum allowed zoom levels can be got via the maxZoomLevel and minZoomLevel getters from the GemMapController class. This class also provides setters for these limits.
In order to check if a particular zoom level can be applied, use the canZoom method.
Map rotation
This is done throughout rotationAngle setter of MapViewPreferences inside of GemMapController like so:
mapController.preferences.rotationAngle = 45;
By default, the camera has a rotation angle value of 0 degrees corresponding to the north-up alignment. Note that the rotation axis is always perpendicular to the ground and passes through the camera, regardless of the current camera orientation.
This operation can also be done via the headingInDegrees setter from the GemMapController class.
Map tilting
The camera can transform the flat 2D map into a 3D perspective, allowing you to view features like distant roads appearing on the horizon. By default, the camera has no tilt (tilt = 90°).
In addition to adjusting the camera's tilt angle, you can modify its rotation angle. The tilt value relative to the ground affects the optical axis of the camera, which at 90° is perpendicular to the ground. Tilt angles are measured relative to this perpendicular axis, providing a dynamic way to adjust the camera's perspective.
In order to change the tilt angle of camera you need to access the preferences field of GemMapController like so:
mapController.preferences.tiltAngle = 30;
 |  |
|---|---|
| Displaying a map with a tilt angle of 30 degrees | Displaying a map with a tilt angle of 90 degrees |
To adjust the camera's perspective dynamically, you can utilize both the tiltAngle and viewAngle properties. The viewAngle is defined as the complement of the tiltAngle, calculated as viewAngle = 90-tiltAngle
The difference between the different types of angles is shown below:
| Tilt angle & view angle | Rotation angle |
This operation can also be done using the pitchInDegrees setter available in the GemMapController class.
Keep in mind that adjusting the rotation value produces different outcomes depending on the camera's tilt. When the camera is tilted, changing the rotation will shift the target location, whereas with no tilt, the target location remains fixed.
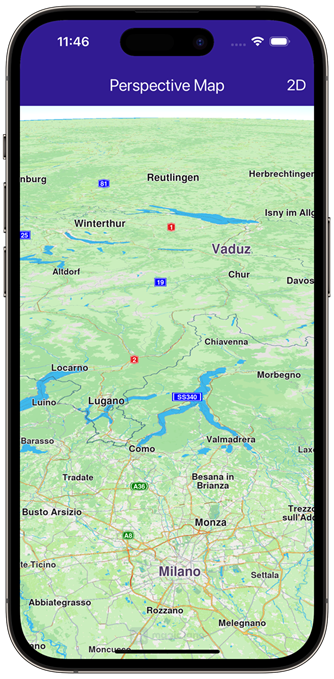
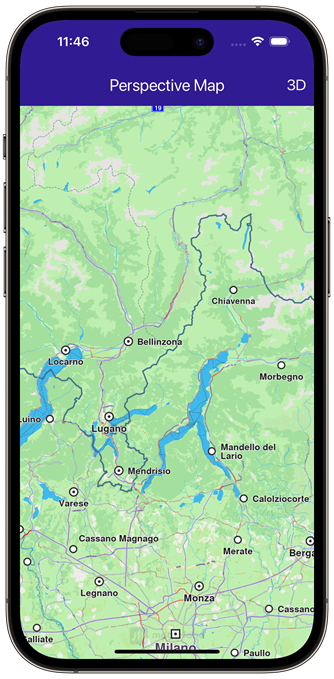
Map perspective
Map perspective can be either two dimensional or three dimensional and can also be set by using MapViewPreferences method setMapViewPerspective:
mapController.preferences.setMapViewPerspective(MapViewPerspective.threeDimensional);
By default, the map perspective is three-dimensional.
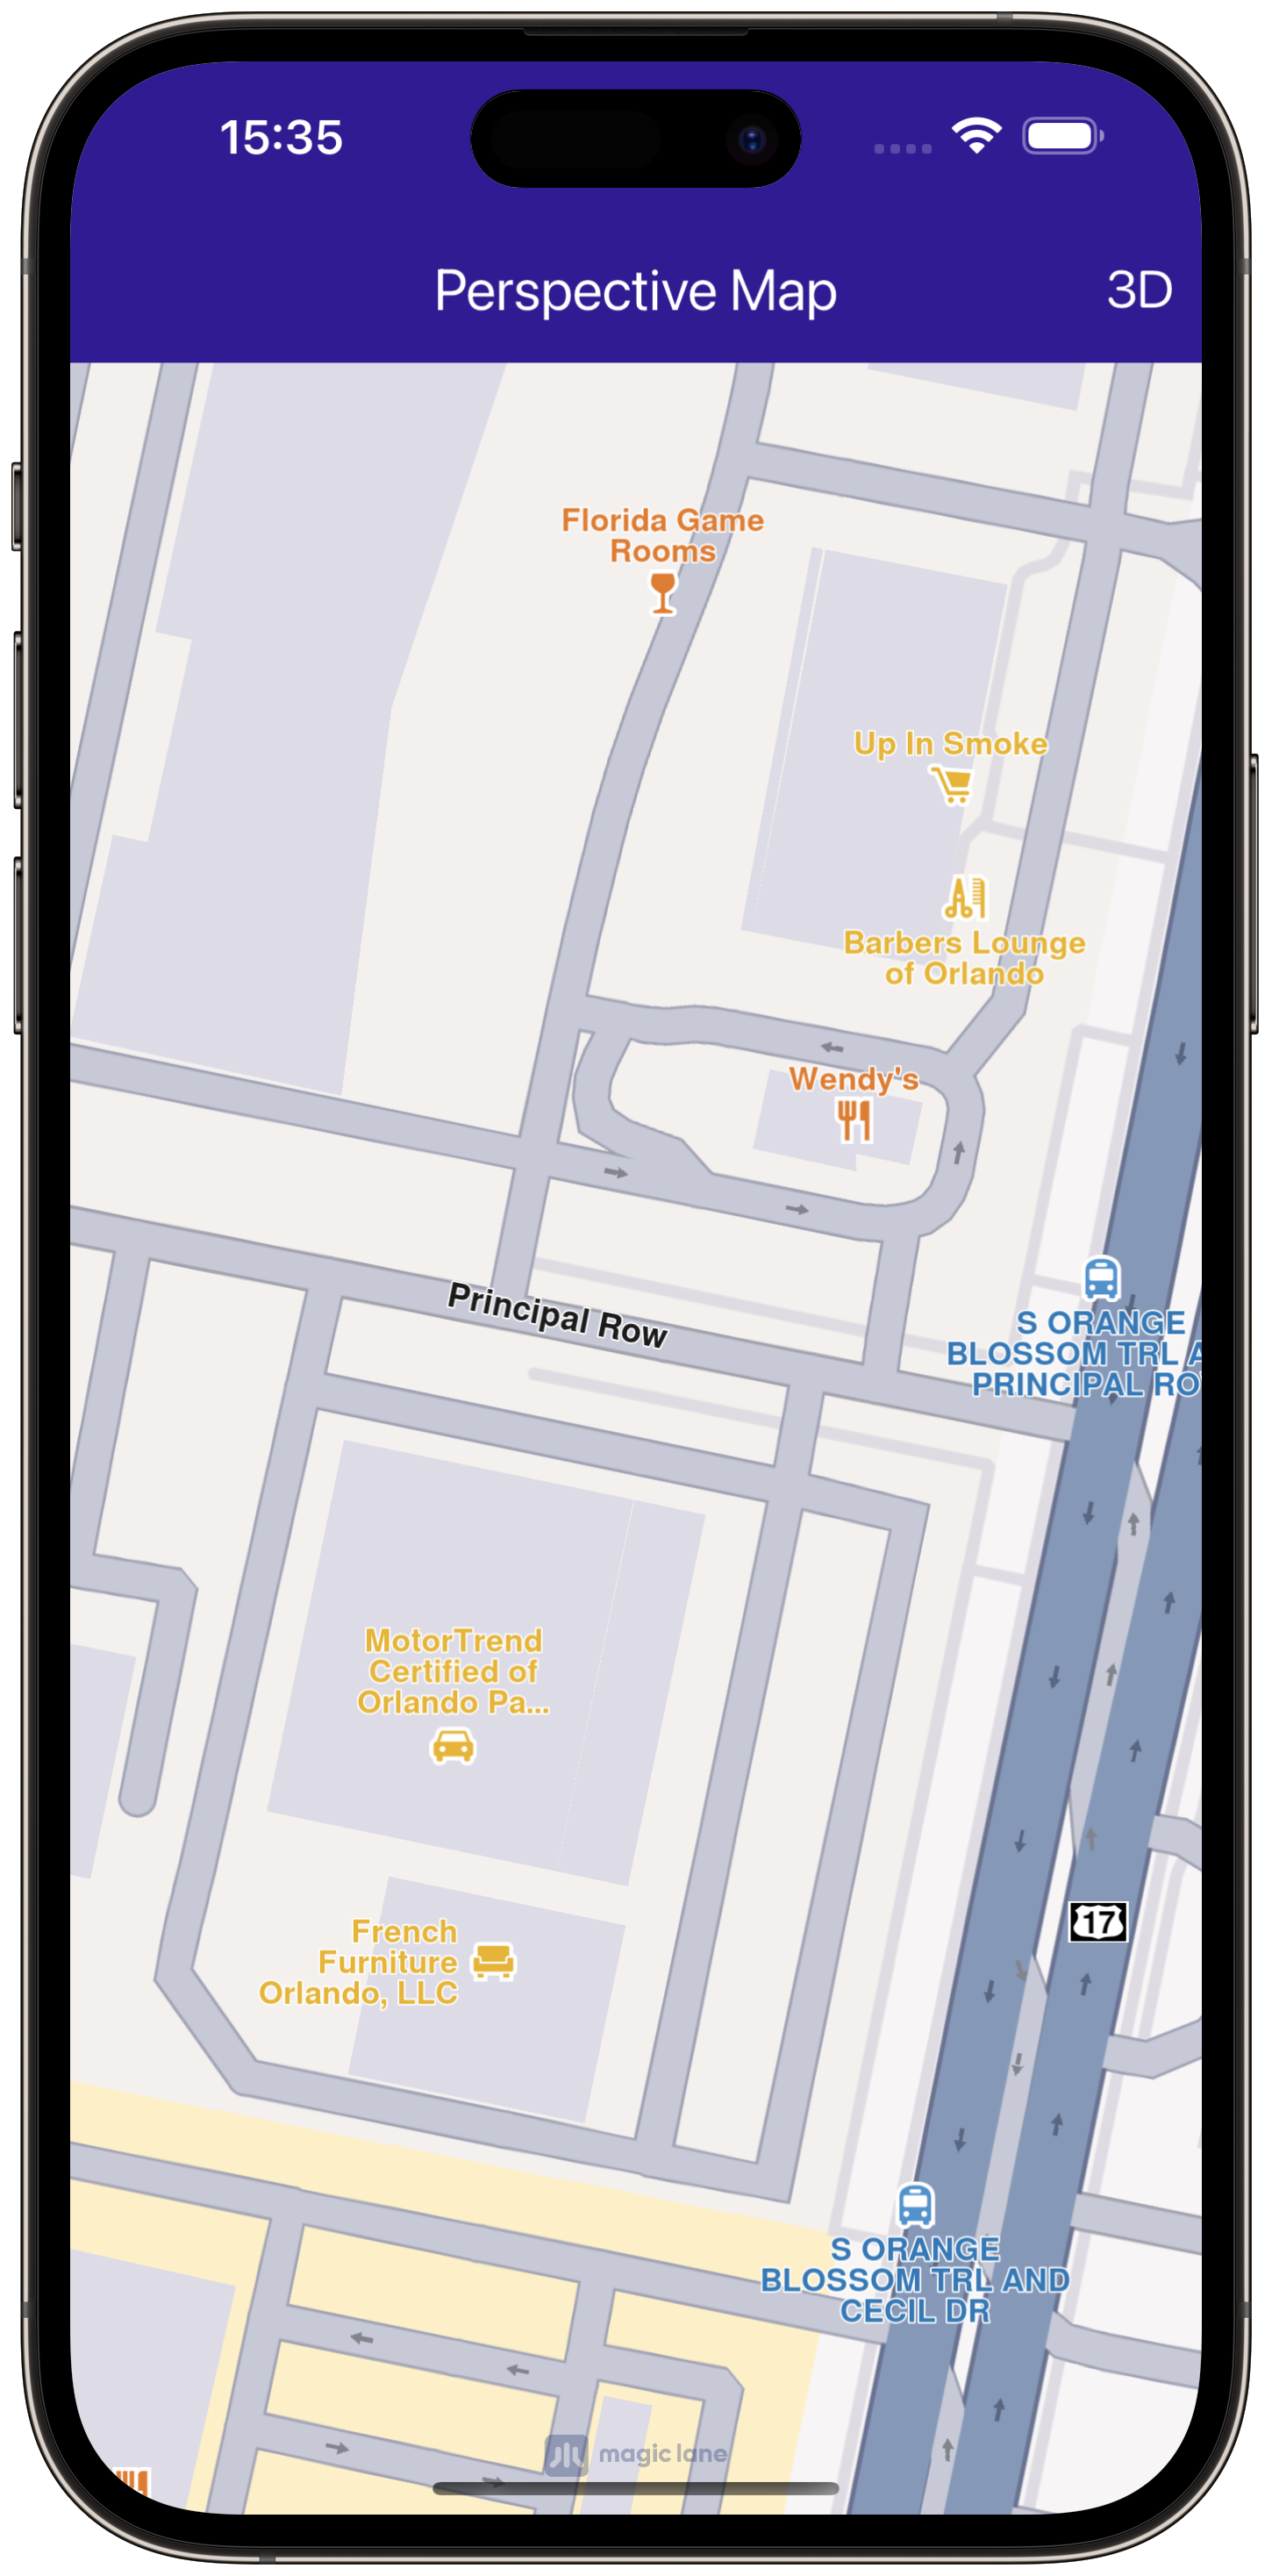 | 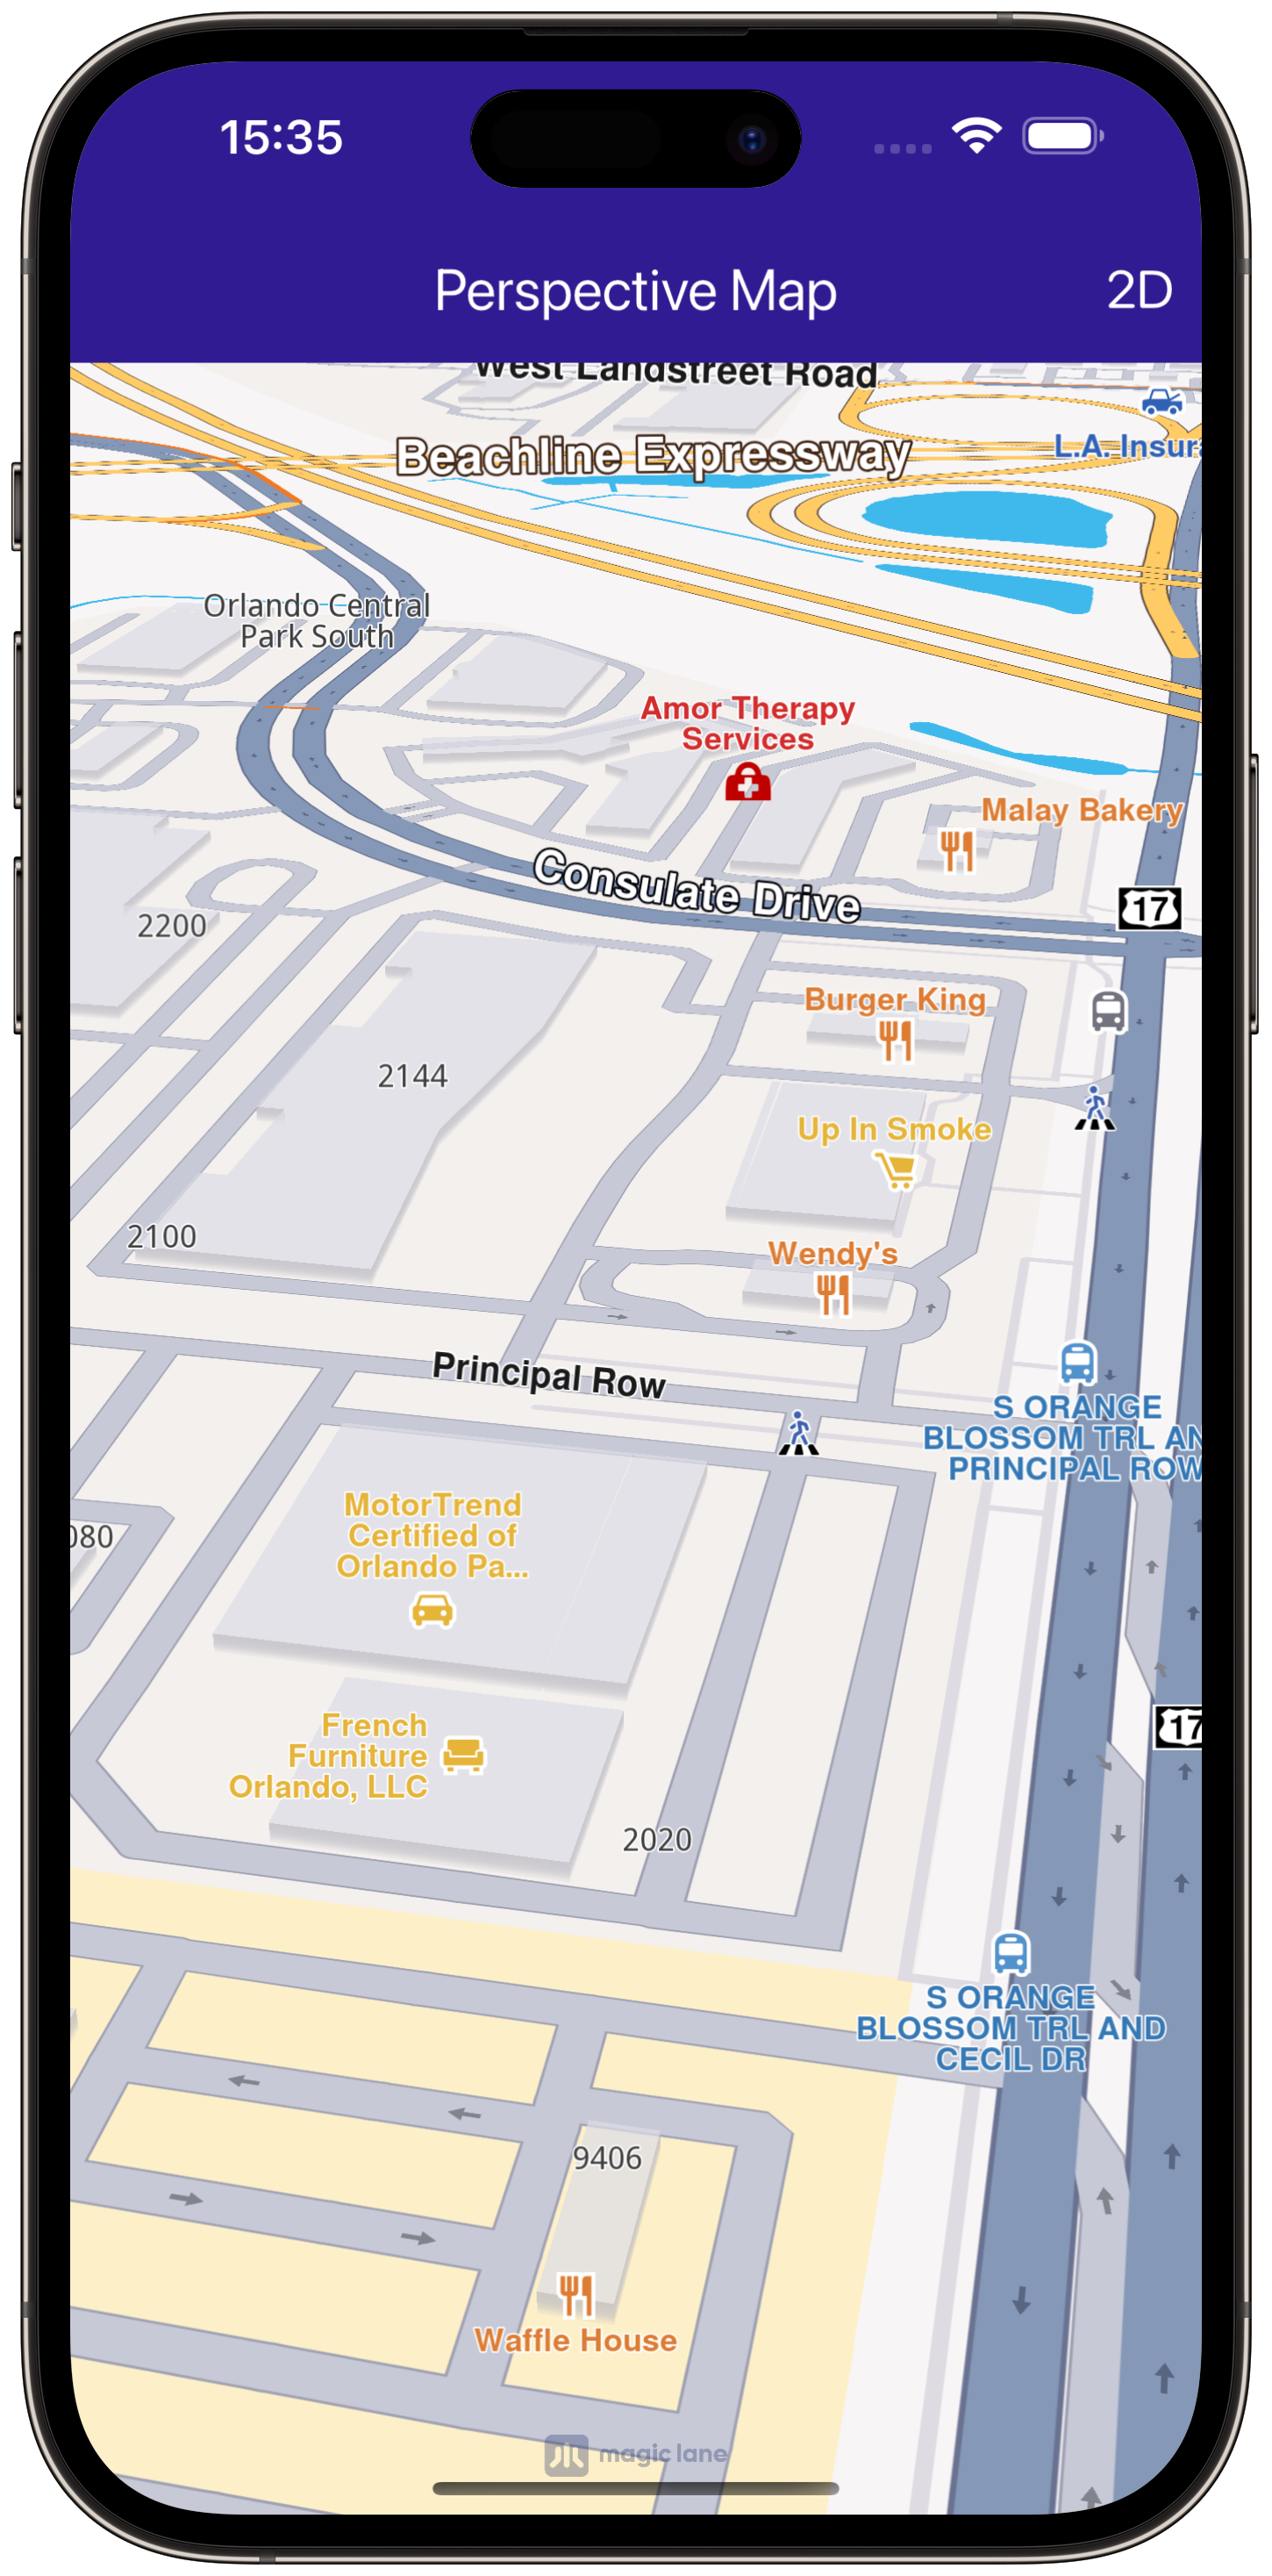 |
|---|---|
| Displaying a map with a two-dimensional perspective | Displaying a map with a three-dimensional perspective |
A three-dimensional perspective gives buildings a realistic, 3D appearance, while a two-dimensional perspective makes them appear as flat shapes.
To ensure three-dimensional buildings are visible, the camera angle should not be perpendicular to the map. Instead, the view angle must be less than 90 degrees.
The same effect can be implemented more precisely using the tiltAngle/viewAngle fields.
Building visibility
Building visibility can be controlled using the buildingsVisibility getter/setter from the MapViewPreferences class:
defaultVisibility: Uses the default visibility defined in the map style.hide: Hides all buildings.twoDimensional: Displays buildings as flat 2D polygons without height.threeDimensional: Displays buildings as 3D polygons with height.
mapController.preferences.buildingsVisibility = BuildingsVisibility.twoDimensional;
Buildings become visible when the camera is zoomed in close to the ground. The 3D effect is most noticeable when viewed from a tilted angle. Note that the 3D buildings do not reflect realistic or accurate heights.
Store and restore a view
The map camera object has getters and setters for position and orientation ensuring a high level of control over the map view.
For storing a particular view the cameraState getter can be used. This member returns a Uint8List object and depending on the usecase this can be stored inside a variable or serialized in a file.
final state = mapController.camera.cameraState;
Restoring a saved view can be done easily using the cameraState setter:
mapController.camera.cameraState = state;
Alternatively the position and orientation can be stored and restored separately using the provided getters and setters.
Please note that cameraState does not contain information about the current style.