Show location on map
The location of the device is shown by default using an arrow position tracker. If setLiveDataSource has been successfully set and the required permissions were granted then the position tracker showing the current location should be visible on the map as an arrow.
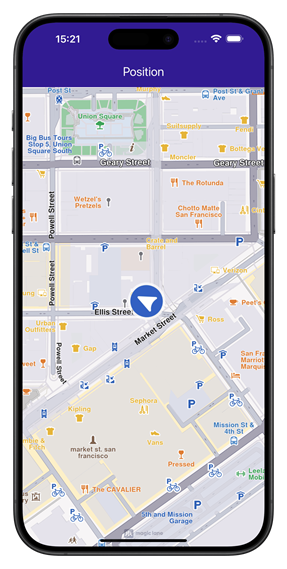 |
|---|
| Default position tracker showing current position |
At the moment it is not possible to have multiple position trackers on the map.
GPS accuracy may be limited in environments such as indoor spaces, areas with weak GPS signals, or locations with significant obstructions, such as narrow streets or between tall buildings. In these situations, the tracker may exhibit erratic movement within a confined area. Additionally, the performance of device sensors, such as the accelerometer and gyroscope, can further impact GPS positioning accuracy.
This behavior is more pronounced when the device is stationary.
Start follow position
Following the position tracker can be done calling the startFollowingPosition method on the mapController.
mapController.startFollowingPosition();
When the startFollowingPosition method is called, the camera enters a mode where it automatically follows the movement and rotation of the position tracker. This ensures the user's current location and orientation are consistently centered and updated on the map.
The startFollowingPosition method can take parameters such as animation, which controls the movement from the current map camera position to the position of the tracker and zoomLevel and viewAngle.
Set map rotation mode
When following position, it is possible to have the map rotated with the user orientation:
final prefs = mapController.preferences.followPositionPreferences;
prefs.setMapRotationMode(FollowPositionMapRotationMode.positionHeading);
If you want to use the compass sensor for map rotation use FollowPositionMapRotationMode.compass:
prefs.setMapRotationMode(FollowPositionMapRotationMode.compass);
The map rotation can also be fixed to a given angle using the FollowPositionMapRotationMode.compass value and providing a angle value:
prefs.setMapRotationMode(FollowPositionMapRotationMode.fixed, angle: 30);
The mapRotationMode returns a pair containing:
- the current
FollowPositionMapRotationModemode - the angle set in case of
FollowPositionMapRotationMode.fixed
Exit follow position
The stopFollowingPosition method from the mapController can be used to programmatically stop following the position.
mapController.stopFollowingPosition();
The follow mode will be exited automatically if the user interacts with the map. Actions such as panning, or tilting will disable the camera's automatic tracking. This can be deactivated by setting touchHandlerExitAllow to false (see the section below).
Customize follow position settings
The FollowPositionPreferences class has options which can be used to customize the behaviour of following the position. This can be accessed from the preferences getter of the mapController.
The fields defined in FollowPositionPreferences take effect only when the camera is in follow position mode. To customize camera behavior when not following the position, refer to the fields available in MapViewPreferences and GemMapController.
| Field | Type | Explanation |
|---|---|---|
| cameraFocus | Point | The position on the viewport where the position tracker is located |
| timeBeforeTurnPresentation | int | The time interval before starting a turn presentation |
| touchHandlerExitAllow | bool | If set to false then gestures made by the user will exit the follow position mode |
| touchHandlerModifyPersistent | bool | If set to true then changes made by the user using gestures are persistent |
| viewAngle | double | The viewAngle used within the follow position mode |
| zoomLevel | int | The zoomLevel used within the follow position mode |
| accuracyCircleVisibility | bool | Specifies if the accuracy circle should be visible (regardless if is in the follow position mode or not) |
| isTrackObjectFollowingMapRotation | bool | Specifies if the track object should follow the map rotation |
Please refer to the adjust map guide for more information about the viewAngle, zoomLevel and cameraFocus fields.
If no zoom level is set, a default value is used.
Set circle visibility
For example, in order to show the accuracy circle visibility on the map (which is by default hidden):
FollowPositionPreferences prefs = mapController.preferences.followPositionPreferences;
GemError error = prefs.setAccuracyCircleVisibility(true);
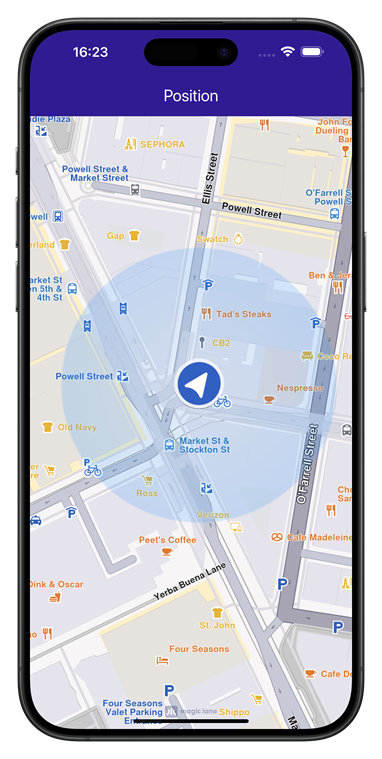 |
|---|
| Accuracy circle turned on |
Customize circle color
The accuracy circle color can be set using the setDefPositionTrackerAccuracyCircleColor static method from the MapSceneObject class:
final GemError setErrorCode = MapSceneObject.setDefPositionTrackerAccuracyCircleColor(Colors.red);
print("Error code for setting the circle color: $setErrorCode");
It is recommended to use colors with partial opacity instead of fully opaque colors for improved visibility and usability.
The current color can be retrieved using the getDefPositionTrackerAccuracyCircleColor static method:
final Color color = MapSceneObject.getDefPositionTrackerAccuracyCircleColor();
The color can be reset to the default value using the resetDefPositionTrackerAccuracyCircleColor static method:
final GemError resetErrorCode = MapSceneObject.resetDefPositionTrackerAccuracyCircleColor();
print("Error code for resetting the circle color: $resetErrorCode");
Set position of the position tracker on the viewport
In order to set the position tracker on a particular spot of the viewport while in follow position mode the cameraFocus property can be used:
// Calculate the position relative to the viewport
double twoThirdsX = 2 / 3;
double threeFifthsY = 3 / 5;
Point<double> position = Point(twoThirdsX, threeFifthsY);

// Set the position of the position tracker in the viewport
// while in follow position mode
FollowPositionPreferences prefs =
    mapController.preferences.followPositionPreferences;
GemError error = prefs.setCameraFocus(position);

mapController.startFollowingPosition();
The setCameraFocus method uses a coordinate system relative to the viewport, not physical pixels.
In this way Point(0.0, 0.0) corresponds with top left corner and Point(1.0, 1.0) corresponds with right bottom corner.
Customize position icon
The SDK supports customizing the position tracker to suit your application's requirements. For example, you can set a simple PNG as the position tracker using the following approach:
    // Read the file and load the image as a binary resource
    final imageByteData = (await rootBundle.load('assets/navArrow.png'));

    // Convert the binary data to Uint8List
    final imageUint8List = imageByteData.buffer.asUint8List();

    // Customize the position tracker
    MapSceneObject.customizeDefPositionTracker(imageUint8List, SceneObjectFileFormat.tex);
Besides simple 2D icons, 3D objects as glb files can be set. The format parameter of the customizeDefPositionTracker should be set to SceneObjectFileFormat.tex in this case.
At this moment it is not possible to set different icons for different maps.
Make sure the resource (in this example navArrow.png) is correctly registered within the pubspec.yaml file. See the Flutter documentation for more information.
| Custom position tracker |
Other position tracker settings
Other settings such as scale and the visibility of the position tracker can be changed using the methods available on the MapSceneObject which can be obtained using MapSceneObject.getDefPositionTracker.
Change the position tracker scale
To change the scale of the position tracker we can use the scale setter:
// Get the position tracker
MapSceneObject mapSceneObject = MapSceneObject.getDefPositionTracker();

// Change the scale
mapSceneObject.scale = 0.5;
A value of 1 corresponds with the default scale value. The parameter passed to the setter should be in the range (0, mapSceneObject.maxScale]. The code snippet from above sets half the scale.
The scale of the position tracker stays constant on the viewport regardless of the map zoom level.
Change the position tracker visibility
To change the visibility of the position tracker we can use the visibility setter:
// Get the position tracker
MapSceneObject mapSceneObject = MapSceneObject.getDefPositionTracker();

// Change the visibility
mapSceneObject.visibility = false;
The snippet above makes the position tracker invisible.