Getting Started
Prerequisites
Before running the example applications, ensure you have an IDE for development such as Android Studio or Visual Studio Code installed on your machine.
Then set up your IDE for Flutter development by following the official setup guides for Visual Studio Code and Android Studio.
After setup is complete, verify that Flutter is correctly installed by running the following command in your terminal:
flutter doctor
It should display a summary of installed tooling and report any issues found. Make sure there are no errors related to Flutter, Dart, or your IDE.
If running the command results in the command not found: flutter error, ensure that Flutter is correctly installed and added to your system's PATH so your terminal can access it. You can verify the installation by running flutter --version in your terminal.
Downloading the examples
Example applications for the Maps SDK for Flutter are available on IssueTracker. You can clone the repository or download project ZIP file by clicking the blue Code button.
If you chose to download the ZIP file, make sure to extract it after the download is complete.
Downloading the Maps SDK for Flutter
To download the Maps SDK for Flutter, follow these steps:
- Go to the Maps SDKs download page.
- Download the latest release ZIP file of Flutter-android-ios.
- Extract the contents of the ZIP file to a location of your choice. Inside the extracted folder, you will find the
gem_kitdirectory, which contains the SDK files needed for your Flutter projects.
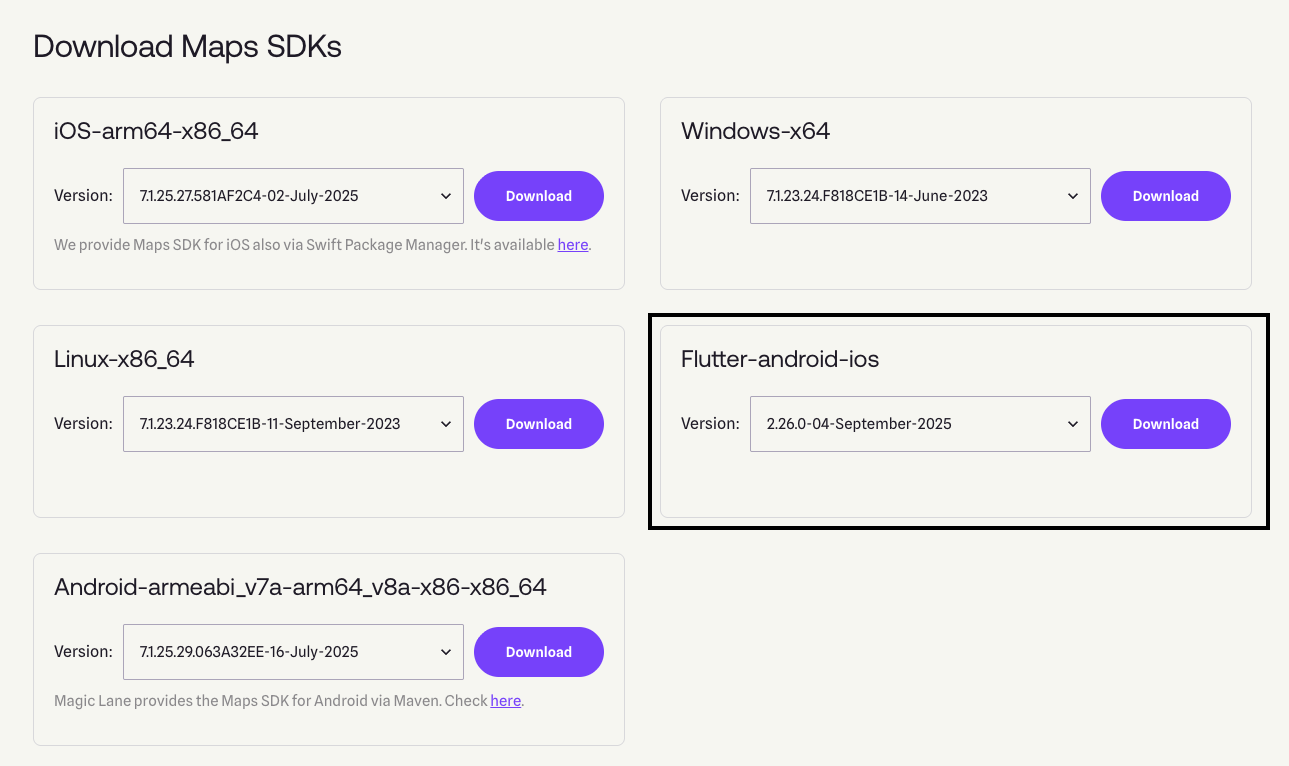
Make sure the SDK version (eg. 2.26.0) matches the examples version you downloaded from IssueTracker. Using mismatched versions may lead to compatibility issues and unexpected behavior in the examples. Also make sure the flutter version you are using is compatible with the SDK version. Check the Minimum Requirements for more information about compatibility.
Running the examples
Copying the SDK files
After downloading and extracting both the examples and the Maps SDK for Flutter, you can open the example projects in your preferred IDE (such as Android Studio or Visual Studio Code). Copy the gem_kit directory into the empty plugins folder of selected example project.
Do not modify the gem_kit directory name or its contents, as this may lead to examples not running or unexpected behavior in the SDK.
Setting up the API key
Authentication is recommended to use the Maps SDK for Flutter without the watermark and ensure full functionality. This guide provides detailed instructions on how to obtain and set up your API key. Some features do not work unless a valid token is set and the number of allowed requests is limited.
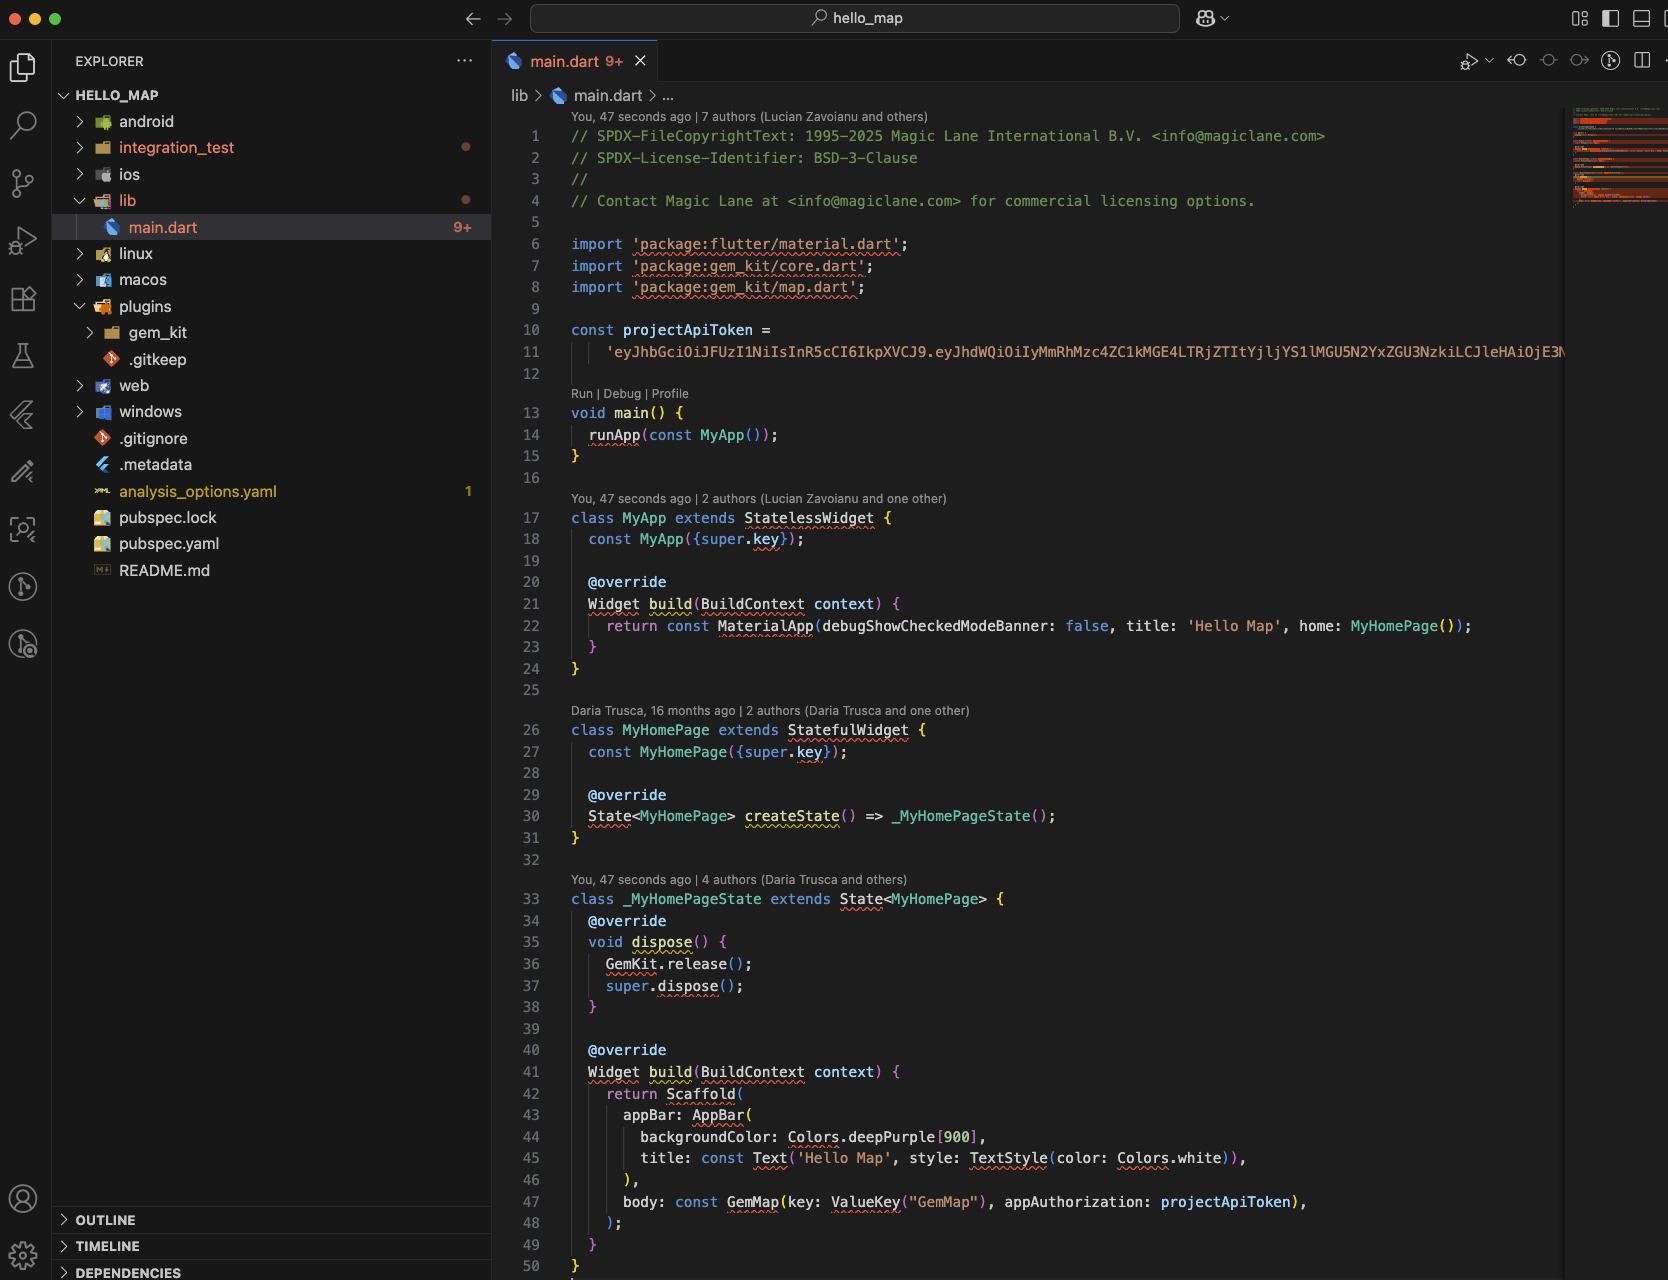
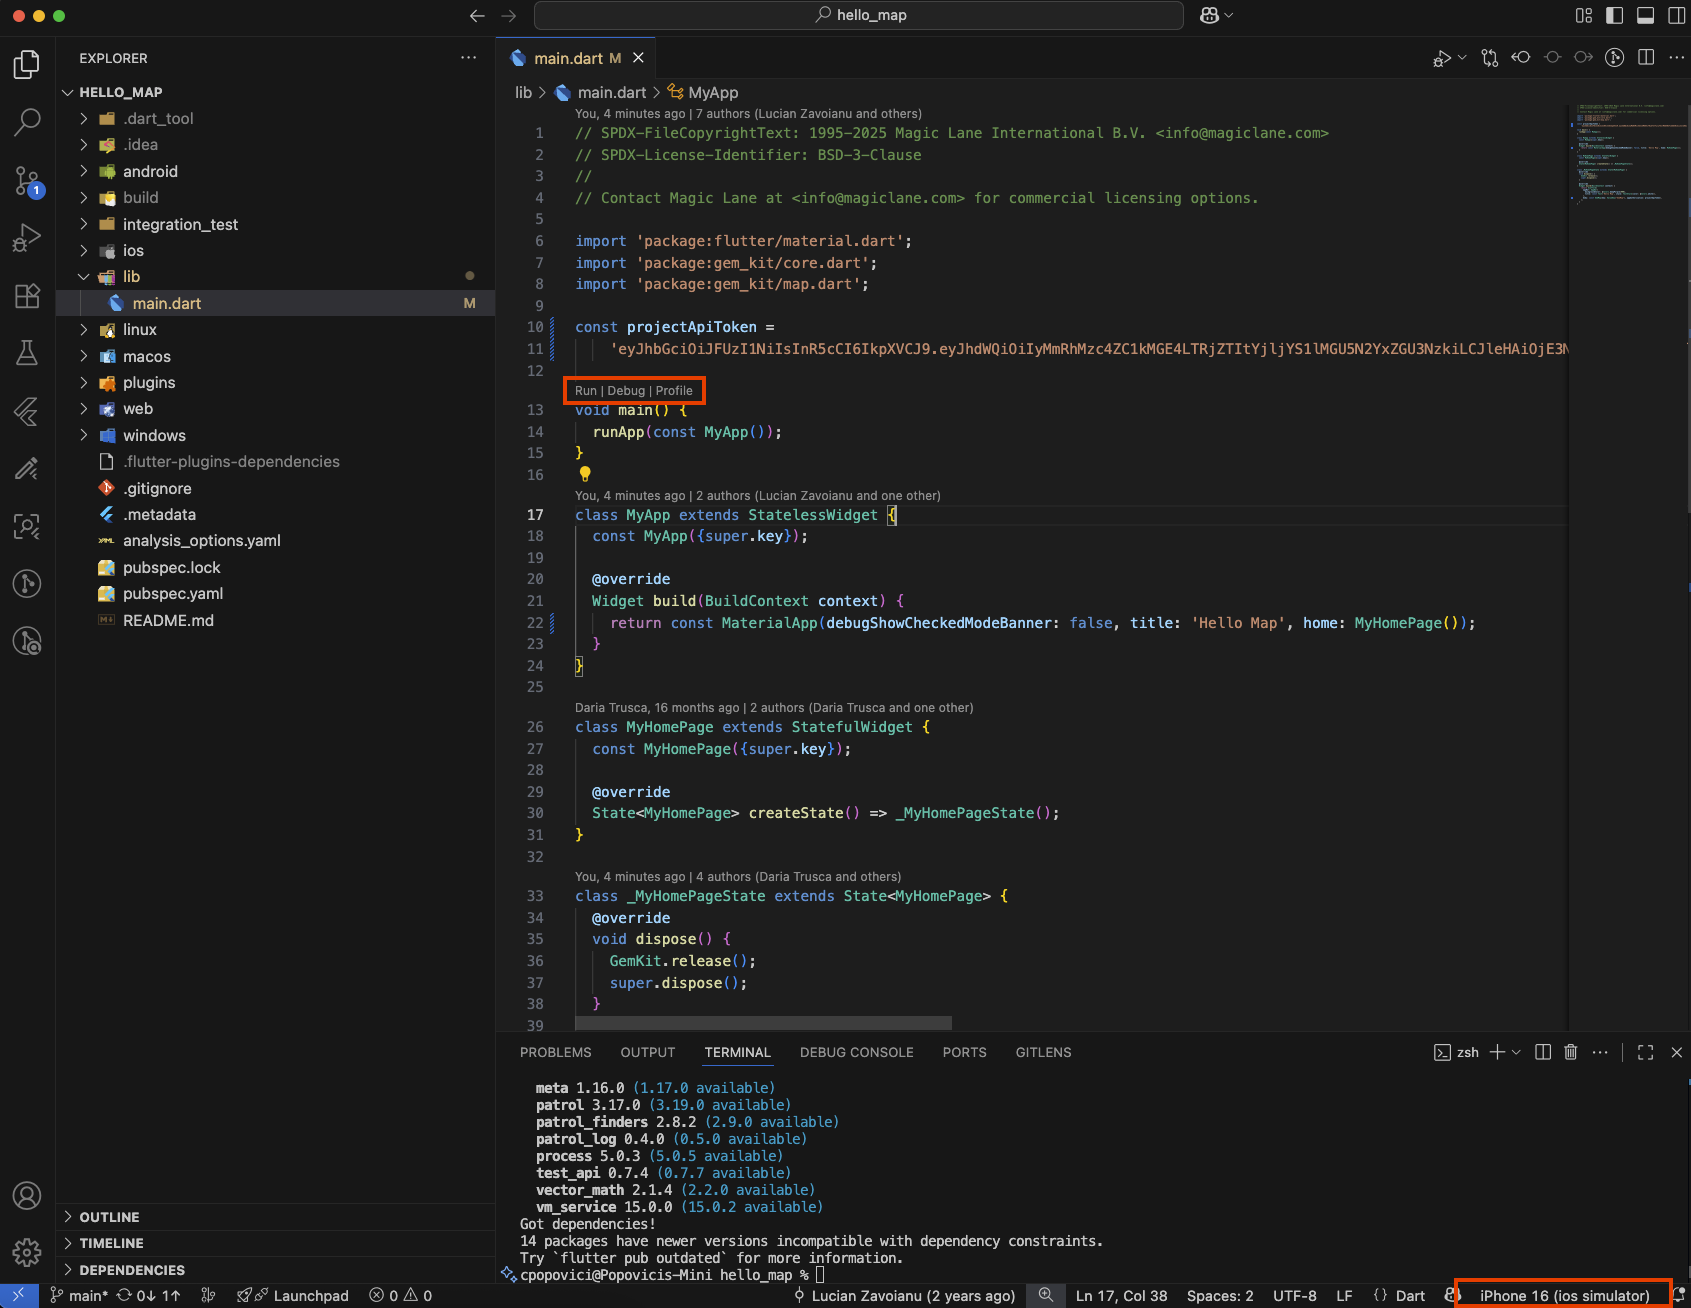
Once you have your API key, you need to set it in the example project. Open the lib/main.dart file and locate the following line:
const projectApiToken = String.fromEnvironment('GEM_TOKEN');
And replace the String.fromEnvironment('GEM_TOKEN') with your actual API key, like this:
const projectApiToken = 'eyJhbGciOiJIUzI1NiIsInR5cCI6IkpXVCJ9.eyJhZG1pbiI6dHJ1ZX0.SflKxwRJSMeKKF2QT4fwpMeJf36POk6yJV_adQssw5c';
You can also set the API key as an environment variable named GEM_TOKEN in your IDE or terminal, which allows you to keep your API key secure and avoid hardcoding it in the source code.
Make sure the token is not commited or shared publicly. If the token is exposed, please deactivate it and generate a new one. Check the Create an API Key guide for more information about token management.
Launching the example
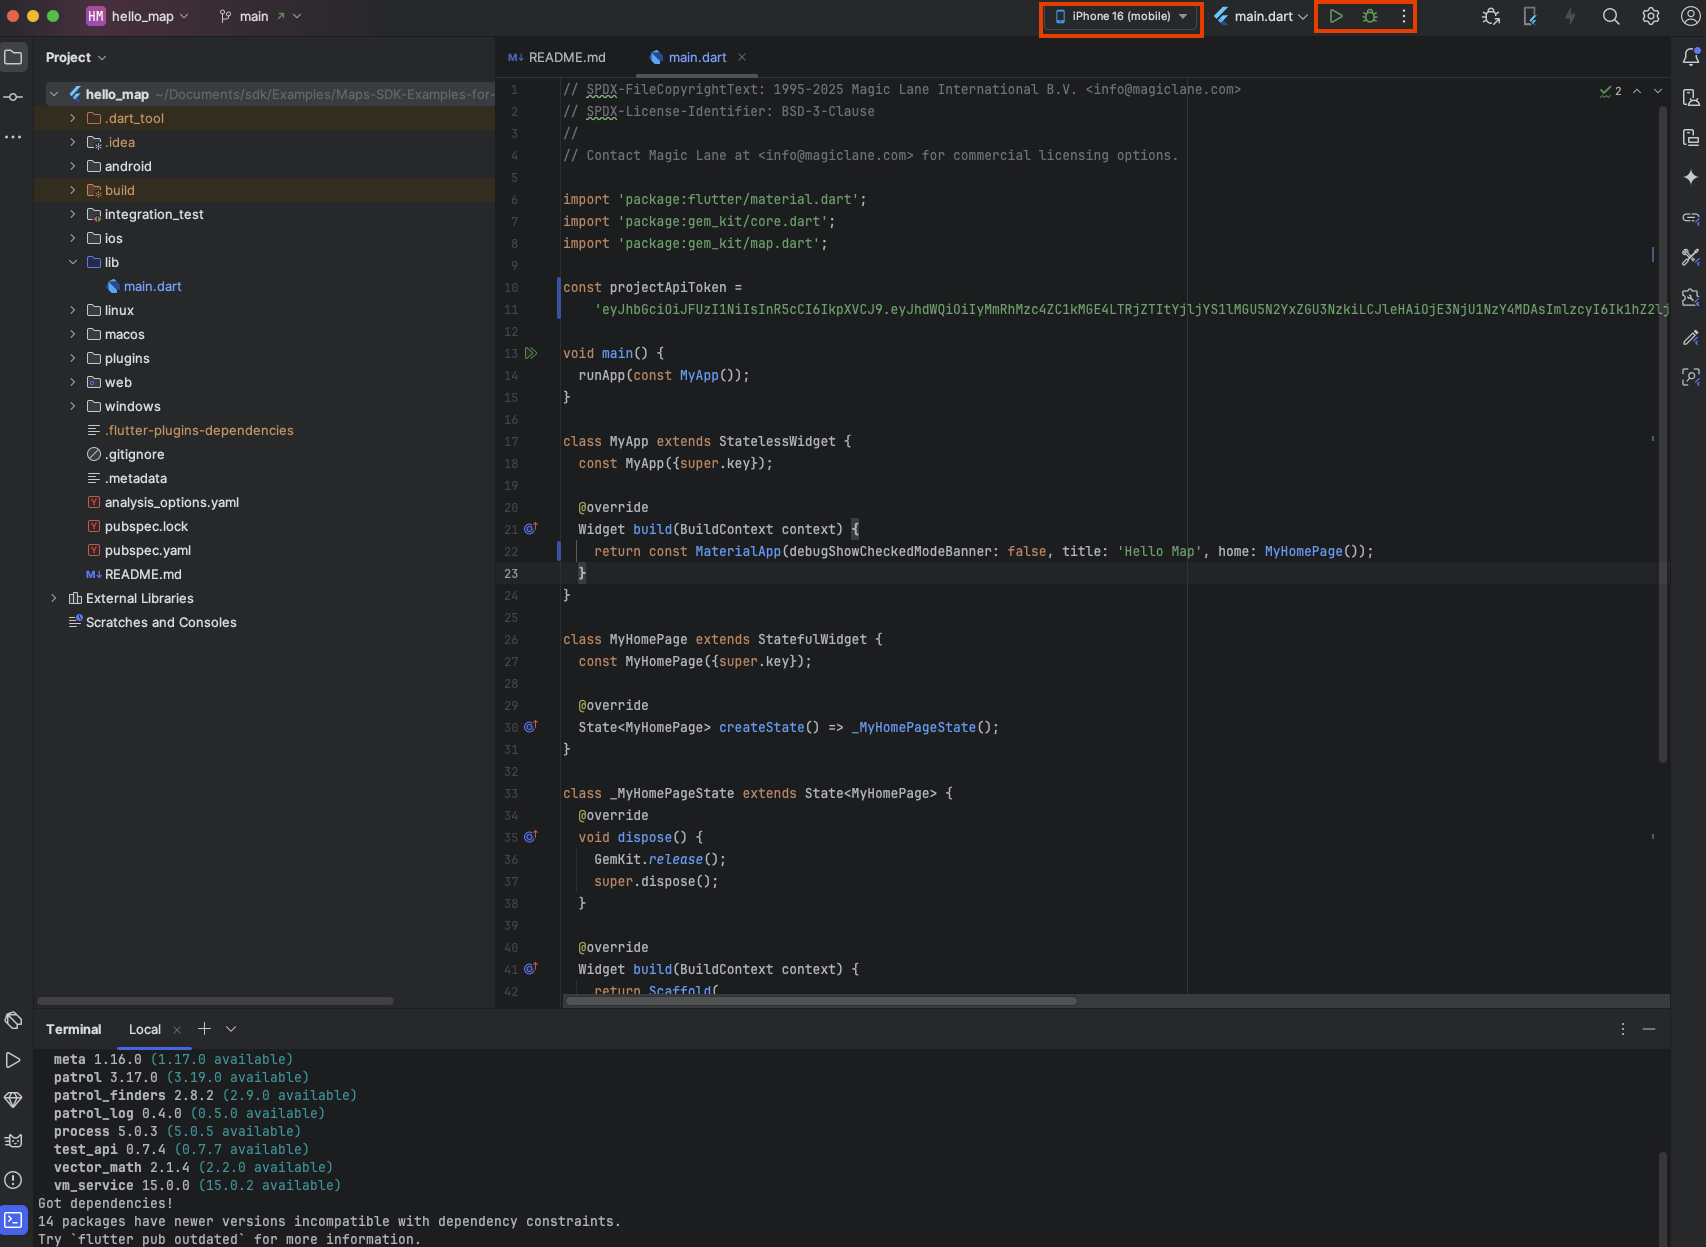
Open the selected example project in your preferred IDE (such as Android Studio or Visual Studio Code).
- Visual Studio Code
- Android Studio
Initially, the example project will display many errors.
Execute the following command in the terminal from the root directory of the example project to fetch the required dependencies:
flutter pub get
If you intend to run on an iOS device or simulator, ensure that you have CocoaPods installed and run the following command in the ios directory of the example project:
cd ios
pod install
After fetching the dependencies, the errors should disappear, and you can run the example application by tapping F5 or by clicking the run button above the main function. You can run the application on an emulator or a physical device connected to your development machine. Make sure the device is set up for development, recognized by your IDE and selected as the target device.
Once launched, the application should build and run without issues.
After running the example, you can use the following command to delete the fetched dependencies and undo the changes made by the previous commands. This also deletes the build folders and cleans up resources :
flutter clean
Initially, the example project will display many errors.

Execute the following command in the terminal from the root directory of the example project to fetch the required dependencies or click the Get dependencies button in the top right corner of the IDE:
flutter pub get
After fetching the dependencies, the errors should disappear, and you can run the example application by clicking the run or debug button on top of the editor. You can run the application on an emulator or a physical device connected to your development machine. Make sure the device is set up for development, recognized by your IDE and selected as the target device.
Once launched, the application should build and run without issues.
After running the example, you can use the following command to delete the fetched dependencies and undo the changes made by the previous commands. This also deletes the build folders and cleans up resources :
flutter clean
Disclaimer
The example applications are primarily designed for standard mobile device screen sizes and may not be fully responsive on all screen sizes. These examples are intentionally simplified to enhance clarity and ease of understanding. They do not necessarily reflect best practices for production environments.