
Calculate Route Multi Map

Last updated: April 7, 2026 | 2 minutes read

This example demonstrates how to use GEMKit in a UIKit application to display two independent MapViewController instances side-by-side, each calculating and presenting its own route with a separate NavigationContext.

Check the full implementation on GitHub.

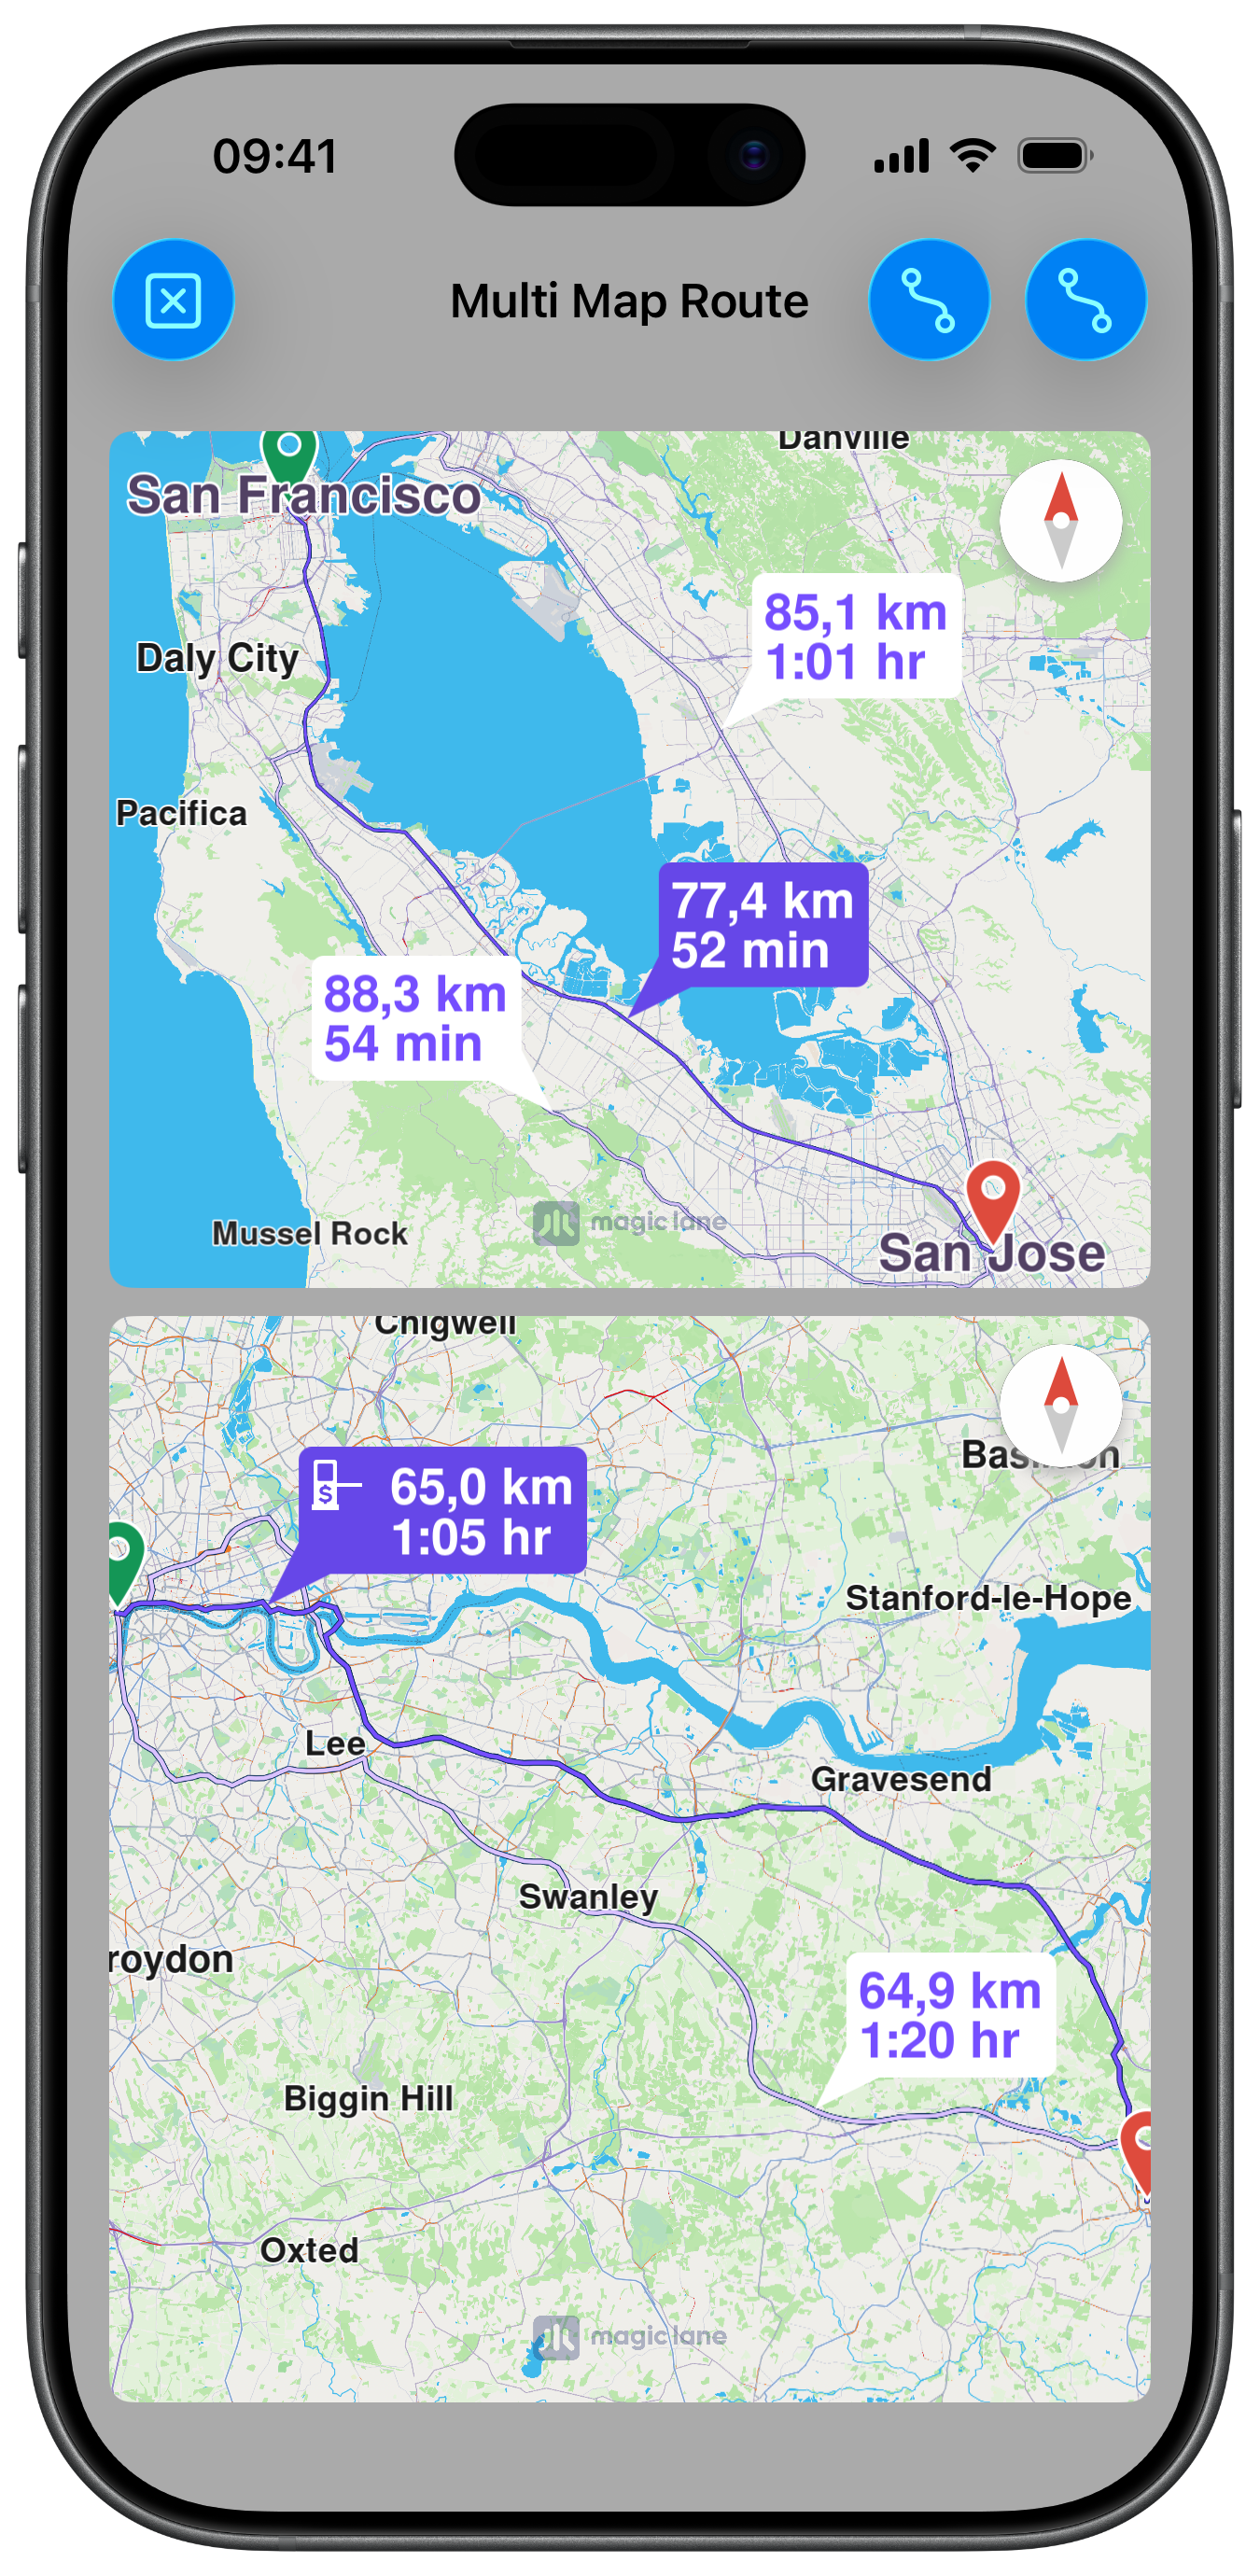
Calculated Routes on multiple maps

Maps Setup

Each map is created with its own constraints so they stack vertically and fill the screen. The maps are initialised lazily — only when the route buttons are tapped:

ViewController.swiftView on GitHub
class ViewController: UIViewController, UISearchBarDelegate {

var mapViewController1: MapViewController?
var mapViewController2: MapViewController?

var navigationContext1: NavigationContext?
var navigationContext2: NavigationContext?

func createMap1View() {

self.mapViewController1 = MapViewController.init()
self.mapViewController1!.view.layer.cornerRadius = 8
self.mapViewController1!.view.layer.masksToBounds = true

self.addChild(self.mapViewController1!)
self.view.addSubview(self.mapViewController1!.view)
self.mapViewController1!.didMove(toParent: self)

self.mapViewController1?.view.translatesAutoresizingMaskIntoConstraints = false
NSLayoutConstraint.activate([
self.mapViewController1!.view.topAnchor.constraint(equalTo: self.view.safeAreaLayoutGuide.topAnchor, constant: 15),
self.mapViewController1!.view.leadingAnchor.constraint(equalTo: self.view.leadingAnchor, constant: 15),
self.mapViewController1!.view.bottomAnchor.constraint(equalTo: self.view.centerYAnchor),
self.mapViewController1!.view.trailingAnchor.constraint(equalTo: self.view.trailingAnchor, constant: -15)
])

self.mapViewController1!.startRender()
}
ViewController.swiftView on GitHub
func createMap2View() {

self.mapViewController2 = MapViewController.init()
self.mapViewController2!.view.backgroundColor = UIColor.systemBackground

self.mapViewController2!.view.layer.cornerRadius = 8
self.mapViewController2!.view.layer.masksToBounds = true

self.addChild(self.mapViewController2!)
self.view.addSubview(self.mapViewController2!.view)
self.mapViewController2!.didMove(toParent: self)

self.mapViewController2?.view.translatesAutoresizingMaskIntoConstraints = false
NSLayoutConstraint.activate([
self.mapViewController2!.view.topAnchor.constraint(equalTo: self.view.centerYAnchor, constant: 10),
self.mapViewController2!.view.leadingAnchor.constraint(equalTo: self.view.leadingAnchor, constant: 15),
self.mapViewController2!.view.bottomAnchor.constraint(equalTo: self.view.safeAreaLayoutGuide.bottomAnchor, constant: -5),
self.mapViewController2!.view.trailingAnchor.constraint(equalTo: self.view.trailingAnchor, constant: -15)
])

self.mapViewController2!.startRender()
}

Calculating Independent Routes

Each route button initialises its respective NavigationContext on the first tap and calculates the route on the second. The two maps and contexts operate independently:

ViewController.swiftView on GitHub
@objc func route1ButtonAction(item: UIBarButtonItem) {

if self.navigationContext1 == nil {

self.createMap1View()

let preferences = RoutePreferencesObject.init()
preferences.setTransportMode(.car)
preferences.setRouteType(.fastest)

self.navigationContext1 = NavigationContext.init(preferences: preferences)

return
}

self.mapViewController1?.removeAllRoutes()

let waypoints = [

LandmarkObject.landmark(
withName: "San Francisco", location: CoordinatesObject.coordinates(withLatitude: 37.77903, longitude: -122.41991)),
LandmarkObject.landmark(
withName: "San Jose", location: CoordinatesObject.coordinates(withLatitude: 37.33619, longitude: -121.89058))
]

self.navigationContext1?
.calculateRoute(withWaypoints: waypoints,
completionHandler: { [weak self] (results: [RouteObject]) in

guard let strongSelf = self else { return }

if !results.isEmpty {

strongSelf.mapViewController1?
.presentRoutes(results, withTraffic: nil, showSummary: true, animationDuration: 1000)
}

item.isEnabled = true
})
}