# Shared colours
Last updated:
October 13, 2026
\| 5 minutes read
The Shared colours screen lists every colour in the style under a name. Change a colour there and every layer that uses it changes with it. The screen also holds the palette, and the bar for [Themes](/docs/guides/map-studio/editing/themes.md). The colour picker, used everywhere a colour is edited, is described at the end of this page.
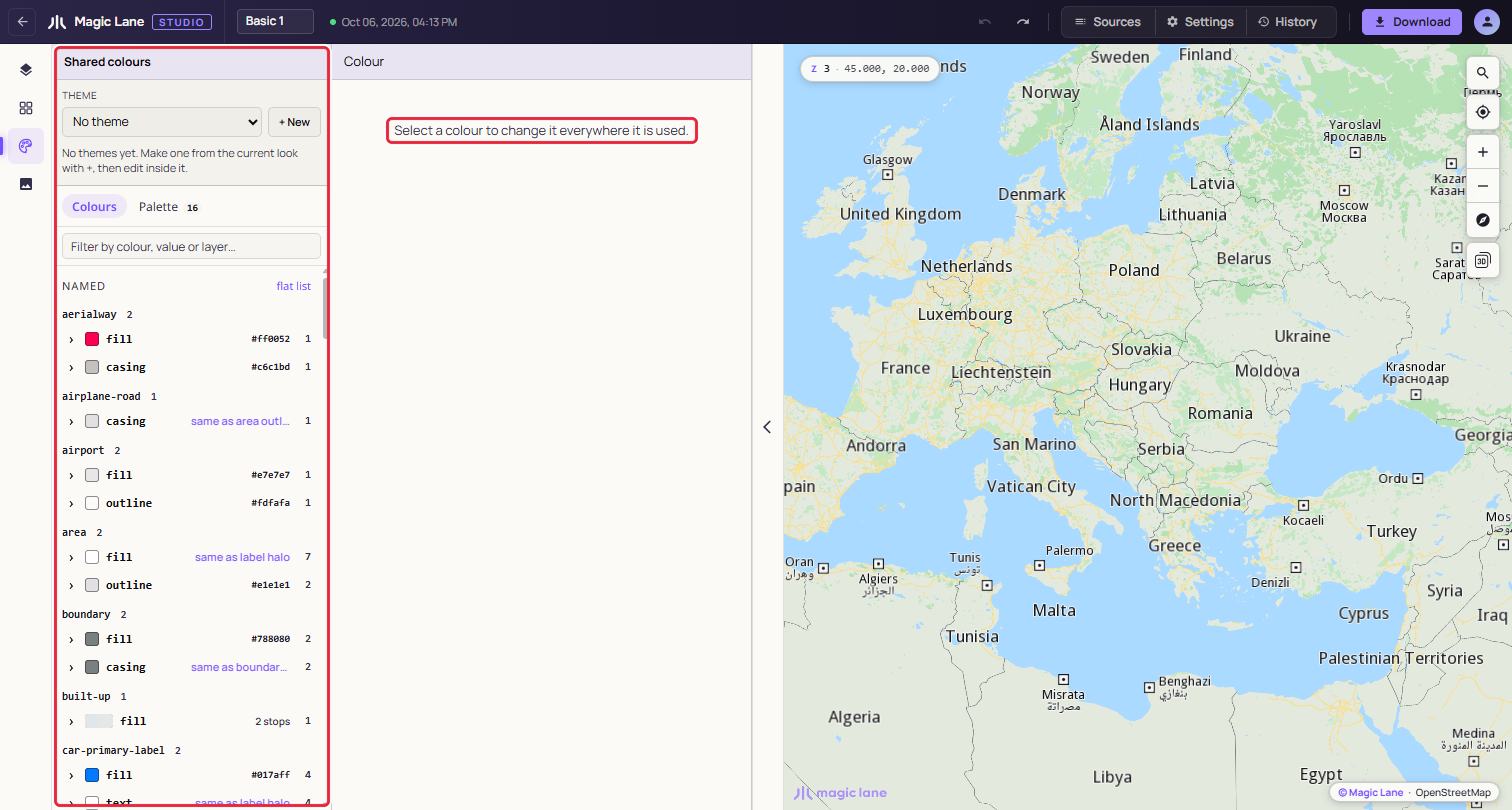
**The Colours tab, grouped by family.**
Open it from the **Shared colours** button on the rail.
## Step by step[](#step-by-step "Direct link to Step by step")
### Recolour every one-way arrow at once[](#recolour-every-one-way-arrow-at-once "Direct link to Recolour every one-way arrow at once")
1. Open **Shared colours** and type `road` in "Filter by colour, value or layer…".
2. Click **road/fill**, the grey of the one-way arrows. Its header says how many layers use it: "used by 29 layers" in Basic 1, one per road class.
3. Type a hex value, or click the swatch and pick a colour. Every layer that uses the colour changes together; one Ctrl+Z (⌘Z on a Mac) puts them back.
### Give one layer its own colour[](#give-one-layer-its-own-colour "Direct link to Give one layer its own colour")
1. Open **label/halo**, the white outline of the labels, used by 68 layers in Basic 1. Under "Layers using it", click the swatch of **Fire Hydrant POIs**. A colour picker opens for that layer alone.
2. Pick the new colour. Because the layer shares the colour with others, Studio asks first: **Change all 68 layers**, **Just Fire Hydrant POIs** or **Keep it**.
3. Choose **Just Fire Hydrant POIs**. The layer takes the new colour and appears in the list as a colour of its own; the other layers keep theirs.
## The colour list[](#the-colour-list "Direct link to The colour list")
A shared colour is one value, a plain colour or one that changes with zoom, together with every layer that uses exactly that value for the same kind of property. Studio works this out from the layers, so a layer you recolour on its own leaves the shared colour.
Studio names each colour after what its layers have in common and what the colour does, for example "label/halo": fill, outline, casing (a line's border), text, halo (a text outline) or background. Click a colour's name in its header to rename it. The text before the slash is its family; the list is grouped by family, or shown flat with "flat list". Right-click a colour to move it to another family.
Each row shows the swatch, the name, the hex (or "3 stops" for a colour that changes with zoom) and how many layers use it. The caret lists those layers. The filter box matches names, hex values and layer names.
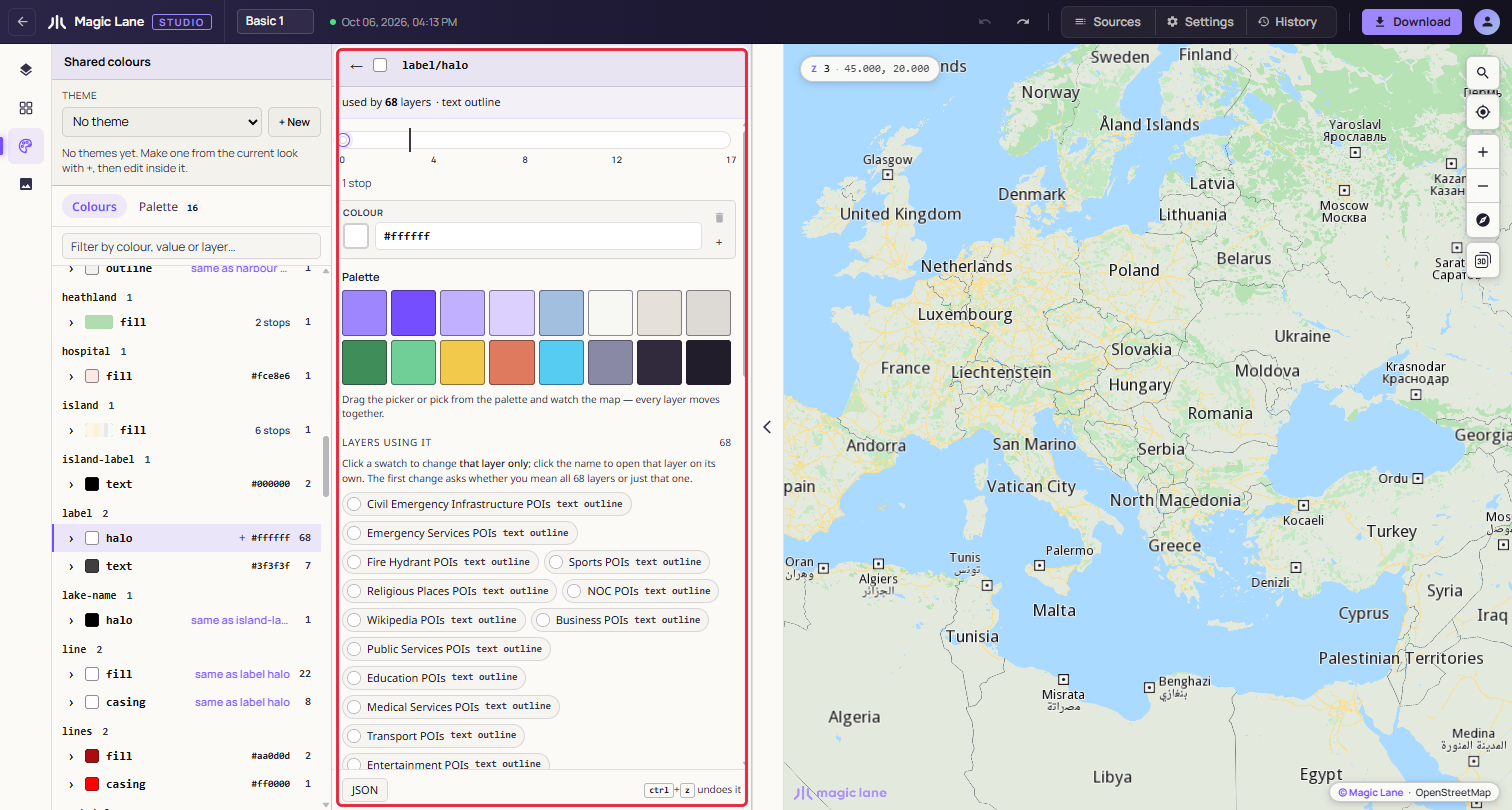
**A colour open. Every control here changes all 68 layers at once.**
Click a colour to open it. The editor is the same as for a colour on the Layers screen: one card per zoom stop, the Palette row and "Between stops". Under "Layers using it" each layer is a chip; click its swatch to change only that layer, as in the steps above, or its name to open the layer on its own. "Nearly the same — probably meant to match" lists layers a shade off this colour, each with a **Make it match** button.
Click the map and pick a layer from the list, and the screen opens that layer's colour.
## The palette[](#the-palette "Direct link to The palette")
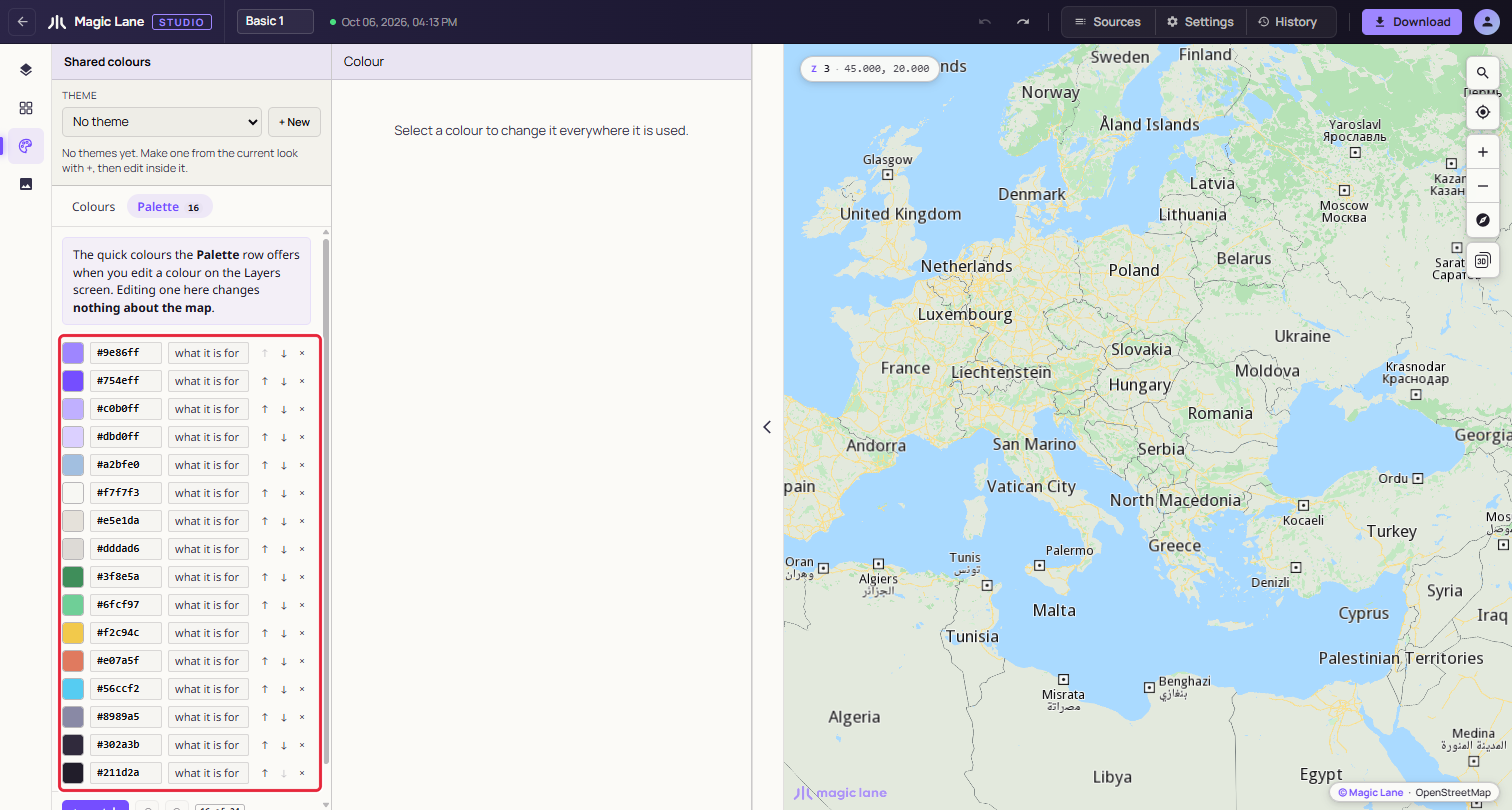
**The palette. Editing it changes the quick colours, not the map.**
The palette is the row of quick colours offered under every colour property. It starts with 16 brand colours and holds up to 24. Clicking a swatch copies its value into the colour you are editing; the two are not linked afterwards, so editing the palette never changes the map.
On the **Palette** tab, edit a swatch's colour, hex and label, reorder with ↑ and ↓, remove with ×, or add one with **+ swatch**. The **+** beside a colour in the Colours list adds that colour to the palette. The palette has its own undo and redo buttons.
## The colour picker[](#the-colour-picker "Direct link to The colour picker")
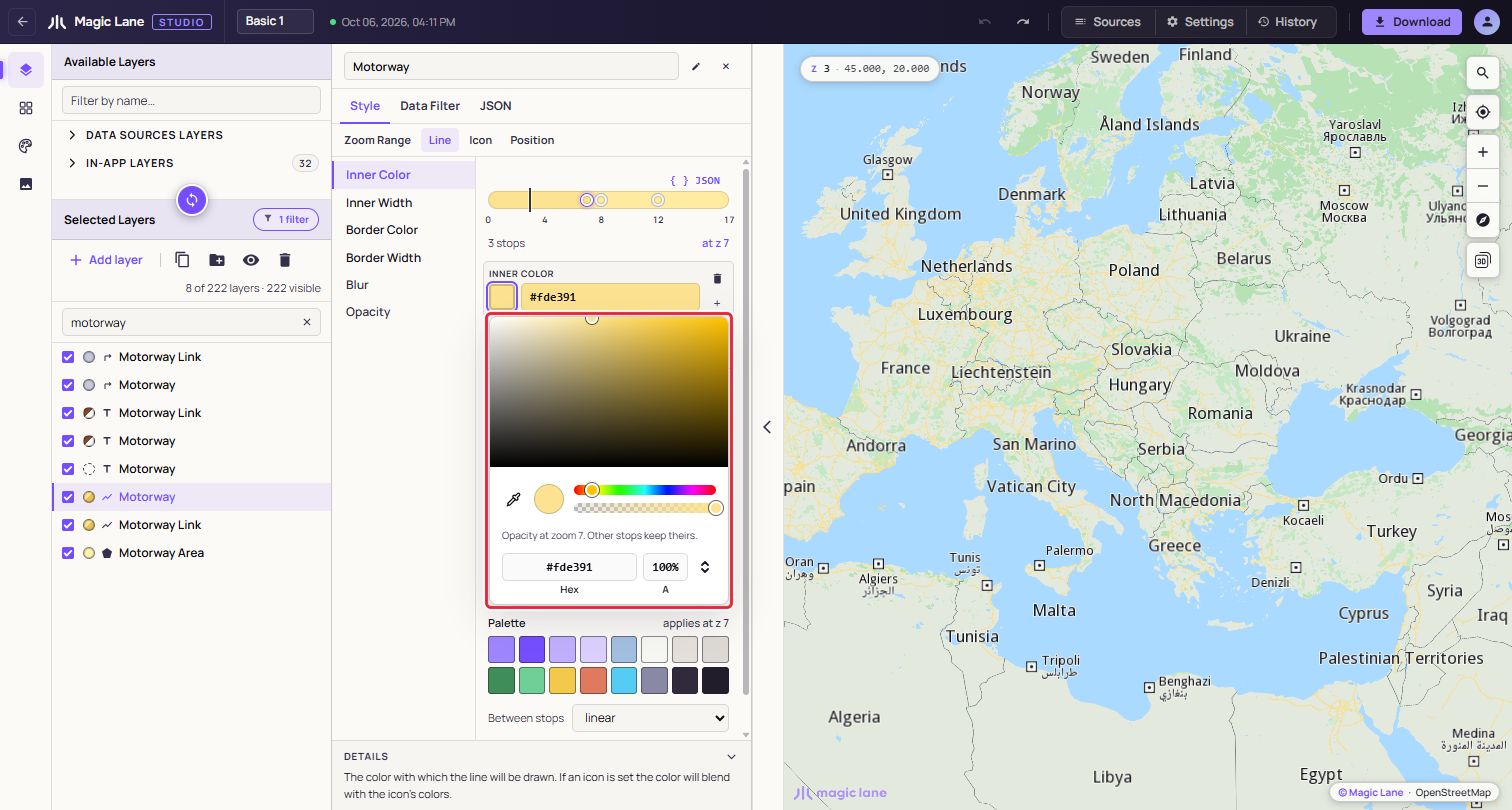
**The picker: square, eyedropper, hue and opacity strips, and the Hex and A fields.**
Wherever a colour is edited there is a swatch and a hex field. Type a hex value and press Enter; `abc` is short for `#aabbcc`, and Esc abandons the edit. Click the swatch for the picker:
* the **square** sets saturation and brightness, and the **hue strip** the hue;
* the **eyedropper** picks a colour from anywhere on screen, the map included, in Chrome, Edge and other Chromium browsers;
* **Hex**, **RGB** or **HSL** show the value as text (⇕ switches between them), and **A** the opacity;
* the **opacity strip** sets the layer's opacity, when the layer has one.
Changes show on the map as you drag. Opacity is set at the zoom of the stop you opened the picker from, and the note under the strips says so, for example "Opacity at zoom 7. Other stops keep theirs."
## Checking colours for colour blindness[](#checking-colours-for-colour-blindness "Direct link to Checking colours for colour blindness")
Turn on **Settings › Editor preferences › Vision simulation** to see the map as people with colour blindness see it; see [Settings](/docs/guides/map-studio/editing/map-settings-and-history.md#vision-simulation).
See also: [Themes](/docs/guides/map-studio/editing/themes.md) · [The Properties column](/docs/guides/map-studio/editing/property-panel.md)