Route Instructions
This example computes a route and presents it as a scrollable timeline - without rendering a map. The timeline starts with a route summary (departure → destination, total distance and time), followed by any route-wide warnings (toll roads, ferry connections, restricted areas), the turn-by-turn instructions with their turn icons, and any traffic events along the way. Every entry is sorted by its position along the route so the list reads from departure to destination.
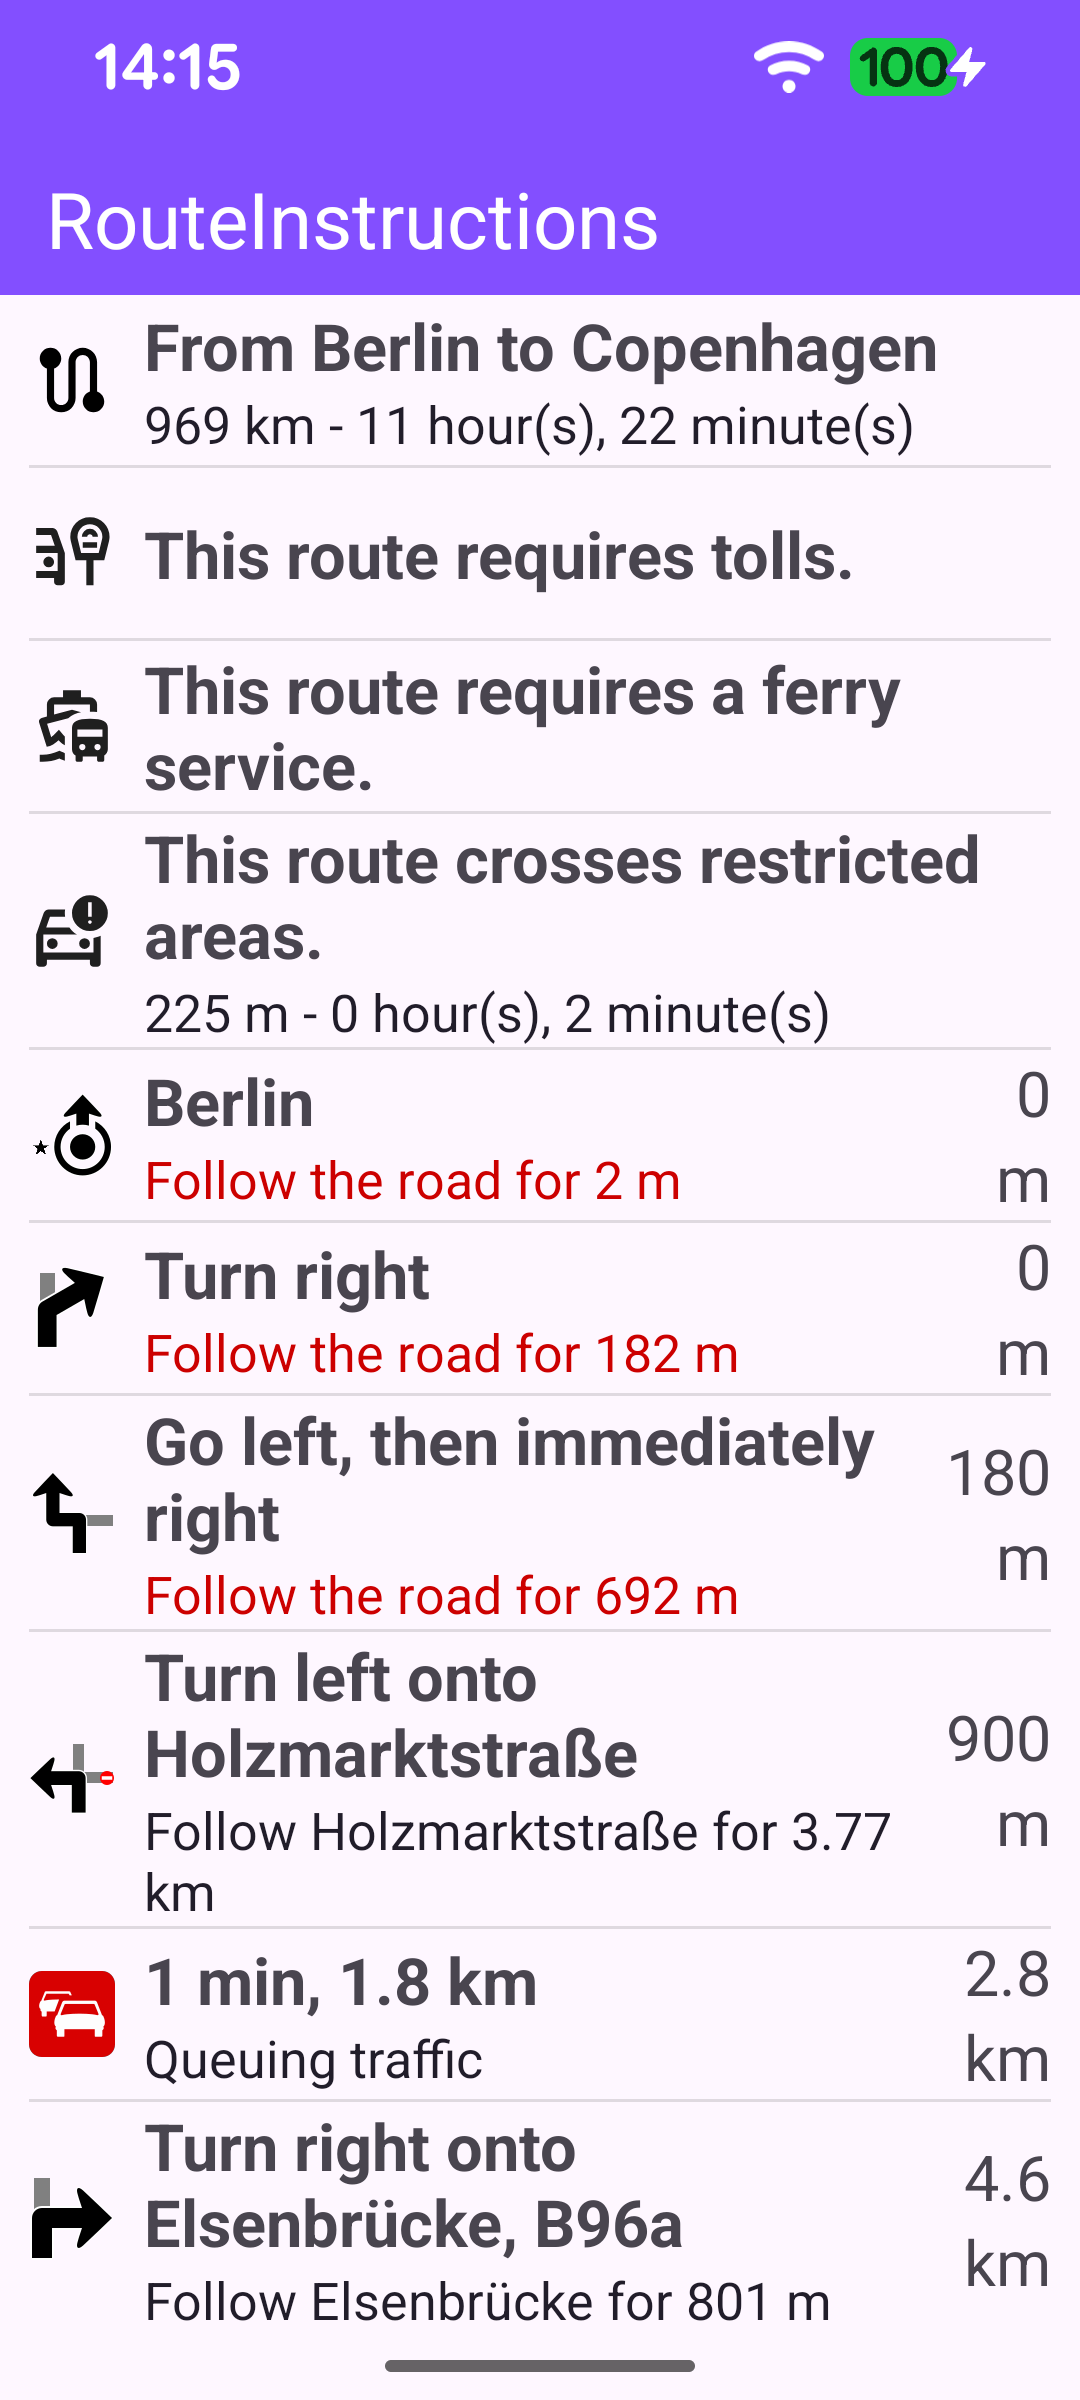
The route used here travels from Berlin to Copenhagen, passing through Poznan.
Routing
The route is calculated exactly as in the Routing On Map example: a RoutingService is retained in MainActivity, and its onStarted / onCompleted callbacks drive the UI. On success the first (main) route is forwarded to displayRouteInstructions; any error is surfaced through a dialog.
Once the worldwide road map is available, startCalculateRoute defines the waypoints and starts the calculation. A route needs at least two waypoints, but it may contain more - here three are used, so the route passes through Poznan on its way from Berlin to Copenhagen. calculateRoute returns synchronously an error code indicating whether the calculation could be started; on success the result arrives later through onCompleted, but when it fails to start that callback never fires, so the error is reported here directly.
Displaying the timeline
When the route is ready, displayRouteInstructions builds the turn-image size and hands the route to a RouteTimelineAdapter, which is set on the RecyclerView. All the work of turning the route into displayable rows happens inside the adapter.
Building the timeline rows
The adapter pre-computes every row once, in its init block, on the SDK thread. Each row is a small RouteTimelineItem (icon bitmap, primary text, description, distance value/unit and a sortingKey used to order the list). The rows are assembled in this order:
- Route summary - read from
route.timeDistance; the title is the "from → to" waypoint names and the description is the total distance and time. The total restricted distance/time is also captured here for the warning below. - Warnings -
route.hasTollRoads()androute.hasFerryConnections()add a toll / ferry warning row, and a non-zero restricted distance or time adds a "crosses restricted areas" row. - Turn-by-turn instructions - one row per
RouteInstruction(covered below). - Traffic events - read from
route.trafficEvents, each formatted with its delay/length and a from→to description.
Finally the items are sorted by sortingKey, which places the summary and warnings first and then interleaves instructions and traffic events by their distance along the route.
Turn instructions and turn images
For each RouteInstruction the adapter builds a turn image and the instruction text. The turn icon is rendered from the instruction's turnDetails?.abstractGeometryImage with GemUtilImages.asBitmap, using theme-aware colors so it is legible on both light and dark backgrounds. The primary text is the turnInstruction, the description is the followRoadInstruction, and the distance traveled up to that turn is formatted into a value/unit pair with GemUtil.getDistText. When the next leg crosses a restricted area the row is flagged so it can be highlighted later.
Binding the rows
Because all rows are prepared up front, onBindViewHolder is a thin mapping from a RouteTimelineItem onto the row views: it sets the turn image, the texts and the distance value/unit, hides the description when it is empty, and colors the description red when that leg crosses a restricted area.